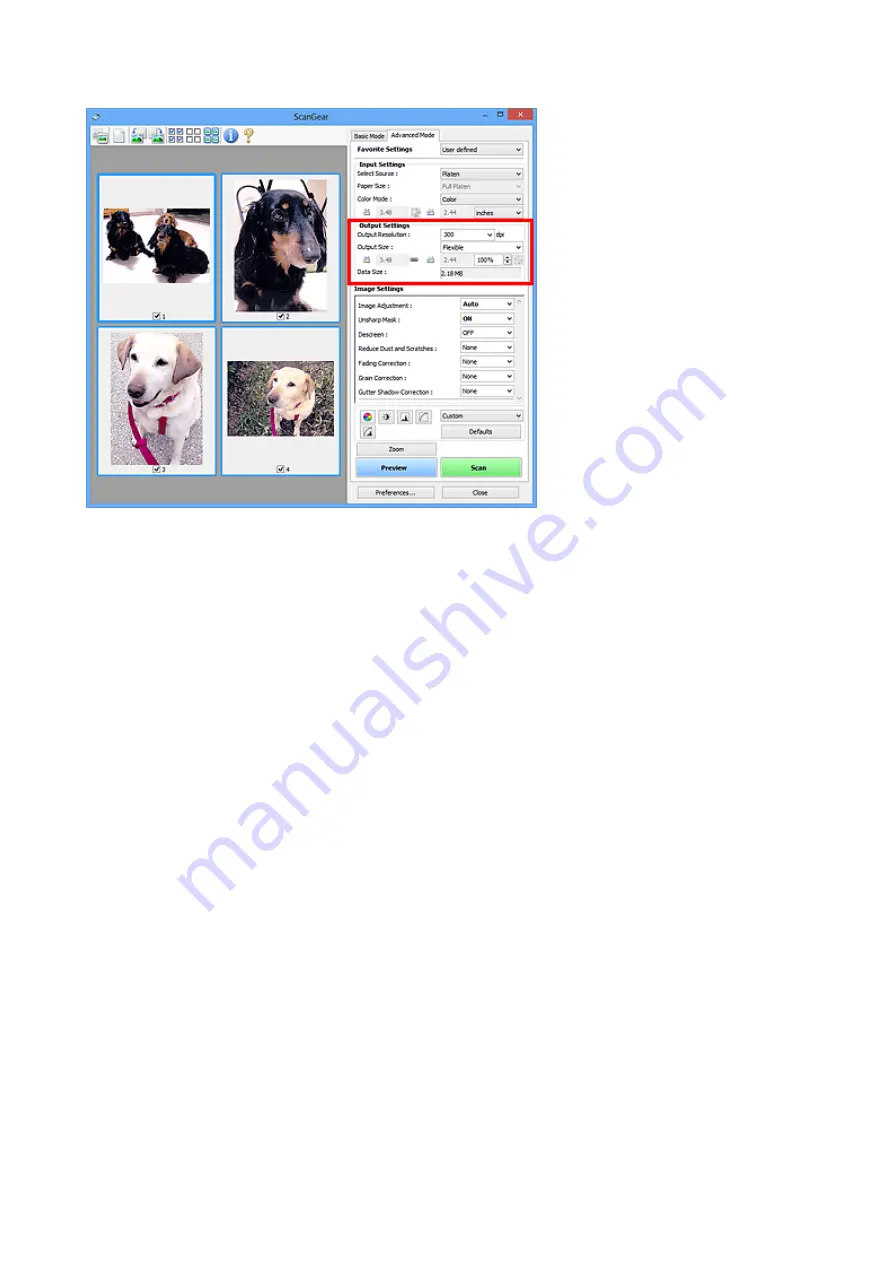
Output Settings
Output Settings
allows you to set the following items:
Output Resolution
Select the resolution to scan at.
The higher the resolution (value), the more detail in your image.
Select a resolution from the options displayed by clicking the button, or enter a value in 1 dpi
increments.
Refer to "Resolution" for your model from Home of the
Online Manual
for details.
When Select Source is Platen:
You can enter a value within the range of 25 dpi to 19200 dpi.
When Select Source is Document (ADF Simplex) or Document (ADF Duplex):
You can enter a value within the range of 25 dpi to 600 dpi.
Output Size
Select an output size.
Select
Flexible
to set custom sizes or select a size for printing or displaying. Select
Add/Delete...
to set
custom size and save it as a new output size option.
Flexible
You can specify the output resolution and scale, and adjust the cropping frames (scan areas).
In thumbnail view:
Drag the mouse over a thumbnail to display a cropping frame. When a cropping frame is displayed,
the portion within the cropping frame will be scanned. When no cropping frame is displayed, each
frame is scanned individually.
611
Содержание MX490 Series
Страница 17: ...6944 997 6945 998 6946 999 9500 1000 B201 1001 B202 1002 B203 1003 B204 1004 ...
Страница 69: ...69 ...
Страница 101: ...Safety Guide Safety Precautions Regulatory and Safety Information 101 ...
Страница 110: ...Main Components Front View Rear View Inside View Operation Panel 110 ...
Страница 123: ...Select Scan contrast press the OK button D Use the or button C to change the contrast then press the OK button D 123 ...
Страница 126: ...Loading Paper Originals Loading Paper Loading Originals 126 ...
Страница 143: ...Printing Area Printing Area Other Sizes than Letter Legal Envelopes Letter Legal Envelopes 143 ...
Страница 155: ... Photo or thick paper 155 ...
Страница 156: ...Replacing a FINE Cartridge Replacing a FINE Cartridge Checking the Ink Status 156 ...
Страница 195: ...Changing the Machine Settings Changing Machine Settings from Your Computer Changing the Machine Settings on the LCD 195 ...
Страница 224: ...Information about Network Connection Useful Information about Network Connection 224 ...
Страница 270: ...5 Delete Deletes the selected IP address from the list 270 ...
Страница 307: ...307 ...
Страница 317: ...PRO 10S 317 ...
Страница 318: ...Printing Printing from a Computer Printing Using the Operation Panel of the Machine Paper setting for Printing 318 ...
Страница 319: ...Printing from a Computer Printing with Application Software that You are Using Printer Driver 319 ...
Страница 339: ...Note Selecting Scaled changes the printable area of the document 339 ...
Страница 368: ...Adjusting Color Balance Adjusting Brightness Adjusting Intensity Adjusting Contrast 368 ...
Страница 374: ...Adjusting Intensity Adjusting Contrast 374 ...
Страница 453: ...Printing Using the Operation Panel of the Machine Printing Template Forms Such As Lined Paper or Graph Paper 453 ...
Страница 460: ...Copying Making Copies Basic Reducing or Enlarging a Copy About Special copy Menu Collated Copying 460 ...
Страница 475: ...Scanning Scanning from a Computer Scanning from the Operation Panel of the Machine 475 ...
Страница 490: ...5 Select Select Source according to the items to be scanned 6 Select Auto scan for Paper Size then click OK 490 ...
Страница 542: ...Instructions Opens this guide Defaults You can restore the settings in the displayed screen to the default settings 542 ...
Страница 545: ...Instructions Opens this guide Defaults You can restore the settings in the displayed screen to the default settings 545 ...
Страница 551: ...Instructions Opens this guide Defaults You can restore the settings in the displayed screen to the default settings 551 ...
Страница 561: ...561 ...
Страница 579: ...579 ...
Страница 618: ...Adjusting Cropping Frames ScanGear 618 ...
Страница 650: ...Other Scanning Methods Scanning with WIA Driver Scanning Using the Control Panel Windows XP Only 650 ...
Страница 659: ...659 ...
Страница 666: ... Scan resolution Select the resolution for scanning Ex 666 ...
Страница 673: ...6 Select the application you want to start after scanning in Application Settings 673 ...
Страница 733: ...Receiving Faxes Receiving Faxes Changing the Paper Settings Memory Reception Receiving Faxes Using Useful Functions 733 ...
Страница 746: ... You can register the rejected number in Rejected numbers in TEL no registration under Fax settings 746 ...
Страница 775: ...4 When a confirmation message is displayed click Yes 775 ...
Страница 812: ...Problems while Printing Scanning from Smartphone Tablet Cannot Print Scan from Smartphone Tablet 812 ...
Страница 844: ...Problems with Scanning Problems with Scanning Scan Results Not Satisfactory Software Problems 844 ...
Страница 865: ...Software Problems The E mail Client You Want to Use Does Not Appear in the Screen for Selecting an E mail Client 865 ...
Страница 867: ...Problems with Faxing Problems Sending Faxes Problems Receiving Faxes Cannot Send a Fax Clearly Telephone Problems 867 ...
Страница 881: ...Telephone Problems Cannot Dial Telephone Disconnects During a Call 881 ...
Страница 929: ...1250 Cause The paper output tray is closed Action Open the paper output tray to resume printing 929 ...
Страница 967: ...5B02 Cause Printer error has occurred Action Contact the service center 967 ...
Страница 968: ...5B03 Cause Printer error has occurred Action Contact the service center 968 ...
Страница 969: ...5B04 Cause Printer error has occurred Action Contact the service center 969 ...
Страница 970: ...5B05 Cause Printer error has occurred Action Contact the service center 970 ...
Страница 971: ...5B12 Cause Printer error has occurred Action Contact the service center 971 ...
Страница 972: ...5B13 Cause Printer error has occurred Action Contact the service center 972 ...
Страница 973: ...5B14 Cause Printer error has occurred Action Contact the service center 973 ...
Страница 974: ...5B15 Cause Printer error has occurred Action Contact the service center 974 ...


