24
Sendi
n
g
/F
ac
simi
le
Fu
nc
tions
Sending a Document (E-mail, I-fax, File Server)
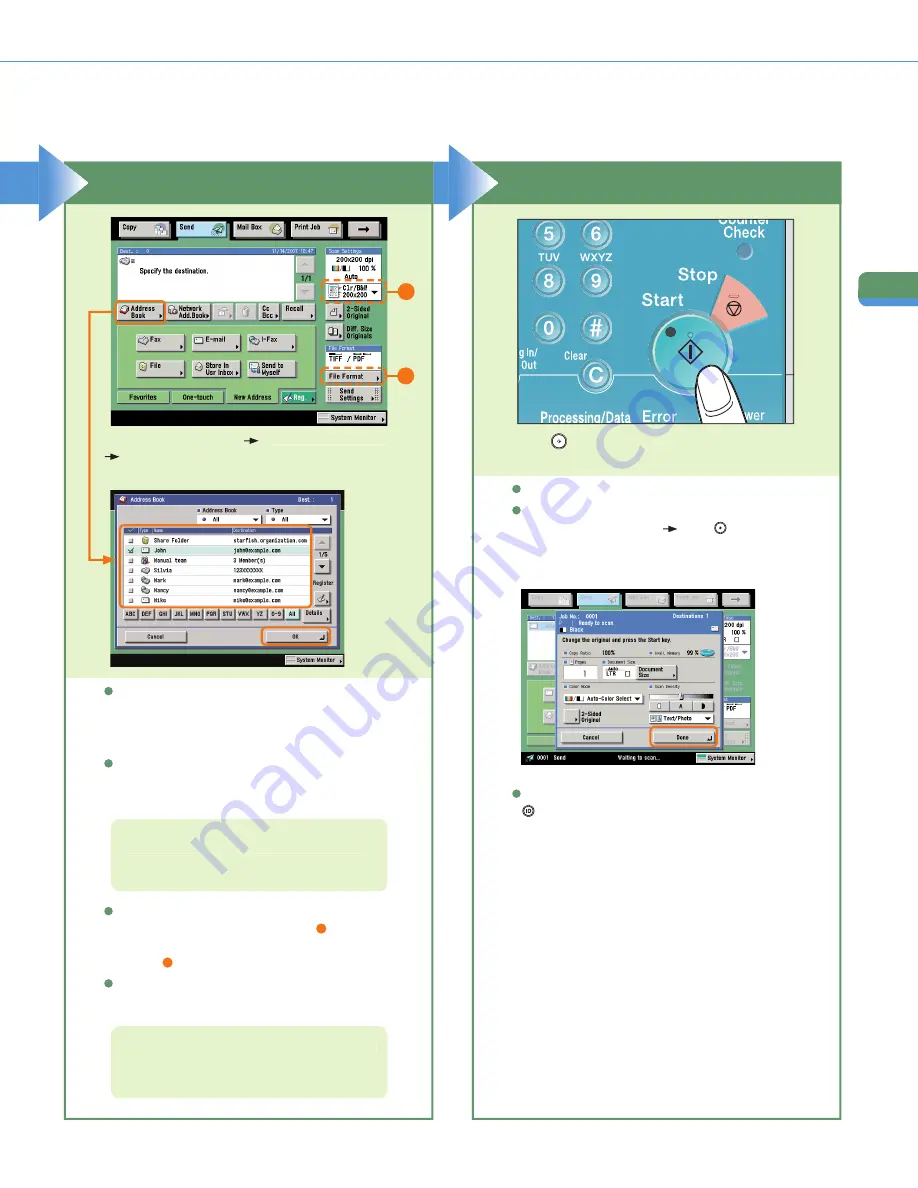
You can also specify the destination using a
one-touch button or favorites button if you have
registered a destination in a one-touch button or
favorites button in advance.
To send to a destination not registered in the
address book, etc., press [New Address] and enter
the destination.
Press [Address Book]
select a destination
press [OK].
When sending is complete, remove your originals.
If the following screen is displayed, follow the
instructions on the screen
press
(Start) once
for each original. When scanning of the originals is
complete, press [Done].
Press
(Start).
For information on specifying destinations, see
p. 35 and p. 36.
For more information on the features you can set
from the Scan Settings screen, see p. 35 and
p. 36.
If Department ID Management is set, press
(Log In/Out).
To change the resolution of the document to be sent,
use the Scan Settings drop-down list (
1
). To change
the fi le format of the document to be sent, press [File
Format] (
2
).
You can also set the scanning mode and Special
Features on the Scan Settings screen.
Specify the Destination
Start Sending
1
2


