


Chapter 1
1-122
4. Main Menu Settings
Main menu items are described in the following tables.
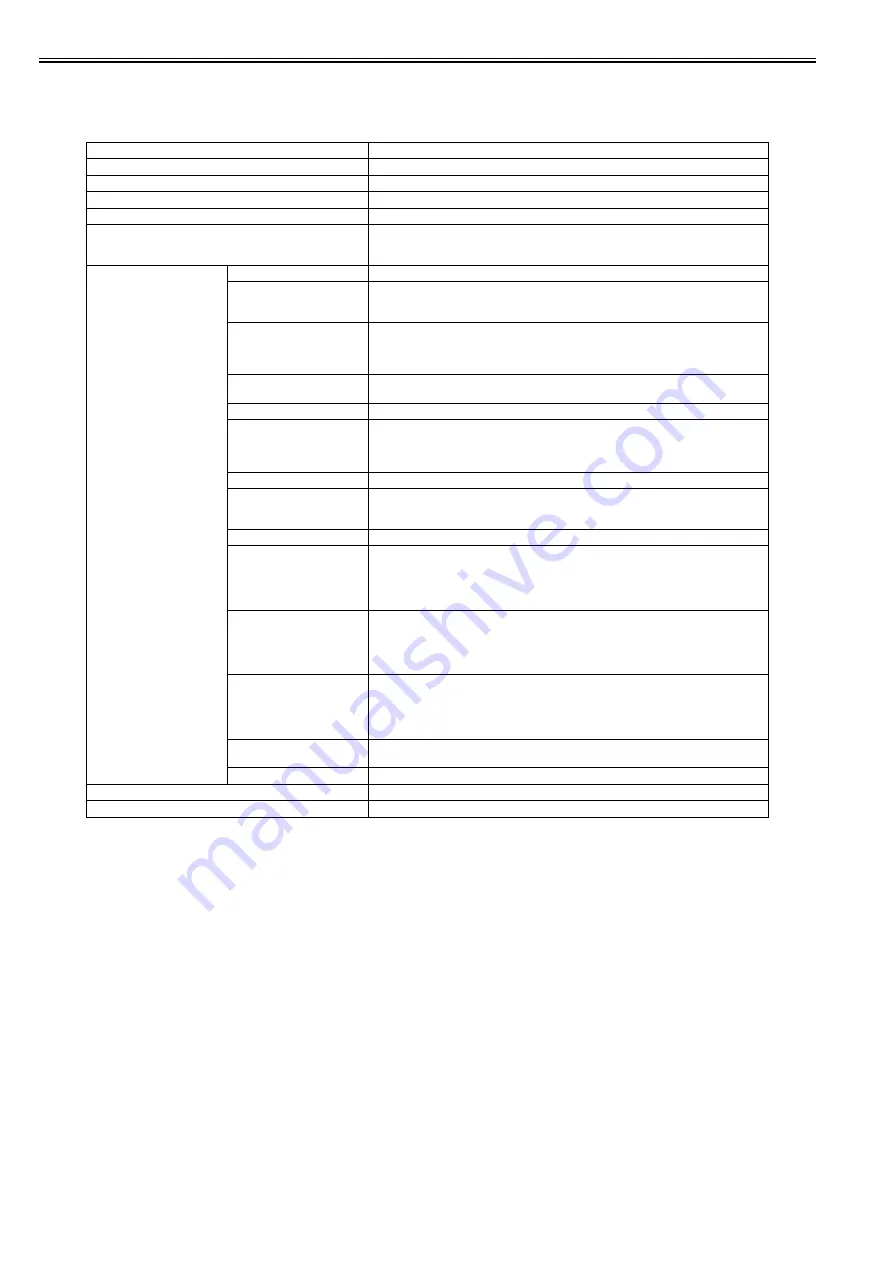
[Paper Menu]
T-1-82
Setting Item
Description/Instructions
[Load Paper]
Select either manually loaded sheets or rolls and load the paper.
[Eject Paper]
Choose this item before removing loaded paper.
[Chg. Paper Type]
Change currently set paper type.
[Chg. Paper Size]
Change currently set paper size.
[ManageRemainRoll]
Choose On to print a barcode at the end of a roll before you remove it. The printed barcode can
be used in managing the amount of roll paper left. ChooseOff if you prefer not to print the
barcode.
[Paper Details]
(The paper type is displayed
here.)
[Head Height]
Adjust the Printhead height.
[Skew Check Lv.]
If you print on the paper that has an irregular width, choose Loose for a higher skew detection
threshold, or choose Off to disable skew detection. However, if paper is loaded askew when
detection is Off, note that paper jams or Platen soiling may occur.
[Cutting Mode]
Select whether to use standard round blade cutter or not.
Select [Automatic] to cut paper after printing. Select [Manual] to print a line at the cut position
after printing without cutting. Select [Eject] to prevent the printout from dropping until the ink
dries after printing.
[Cut Speed]
Choose the cutting speed. If you use adhesive paper, choosing Slow helps prevent adhesive
from sticking to the cutter and keeps the cutter sharp.
[Trim Edge First]
If a roll is loaded, the end of the paper will be cut.
[CutDustReduct.]
Choose On to reduce the amount of debris generated when cutting film and similar media by
printing a line at the cut position. This option reduces the amount of debris given off after
cutting. It also helps prevent adhesive from sticking to the cutter and keeps the cutter sharp if
you use adhesive paper.
[VacuumStrngth]
Specify the level of suction that holds paper against the Platen.
[Scan Wait Time]
Specify the time to wait for the ink to dry between each scan in bidirectional printing, in
consideration of how quickly the ink dries. Note that printing will take longer if you specify a
wait time.
[Roll DryingTime]
Specify the time to wait for the ink to dry for each sheet.
[NearEnd RollMrgn]
Specify the minimum margin at the leading edge of roll paper to ensure better printing quality
at the leading edge.
Note that if you choose 3mm, it may lower the printing quality at the leading edge and affect
feeding accuracy. The printed surface may be scratched, and ink may adhere to the leading
edge. It may also cause the Platen to become soiled.
[NearEnd Sht Mrgn]
Specify a margin at the leading edge of sheets to ensure better printing quality at the leading
edge.
Note that if you choose 3mm, it may lower the printing quality at the leading edge and affect
feeding accuracy. The printed surface may be scratched, and ink may adhere to the leading
edge.
[Bordless Margin]
Adjust the margin during borderless printing.
Choose Automatic to have the printer automatically detect the paper width and configure the
margin settings for borderless printing. If margins are mistakenly created when Automatic is
selected, choose Fixed. In this case, the paper width is not detected automatically, and the
document is printed without borders, using the margin settings required by the printer.
[Manual Feed]
Select the Paper Feed Slot to use when printing on sheets. Normally, select Top. When printing
on heavyweight paper such as POP Board, select Front.
[Return Defaults]
Choose OK to restore Paper Details to the factory default values.
[Print Paper Detail]
Print the paper settings set with [Paper Details].
[Keep Paper Type]
Select [On] to continue using the same type of paper.
Содержание imagePROGRAF iPF6200
Страница 1: ...Mar 7 2011 Service Manual iPF6000 series ...
Страница 2: ......
Страница 6: ......
Страница 14: ...Contents ...
Страница 15: ...Chapter 1 PRODUCT DESCRIPTION ...
Страница 16: ......
Страница 109: ...Chapter 1 1 91 6 Color calibration print chart The following chart sample is printed when executing Calibration F 1 52 ...
Страница 129: ...Chapter 1 1 111 6 Color calibration print chart The following chart sample is printed when executing Calibration F 1 53 ...
Страница 174: ...Chapter 1 1 156 ...
Страница 175: ......
Страница 176: ......
Страница 177: ...Chapter 2 TECHNICAL REFERENCE ...
Страница 178: ......
Страница 276: ......
Страница 277: ...Chapter 3 INSTALLATION ...
Страница 278: ......
Страница 280: ......
Страница 305: ...Chapter 4 DISASSEMBLY REASSEMBLY ...
Страница 306: ......
Страница 308: ......
Страница 402: ......
Страница 403: ...Chapter 5 MAINTENANCE ...
Страница 404: ......
Страница 406: ......
Страница 421: ...Chapter 6 TROUBLESHOOTING ...
Страница 422: ......
Страница 507: ...Chapter 7 SERVICE MODE ...
Страница 508: ......
Страница 510: ......
Страница 643: ......
Страница 644: ......
Страница 645: ...Chapter 8 ERROR CODE ...
Страница 646: ......
Страница 648: ......
Страница 690: ......
Страница 691: ...Mar 7 2011 ...
Страница 692: ......


