


COPYRIGHT © CANON ELECTRONICS INC. 2012
CANON P-208 FIRST EDITION
3-1
CHAPTER 3 DISASSEMBLY & REASSEMBLY
I. EXTERNAL
PARTS
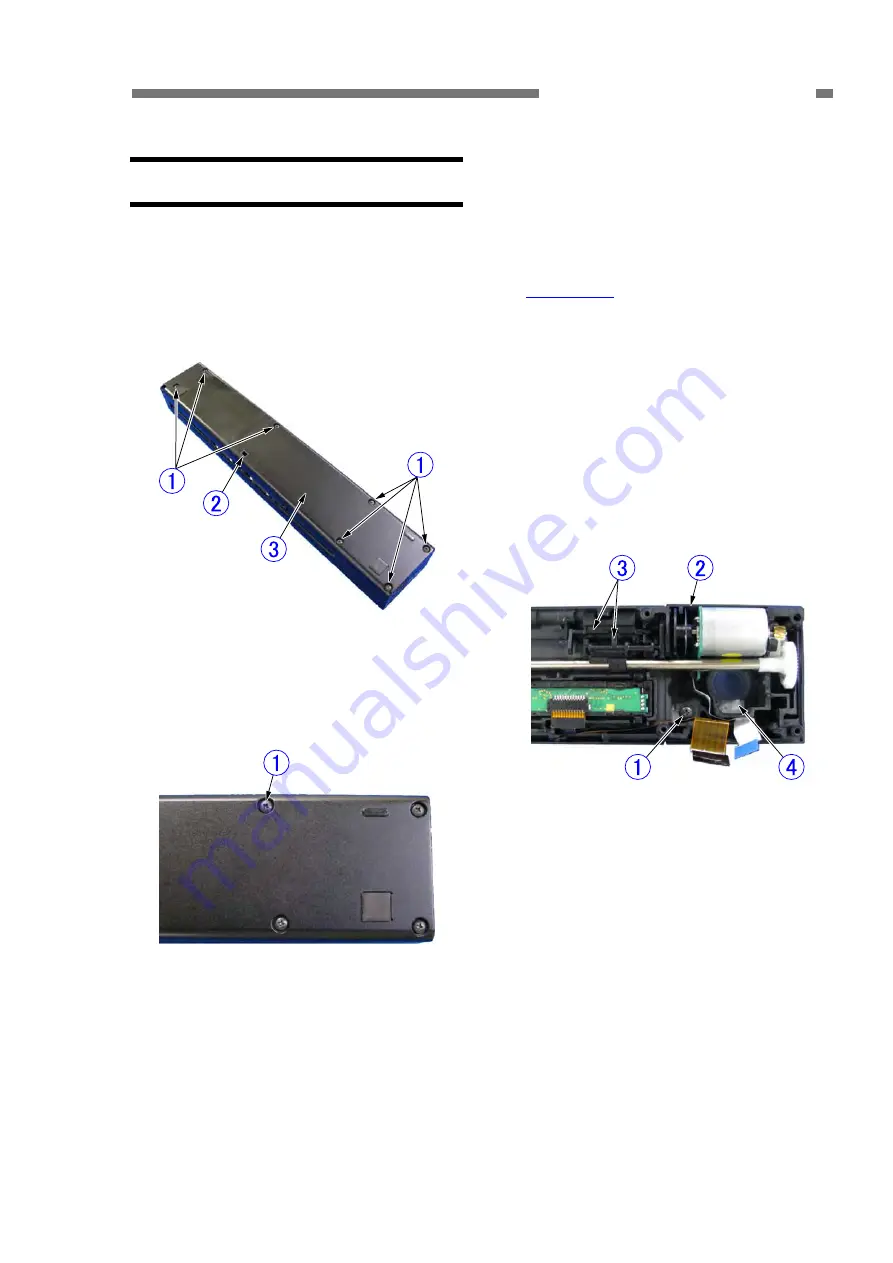
1. Bottom Cover
1) Remove 7 screws
{
1
(self-tapping, BH
M2.5x6), insert a tool with a thin and flat tip
into the central hole
{
2
, unhook the fitting
parts, and remove the bottom cover
{
3
.
Figure 3-101
Notes on assembling
Since the hole
{
1
is used for positioning,
tighten the screw from this position.
Figure 3-102
After tightening the screw, push in the
bottom cover until the fitting parts
{
2
is
hooked.
2. Operation Section Cover
1) Remove the control PCB.
2) Remove 1 screw
{
1
(self-tapping, BH
M2.5x6) and slide the operation section
cover
{
2
downward. Since there are fitting
parts for the main body, slide the cover
strongly and slowly.
Note:
The two detection levers
{
3
, the start
button
{
4
and the pickup tray are de-
tached. The two detection levers should
be removed so that they are not lost
during work.
Figure 3-103
Notes on assembling
Do not get FPC or FFC caught when as-
sembling the operation section cover.
Содержание imageFORMULA P-208II
Страница 6: ......
Страница 8: ......
Страница 18: ......
Страница 20: ......
Страница 40: ......
Страница 42: ......
Страница 58: ......
Страница 64: ......
Страница 66: ......
Страница 110: ......
Страница 112: ......
Страница 117: ...COPYRIGHT CANON ELECTRONICS INC 2012 CANON P 208 FIRST EDITION A 5 APPENDIX 2 Upper Unit Figure 200 ...
Страница 119: ...COPYRIGHT CANON ELECTRONICS INC 2012 CANON P 208 FIRST EDITION A 7 APPENDIX 3 Base Unit Figure 300 ...
Страница 122: ......
Страница 124: ...1212TG ...


