background image

31

11

12

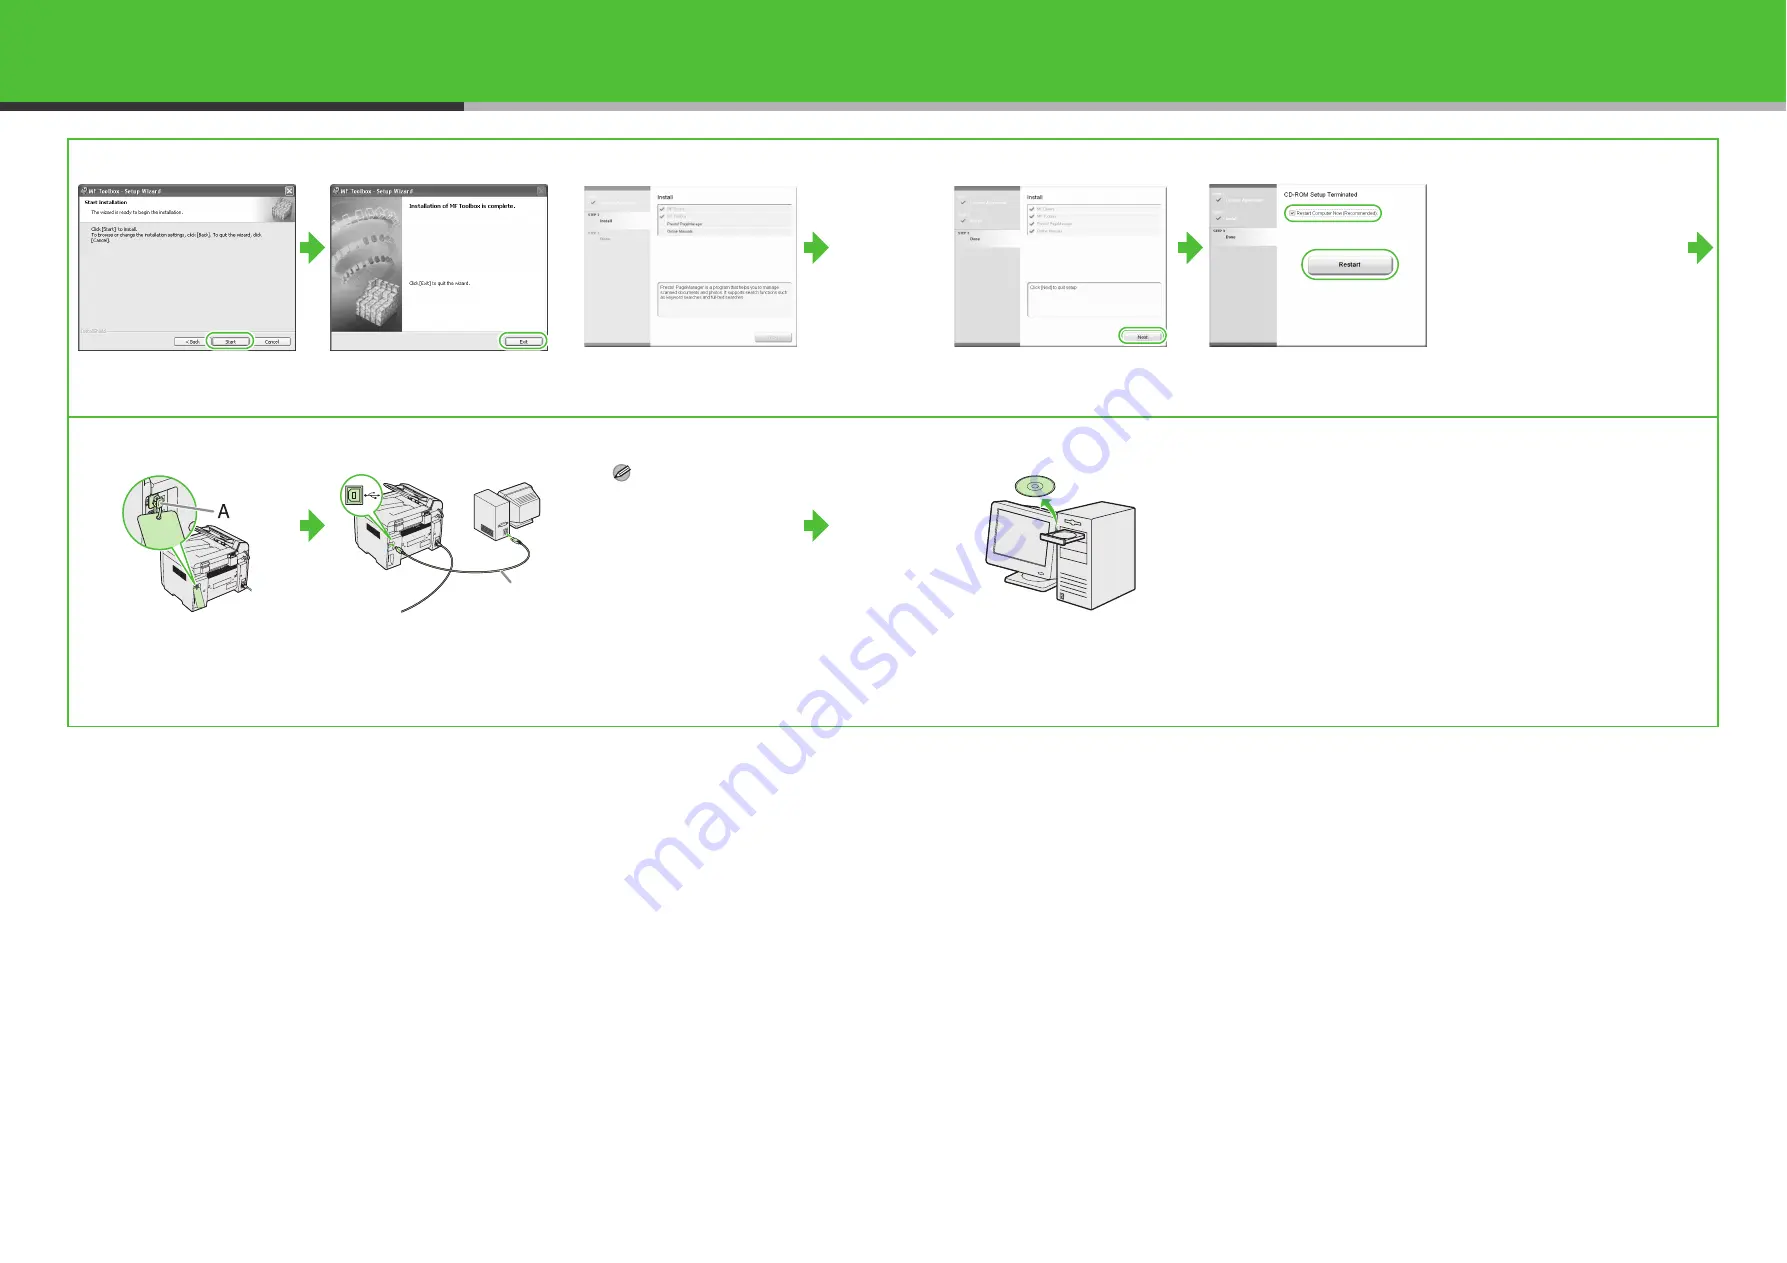
When you install Presto! 
PageManager, follow the on-
screen instructions.

13

14

After checking [Restart 
Computer Now 
(recommended)] button, you 
can restart your computer by 
clicking the [Restart] button.

15

The machine has a cap (A) 
that covers the USB port on 
the back of the machine. 
Remove the cap (A) by pulling 
the string.

16

After restarting your computer, 
connect the machine and your 
computer with a USB cable 
(A).

NOTE

If you are using Windows 98/
Me, Version Conflict 
messages may appear 
during the installation. In this 
case, click [YES] and 
continue.

17

You have now completed
installation.

A

32

Содержание imageCLASS MF4680

Страница 1: ...ENG Starter Guide Please read this guide before operating this product After you finish reading this guide store it in a safe place for future reference ...

Страница 2: ...ape and packing material from the machine When moving the machine grip the handles on both left and right sides of the machine and lift it carefully as shown in the illustration right The shapes of your machine and supplies may differ slightly from those illustrations listed in this manual 1 2 ...

Страница 3: ...stem monitor and reports and lists Scanner Driver Guide located on the User Software CD Scanner settings from a computer Machine Dust Cover Paper Cassette Toner Cartridge Document Feeder Tray Power Cord Handset optional Plugs with Pins optional Handset Cradle optional Telephone Cable USB Cable Starter Guide This Document Basic Operation Guide User Software CD Limited Warranty Notice Not available ...

Страница 4: ...tely out NOTE Do not pull the seal out at an angle 4 Lift the scanning platform A until it is locked You will hear an audible click 5 Open the toner cover B using the tab A which covers over on dent 6 Hold the toner cartridge by its handle A 7 Insert the cartridge so that the protrusion on the right side of the toner cartridge A fits into the guide B located on the right side of the machine and sl...

Страница 5: ... in the machine Set Up the Paper Cassette and Load Paper 1 Align the guides B on the both edges of the paper cassette to the protrusions A inside the machine NOTE Install the paper cassette with the front end tilted upwards 2 Push the paper cassette down until the hooks A on both sides of the paper cassette engage the protrusions B inside the machine 3 Open the front panel of the paper cassette 4 ...

Страница 6: ...r A and the edge of paper cassette B 10 Slide the output tray extension on the front of the machine and lift the paper stopper 11 Attach the document feeder tray on the document feeder NOTE The default paper size type setting is A4 and PLAIN PAPER When you load other size and or type of paper change the paper size type setting For details see Chapter 2 Document and Paper in the Basic Operation Gui...

Страница 7: ...d properly See Install Toner Cartridge on p 5 TONER IS NOT SET INSERT TONER is displayed Make sure that the toner cartridge is installed properly See Install Toner Cartridge on p 5 LOAD PAPER CASSETTE A4 is displayed Make sure that paper is loaded in the machine See Set Up the Paper Cassette and Load Paper on p 7 WARNING This product emits low level magnetic flux If you use a cardiac pacemaker and...

Страница 8: ...lugs with the cradle into the holes on the machine 4 Carefully push the pins into the plugs as far as they will go 5 Place the handset on the cradle 6 Attach the handset clamps A to the back side of the machine 7 Set the handset cable A in the clamps and close the clamps NOTE If using the handset or an external telephone make sure to set the fax receive mode to FaxTel or Manual For how to set the ...

Страница 9: ...elect the date format among three types listed below at 3 DATE TYPE SELECT DD MM YYYY YYYY MM DD MM DD YYYY OK Numeric Keys Additional Functions Stop Reset Ex D A T E T I M E S E T T I N G 3 1 1 2 0 7 2 3 1 9 Set the Telephone Line Type 1 Press Additional Functions 2 Press or to select 5 TX RX SETTINGS then press OK 3 Press or to select 2 FAX SETTINGS then press OK 4 Press or to select 2 USER SETT...

Страница 10: ...d character appears Press to enter symbols Press to switch among input modes A Letter uppercase mode a Letter lowercase mode 1 Number mode Press to move the cursor position right Press Clear or to delete the character before the cursor position Hold Clear to delete the entire entry Pressing and Clear for entering the unit name moves the cursor left and deletes the character at the position Press O...

Страница 11: ...keys to enter your fax telephone number max 20 digits including spaces then press OK 7 Press Additional Function twice 8 Press or to select 1 TX RX COMMON SET then press OK 9 Press or to select 1 TX SETTING then press OK 10 Press or to select 1 UNIT NAME then press OK 11 Use the numeric keys to enter the unit name up to 24 characters your name company name etc then press OK 12 Press Stop Reset to ...

Страница 12: ...ephone company for availability Do you intend to use the machine to receive voice calls No FaxOnly Answers all calls as faxes Do you intend to use an answering machine with the machine Yes AnsMode Receives faxes automatically and records voice messages Do you intend to receive faxes automatically No Manual Does not answer any calls You have to manually receive faxes FaxTel Switches between fax and...

Страница 13: ... to enable communication between the machine and a computer NOTE It is recommended that the network administrator perform the following procedures Before performing the following procedure make sure that the machine is turned on and connected to a network This machine is set by default to automatically draw an IP address using DHCP If your network server or router is configured to provide a DHCP a...

Страница 14: ...to enter the subnet mask then press OK 11 Press or to select 4 GATEWAY ADDRESS then press OK 12 Use the numeric keys to enter the gateway address number then press OK 13 Turn off the main power on the left side of the machine then turn on the power to restart the machine NOTE If you send documents via e mail specify the E MAIL settings See Chapter 6 Network in the Reference Guide Ex I P A D D R E ...

Страница 15: ...alling the software and the Found New Hardware Wizard screen appears click Cancel For Windows 2000 XP Server 2003 Vista logon as Administrator to install the software Make sure the machine is turned on before connecting the USB cable On the screen shown at each step click on the circled button to proceed Microsoft Windows XP 32bit Version CPU Intel Pentium Celeron series 300 MHz or faster Memory 1...

Страница 16: ...indows Vista click Start on the Windows task bar Computer Windows 98 Me 2000 double click My Computer on the Windows desktop Open the CD ROM icon then double click MInst MInst exe 3 4 NOTE If the disk space is insufficient to install the software an error message is displayed Free the disk space and then try again 5 6 7 8 9 10 30 ...

Страница 17: ...t button 15 The machine has a cap A that covers the USB port on the back of the machine Remove the cap A by pulling the string 16 After restarting your computer connect the machine and your computer with a USB cable A NOTE If you are using Windows 98 Me Version Conflict messages may appear during the installation In this case click YES and continue 17 You have now completed installation A 32 ...

Страница 18: ...ick Start on the Windows task bar Computer Windows 98 Me 2000 double click My Computer on the Windows desktop Open the CD ROM icon then double click MInst MInst exe 3 While installing the software on a computer running Windows Server 2003 the display in this step does not appear 4 5 6 7 8 9 Repeat this step for each driver that you have selected 34 ...

Страница 19: ...35 10 11 12 13 14 15 16 You have now completed installation 36 ...

Страница 20: ...onding printer driver icon is displayed 2 Set as default printer Click the printer icon of this product Click Set as Default Printer from File menu 3 Open the Scanners and Cameras folder Windows 98 2000 the Scanners and Cameras Properties dialog box Windows XP Server2003 Click start on the Windows task bar select Control Panel Printers and Other Hardware Scanners and Cameras Windows Vista Click St...

Страница 21: ...creen and click the Uninstall button for Manual Uninstaller Uninstalling the MF Toolbox 1 Click start on the Windows task bar All Programs Canon MF Toolbox 4 9 Toolbox Uninstall 2 Follow the on screen instructions When the Repair or Remove program selection screen is displayed check Remove then click Next If asked to confirm removal of an application etc click Remove Restart your computer if asked...

Страница 22: ...he CD ROM icon then double click MInst MInst exe Presto PageManager Presto PageManager makes it easy to scan share and organize photos and documents For details see the online manual and online help for this program NetSpot Device Installer NSDI NetSpot Device Installer enables you to set up the machine for network operations When you start this program click on the Additional Software Programs bu...

Страница 23: ...e help file provided with the driver software In the Properties dialog box you can click Help to display information about every feature and option in the drivers In the help dialog box you can click Contents then double click your desired title to display information In the help dialog box you can click Index then double click your desired keyword in the list to display information To search the ...

Страница 24: ... yourself Never attempt to disassemble the machine opening and removing its interior covers will expose you to dangerous voltages and other risks For all service contact your local authorized Canon dealer or the Canon help line Model Names F149300 MF4680 Laser Safety Information Laser radiation could be hazardous to the human body For this reason laser radiation emitted inside this equipment is he...

Страница 25: ...ide DDDD DDDD DDDD DDDD 4 CCCC CCCC CCCC CCCC 3 BBBB BBBB BBBB BBBB 2 AAAA AAAA AAAA AAAA 1 AAAA AAAA AAAA AAAA 1 AAAA AAAA AAAA AAAA 1 AAAA AAAA AAAA AAAA 1 AAAA AAAA AAAA AAAA 1 2 on 1 Combination See the Reference Guide BBB BBB BBB BBB 2 AAA AAA AAA AAA 1 AAA AAA AAA AAA 1 BBB BBB BBB BBB 2 2 on 1 Combination 1 to 2 Sided Collate 2 o n 1 C o m b i n a t i o n 1 t o 2 S i d e d C o l l a t e To ...

Страница 26: ...K LTD Woodhatch Reigate Surrey RH2 8BF United Kingdom CANON DEUTSCHLAND GmbH Europark Fichtenhain A10 47807 Krefeld Germany CANON ITALIA S p A Via Milano 8 20097 San Donato Milanese MI Italy CANON ESPAÑA S A c Joaquín Costa 41 28002 Madrid Spain CANON LATIN AMERICA INC 703 Waterford Way Suite 400 Miami Florida 33126 U S A CANON AUSTRALIA PTY LTD 1 Thomas Holt Drive North Ryde Sydney N S W 2113 Aus...

Отзывы: