


Check the Security Settings of the Wireless LAN Router.
For details, see the manual of the wireless LAN router or contact the manufacturer.
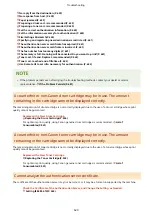
Cannot print RX data.
Received data cannot be printed for some reason.
Do the Cause and Solution Appear on the Control Panel?
If so, follow the instructions on the screen.
Is the Control Panel, Back Cover, or Toner Cover Open on the Machine?
Close the covers if they are open.
Is Paper Loaded?
Load paper if not loaded. Loading Paper(P. 142)
Is Paper Jammed?
If so, remove any jammed paper. Paper Jams(P. 549)
Has the Toner Cartridge or the Drum Cartridge Reached the End of Their Lifetime?
Check the remaining amount in the toner cartridge or the drum cartridge, and replace any of the toner
cartridge or the drum cartridge, as needed.
Checking the Remaining Amount of Consumables(P. 540)
Replacing the Toner Cartridge(P. 532)
Replacing the Drum Cartridge(P. 536)
Cannot receive the fax. Make sure the fax was sent correctly by the sender.
Operations were not performed within the fixed time when receiving a fax manually, and the machine timed out.
When You Hear a Beep During Fax Reception, Press [Start Receiving] Within 35 Seconds.
[Home] screen on the control panel [Fax] [Start Receiving]
Cannot send because more than one destination is specified.
Sending of faxes to multiple destinations is restricted.
To Cancel Restriction, Change the [Restrict Sequential Broadcast] Setting.
Log in to Remote UI in System Manager Mode [Settings/Registration] [TX Settings] [Fax TX Settings]
[Edit] in [Restrict Sequential Broadcast], select [Off] [OK]
On the control panel, select [Menu] in the [Home] screen, and then select [Function Settings] to change the
setting. [Restrict Sequential Broadcast](P. 496)
Cannot specify a group.
If you press [Hook] when sending a fax, you cannot specify a group destination.
Specify the destination without pressing [Hook].
Troubleshooting
631
Содержание imageCLASS MF264dw
Страница 72: ... Shared Key Encryption for WPA WPA2 TKIP AES CCMP IEEE 802 1X Authentication Setting Up 63 ...
Страница 96: ...7 Click OK 8 Restart the machine Restarting the Machine P 113 The settings are applied Setting Up 87 ...
Страница 139: ...Basic Operations 130 ...
Страница 160: ...Paper with logo in portrait orientation Paper with logo in landscape orientation Basic Operations 151 ...
Страница 165: ... You can change the paper size displayed on the screen in Step 3 Hiding Unused Paper Sizes P 166 Basic Operations 156 ...
Страница 201: ...Press on the control panel Function Settings Copy Initialize Default Settings Yes Basic Operations 192 ...
Страница 204: ... The volume is adjusted Basic Operations 195 ...
Страница 319: ... To reduce moire vertical pattern noise in photos Press on the control panel 3 Press Copying 310 ...
Страница 333: ...Copying 324 ...
Страница 368: ...8 Log out from Remote UI Security 359 ...
Страница 501: ... Confirm Destination Scan PC Settings Menu Items 492 ...
Страница 538: ...10 Plug the power cord into the outlet and turn ON the machine Turning ON the Machine P 111 Maintenance 529 ...