


➠
The [Enter Private Key Password] screen is displayed.
2
Enter the key name password using single-byte alphanumeric characters, and click [OK].
➠
The registered key and certificate are added to [Registered Key and Certificate] on the [Key and
Certificate Settings] screen.
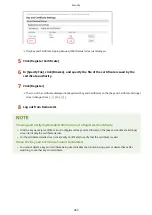
When registering a CA certificate
To the right of the CA certificate file to register, click [Register].
➠
The registered CA certificate is added to [Registered CA Certificate] on the [CA Certificate Settings] screen.
7
Log out from Remote UI.
Viewing and Verifying Detailed Information of a Registered Certificate
●
When you click the key name (or certificate icon) in [Registered Key and Certificate] on the [Key and
Certificate Settings] screen, the certificate details appear.
●
On the certificate details screen, click [Verify Certificate] to verify that the certificate is valid.
Viewing and Verifying Detailed Information of a Registered CA Certificate
●
When you click the issued to location in [Registered CA Certificate] on the [CA Certificate Settings] screen, the
CA certificate details appear.
●
On the CA certificate details screen, click [Verify Certificate] to verify that the CA certificate is valid.
When the Key and Certificate or CA Certificate Cannot Be Deleted
●
You cannot delete a key and certificate being used. Disable the function being used, or delete these after
switching to another key and certificate.
●
A preinstalled CA certificate cannot be deleted. If a preinstalled CA certificate is not required, click [Disable]
to the right of the CA certificate.
Security
371
Содержание imageCLASS MF264dw
Страница 72: ... Shared Key Encryption for WPA WPA2 TKIP AES CCMP IEEE 802 1X Authentication Setting Up 63 ...
Страница 96: ...7 Click OK 8 Restart the machine Restarting the Machine P 113 The settings are applied Setting Up 87 ...
Страница 139: ...Basic Operations 130 ...
Страница 160: ...Paper with logo in portrait orientation Paper with logo in landscape orientation Basic Operations 151 ...
Страница 165: ... You can change the paper size displayed on the screen in Step 3 Hiding Unused Paper Sizes P 166 Basic Operations 156 ...
Страница 201: ...Press on the control panel Function Settings Copy Initialize Default Settings Yes Basic Operations 192 ...
Страница 204: ... The volume is adjusted Basic Operations 195 ...
Страница 319: ... To reduce moire vertical pattern noise in photos Press on the control panel 3 Press Copying 310 ...
Страница 333: ...Copying 324 ...
Страница 368: ...8 Log out from Remote UI Security 359 ...
Страница 501: ... Confirm Destination Scan PC Settings Menu Items 492 ...
Страница 538: ...10 Plug the power cord into the outlet and turn ON the machine Turning ON the Machine P 111 Maintenance 529 ...