9
1
Tap
OK
.
Tap
Manual
.
2
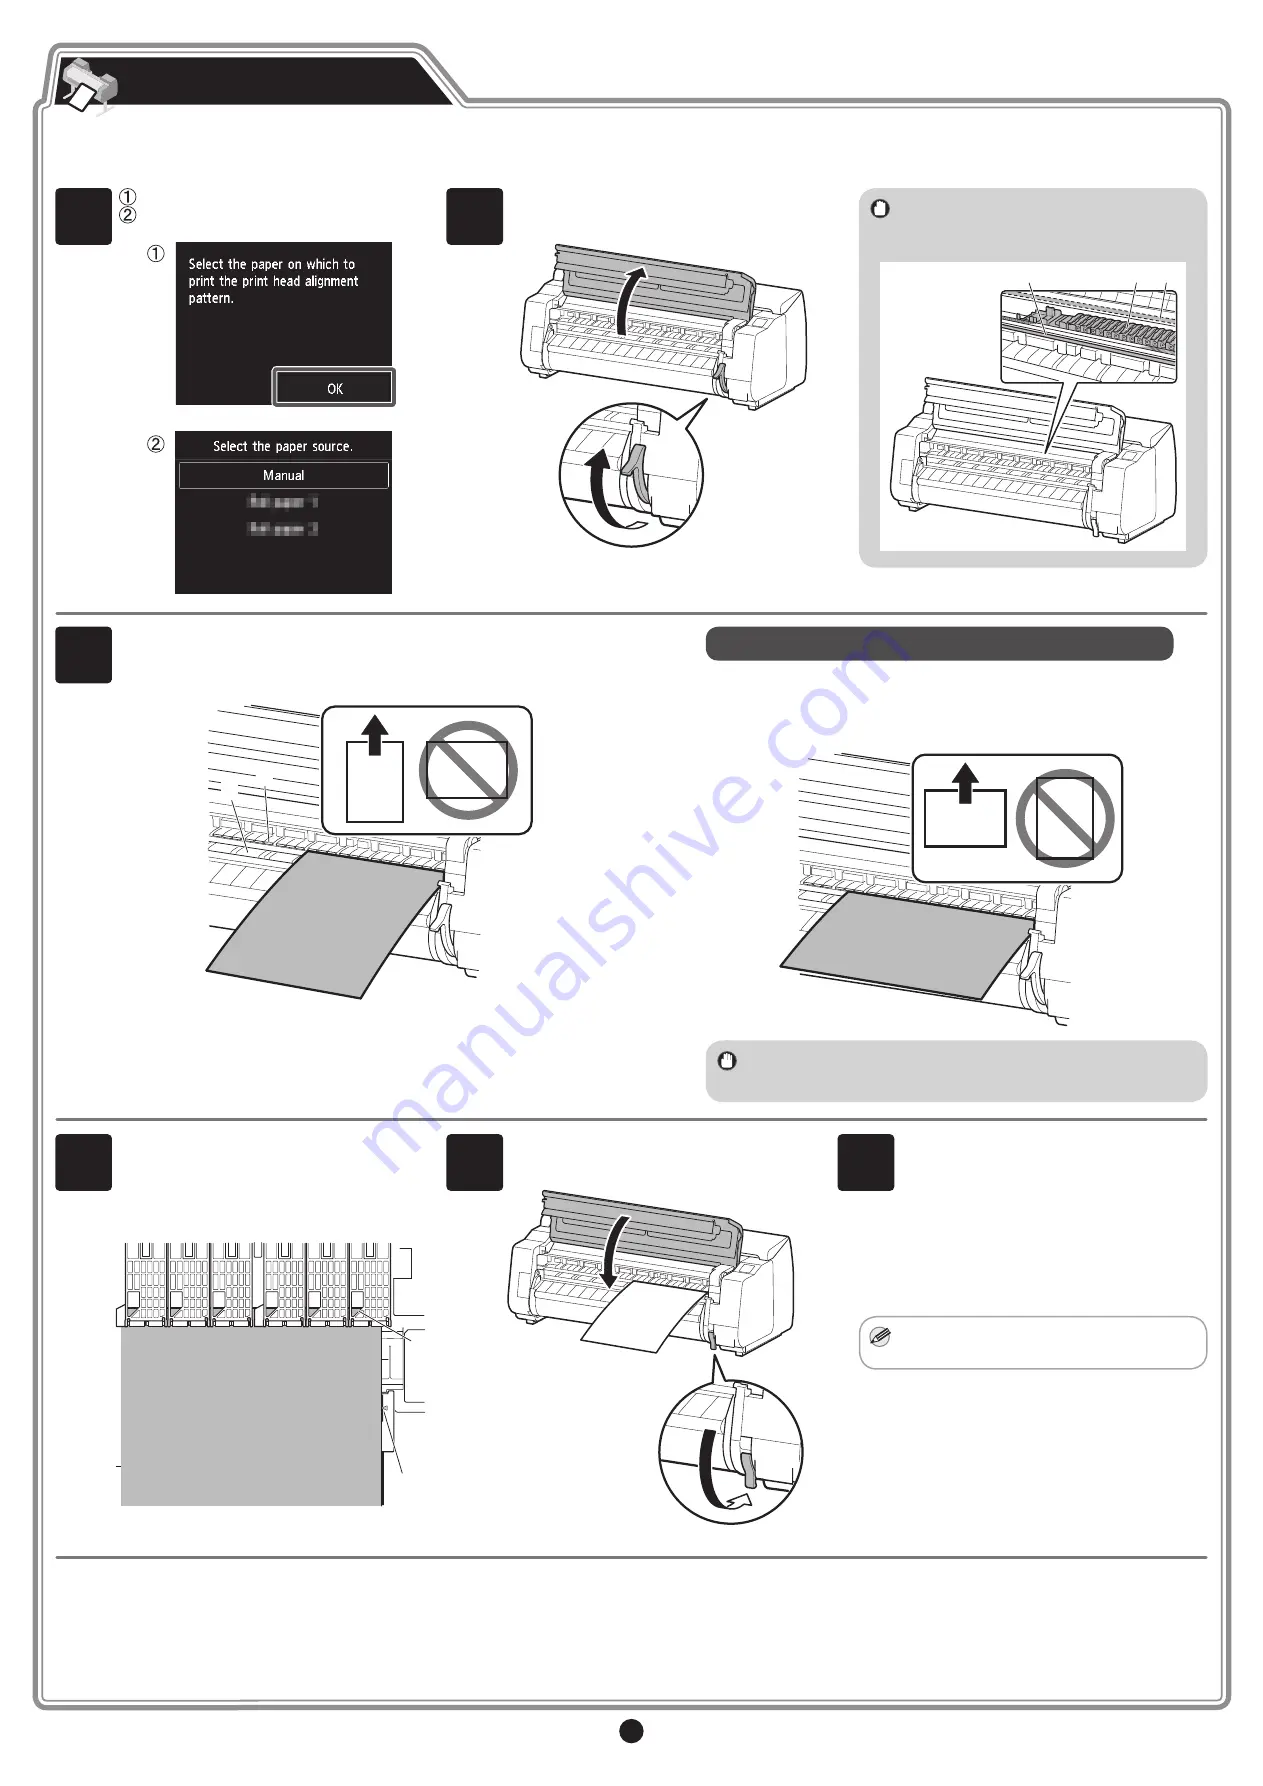
Open the top cover and lift the release
lever.
Important
• Do not touch the linear scale (A),
carriage shaft (B), or ink tube stabilizer
(C). Touching them may cause damage.
A
C
B
3
Insert the paper for adjustment between the platen (A) and paper
retainer (B) in portrait orientation with the printed side of the paper
facing up. Only one sheet of paper is needed.
A
B
When using the PRO-2000 without the printer stand
Insert the paper for adjustment in landscape orientation with the
printed side of the paper facing up. In this case, a second sheet
needs to be loaded after the first sheet has finished printing.
Important
• If you insert the paper in portrait orientation while not using the
printer stand, the paper may become jammed.
4
Load the paper aligned with the paper
alignment lines (A) to ensure that the
paper is not crooked, and align the
leading edge of the paper with the front
side of the line (B).
A
B
5
Lower the release lever to lock the paper
and close the top cover.
6
The screen for selecting the paper type
appears. Tap the type of paper you
loaded.
In this case, tap
Coated papers
then
HW
Coated HG
.
Note
• If
The paper is loaded askew.
appears,
repeat steps 2 to 5.
Load the paper for adjustment.
The remainder of this procedure differs depending on the model you are using.
Check the name of the model you are using, and proceed to the following page.
For the PRO-2000: Go to p.10
For the PRO-4000, PRO-4000S, PRO-6000, and PRO-6000S: Go to p.11
Load the Paper


