1
QT6-2133-V01
PRINTED IN XXXXXXXX
XXXXXXXX
© CANON INC. 2017
479
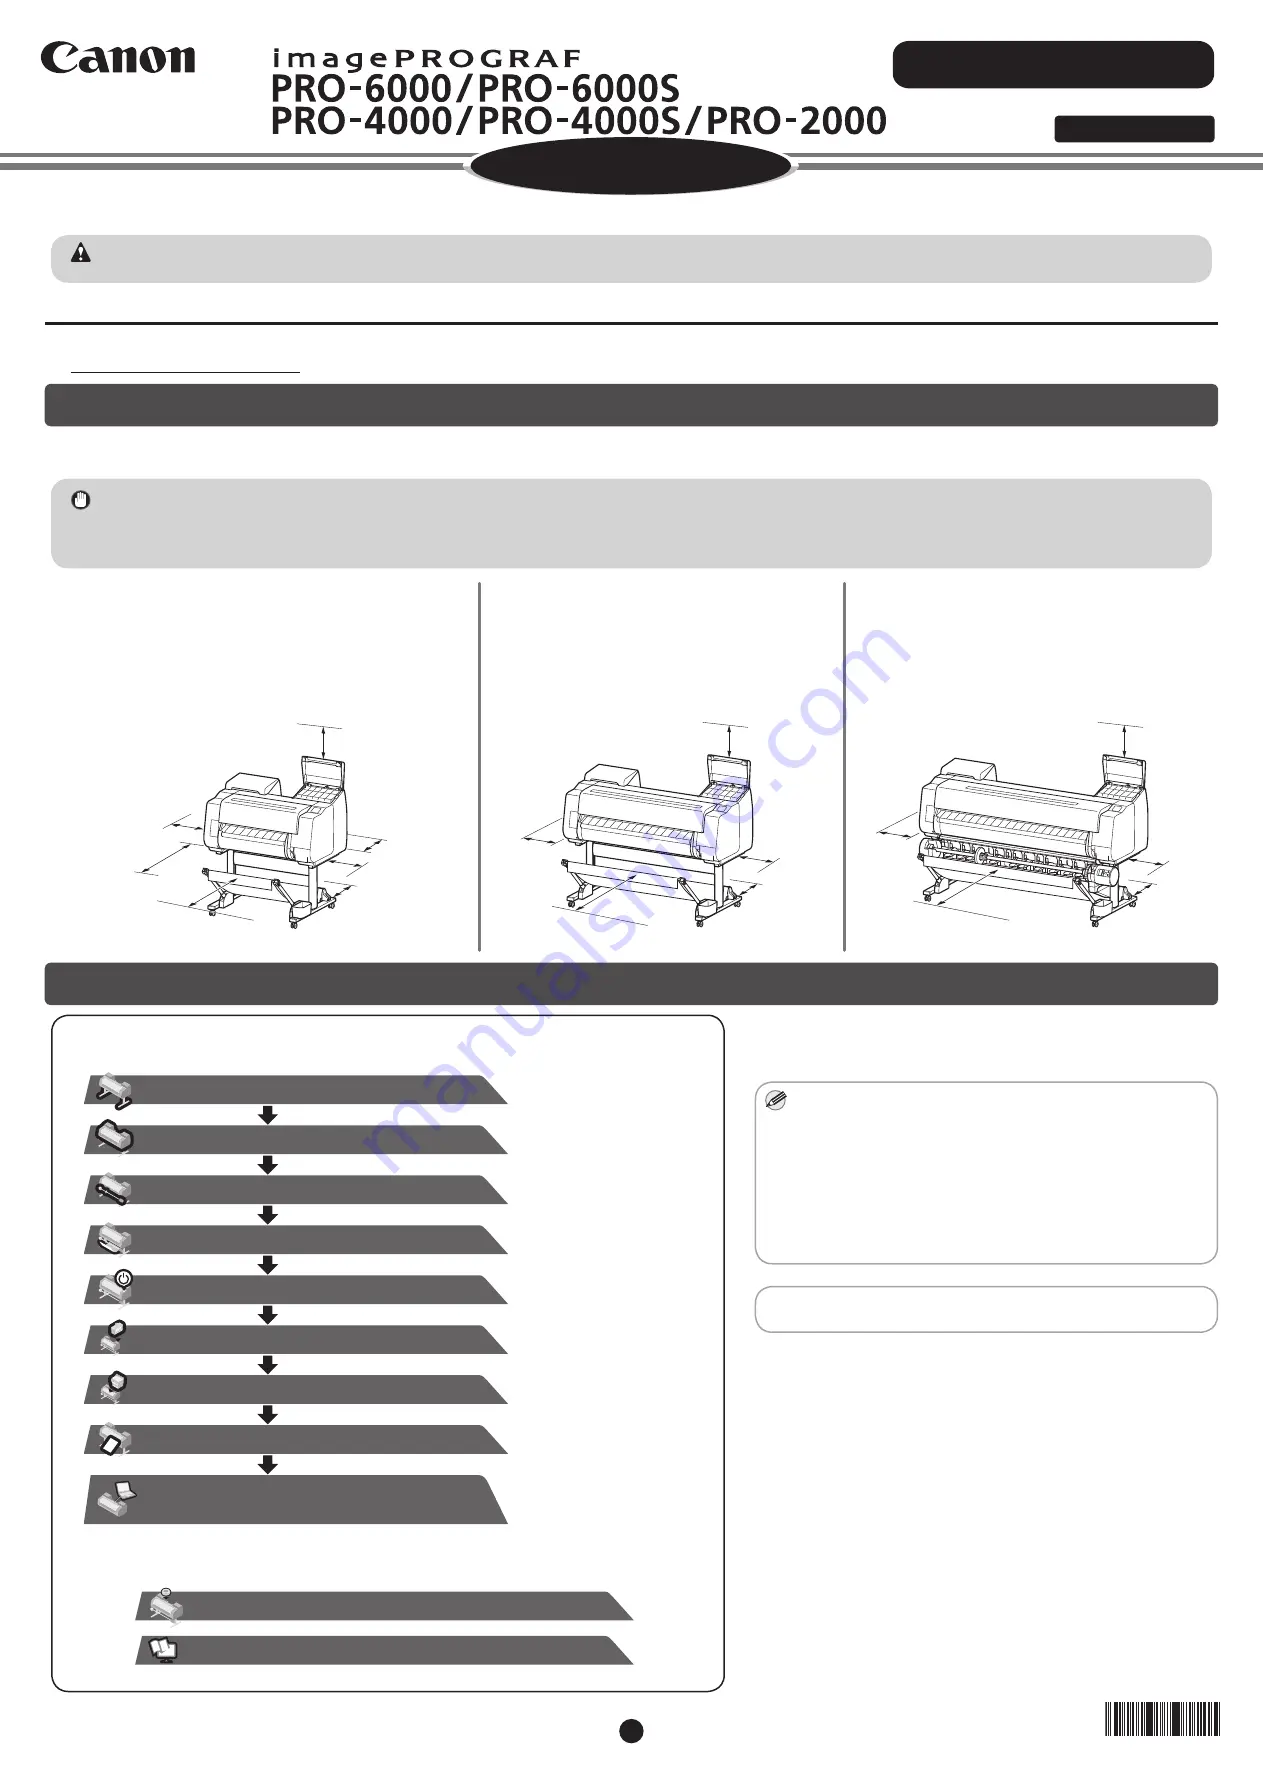
It is recommended that you reserve space of the following dimensions to allow you to work around the printer.
Check the completed image of the printer you purchased and make sure you have enough space to install the printer.
In order to ensure that this product is used safely, be sure to read the precautions.
-> Quick Guide (separate manual)
Before Setting Up the Printer
Read this manual before attempting to operate the printer.
Keep this manual in a handy location for future reference.
Set up the printer using the following procedure.
• Windows is a trademark or registered trademark of Microsoft Corporation in the
U.S. and/or other countries.
PRO-2000
Installation space (W x D x H)
• When not using the stand
59.5 x 56.5 x 40.2 inches (1510 x 1434 x 1020 mm)
• When using the stand
59.5 x 66.3 x 61.5 inches (1510 x 1684 x 1560 mm)
PRO-4000 / PRO-4000S
Installation space (W x D x H)
78.5 x 66.3 x 61.5 inches (1993 x 1684 x 1560 mm)
PRO-6000 / PRO-6000S
Installation space (W x D x H)
94.5 x 66.3 x 61.5 inches (2399 x 1684 x 1560 mm)
Confirming the Installation Space
Overview of Setup
Important
• The printer stand and roll unit may be options depending on the model. Care is required because the required space may differ depending on whether or not the
options are used.
• The space required in front of the printer differs on how the basket supplied with the printer stand is used. This shows the installation space when used in the
position in the illustration.
Caution
• Instructions in this Setup Guide show the PRO-4000 printer. Note that your printer may look different from these illustrations in some cases. However, the basic
operations are the same.
Note
• Some items are included with the printer but not described in
this manual.
Keep these items in a safe place after setup because they
are used in various printing applications.
• For instructions on the included items not described in this
manual, refer to the Online Manual. ("How to Display the
Online Manuals" on p.14)
• A cable to connect the printer to a computer is not provided
with the printer.
RMC (Regulatory Model Code): K10468
RMC (Regulatory Model Code): K10441
RMC (Regulatory Model Code): K10440
RMC (Regulatory Model Code): K10439
RMC (Regulatory Model Code): K10438
If an error message appears during setup or other problems occur,
refer to "Responding to Messages" on p.14.
Setup Guide
Introductory Information
ENGLISH
• Check this also after setup is complete.
3.9 inches
(100 mm)
(When not using
the stand)
3.9 inches (100 mm)
(When using the
stand)
23.6 inches
(600 mm)
(When using the stand)
(When not
using the stand)
5.9 inches (150 mm)
7.9 inches
(200 mm)
7.9 inches
(200 mm)
23.6 inches
(600 mm)
7.9 inches
(200 mm)
7.9 inches
(200 mm)
23.6 inches
(600 mm)
3.9 inches
(100 mm)
5.9 inches
(150 mm)
7.9 inches
(200 mm)
7.9 inches
(200 mm)
23.6 inches
(600 mm)
3.9 inches
(100 mm)
5.9 inches
(150 mm)
*
Assemble the Stand
(P.3)
* Refer to the separate
manual
Install the Printer
(P.3)
*
Attach the Roll Unit
(P.4)
* Refer to the separate
manual
*
Attach the Basket
(P.4)
* Refer to the separate
manual
Turn On the Printer
(P.4)
Install the Ink Tanks
(P.6)
Install the Print Head
(P.8)
Load the Paper
(P.9)
Store Accessories in the Pockets
(P.13)
How to Display the Online Manuals
(P.14)
• Perform Print Head Adjustment
(P.10 ~ 12)
• Connect to the Printer


