115
Using
a
Mem
o
ry
Ca
rd
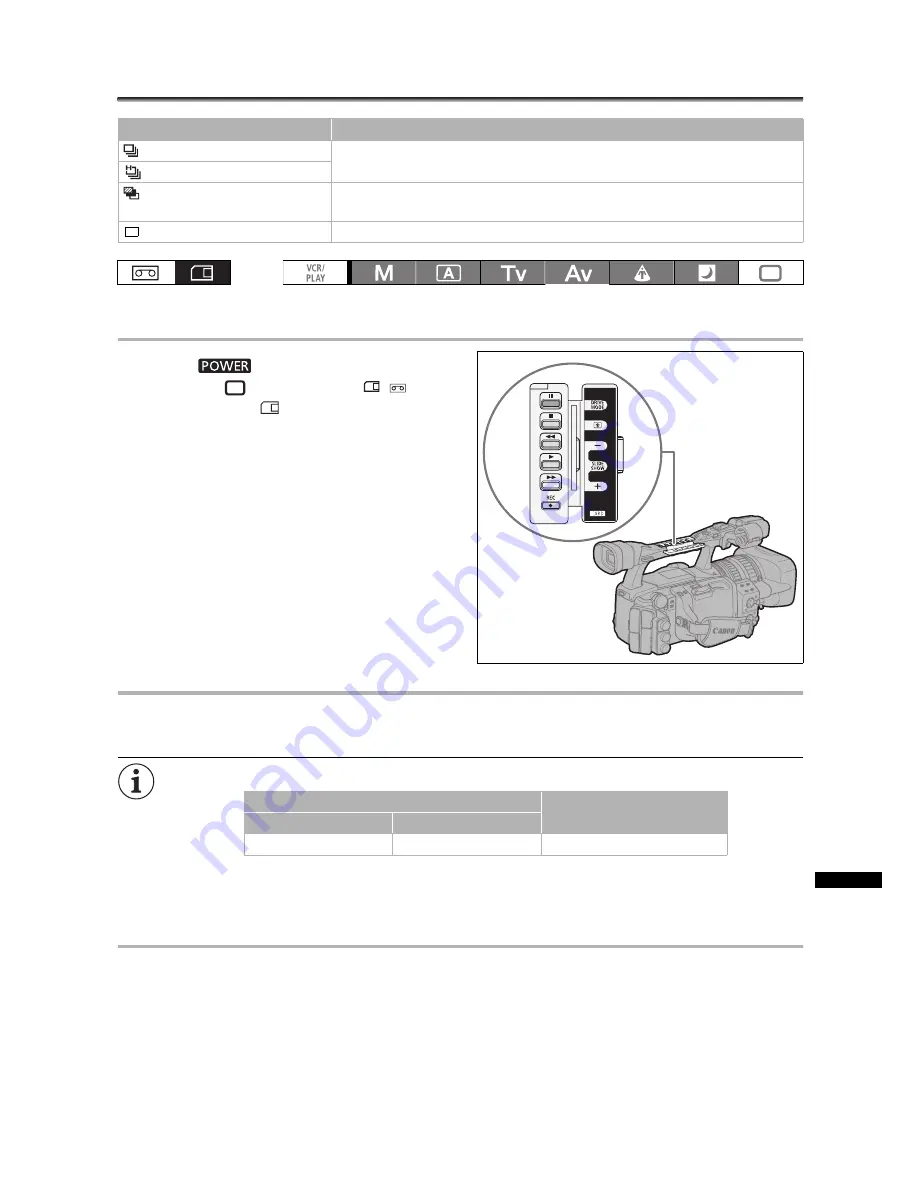
Drive Mode
Changing the Drive Mode
1. Set the
dial to a recording program
other than
and move the
/
(card/
tape) switch to
.
2. Press the DRIVE MODE button to switch
between the drive modes.
Pressing the button will cycle through the drive
modes. The icon of the selected drive mode will
appear on the screen.
Continuous Shooting/High-Speed Continuous Shooting
Press and hold the PHOTO button.
A series of still images will be recorded as long as you hold the PHOTO button pressed down.
Maximum number of continuous shots:
- These figures are approximate and vary depending on the recording conditions and subject.
- Sufficient space on the memory card is required. Continuous shooting will stop when the card is
full.
Auto Exposure Bracketing
Press the PHOTO button.
Three still images in different exposures are recorded on the memory card. Make sure that there is sufficient
space on the memory card.
Drive mode
Use
Continuous Shooting
Captures a quick series of still images while you hold the PHOTO button pressed down.
For the number of shots per second, refer to the table below.
High-Speed Continuous
AEB
(Auto Exposure Bracketing)
The camcorder records a still image in three different exposures (dark, normal, light in
1/2 EV steps).
Single
Records a single still image when you press the PHOTO button.
Shots per second
Maximum number of continuous
shots
Normal speed
High speed
2.5 images
4.1 images
60 images


