background image


View Device Information 

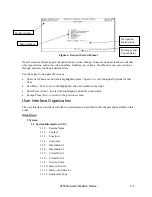
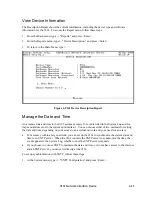
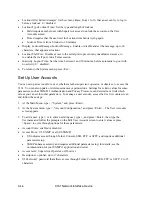
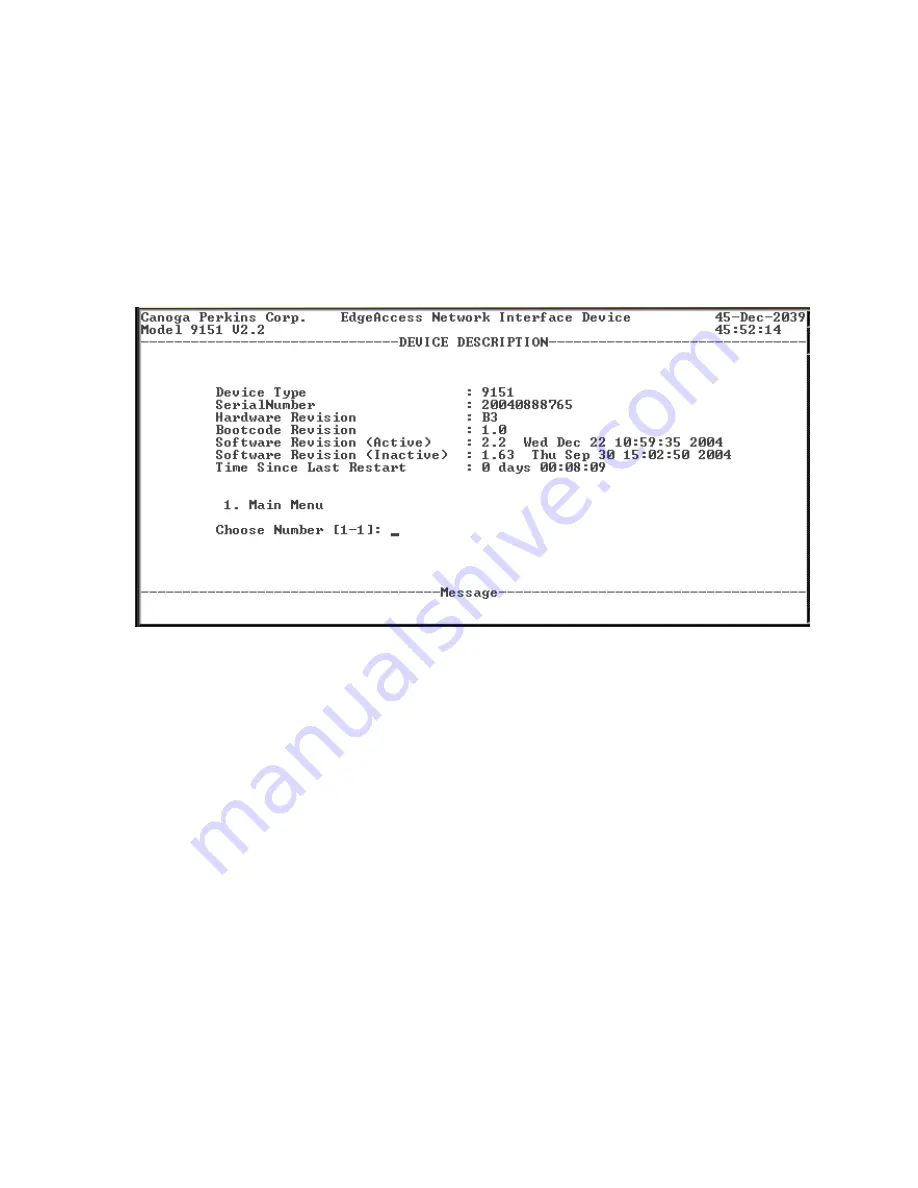
The Description Report shows the current information, including the device type and software 
information for the 9161.  To access the Report menu, follow these steps: 

1.  From the Main menu, type 

4

, "Reports," and press <Enter>. 

2.  From the Reports menu, type 

1

, "Device Description," and press <Enter>.. 

3.  To return to the Main Menu, type 

4


Figure 6. 9161 Device Description Report 

Manage the Date and Time 

An accurate date and time in the 9161 assures accuracy for events listed in the System Log and for 
traps and alarms sent to the system administrator.  You can choose either of two methods for setting 
the date and time, depending on your access to an external network and your need for accuracy. 


For accuracy within a large network, you can set up the 9161 to synchronize the system date and 
time to an SNTP server.  When the 9161 contacts the SNTP server to synchronize the time, the 
event appears in the System Log, whether or not the SNTP server responds. 


If you choose to not use SNTP to maintain the date and time, or do not have access to the Internet 
and an SNTP server, you can set it directly at the 9161. 

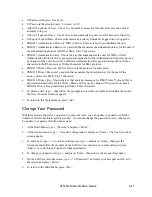
To set up synchronization with SNTP, follow these steps: 

1.  At the System menu, type 

10

, "SNTP Configuration" and press <Enter>. 

9161 Network Interface Device 

3-11

Содержание 9161

Страница 1: ...the 9161 Network Interface Device User Manual...

Страница 2: ......

Страница 3: ...ifications of its products at any time without prior notification Every effort has been made to keep the information in this document current and accurate as of the date of publication or revision How...

Страница 4: ......

Страница 5: ...on d instruments optiques par exemple un collimateur optique avec cet quipement peut s av rer dangereuse pour les yeux Proc der des contr les des ajustements ou toute proc dure autre que celles d crit...

Страница 6: ......

Страница 7: ...e and Time 3 11 Manage SNMP and Host Access 3 12 Manage Traps and Alarms 3 13 View System Events and Traps 3 14 Control Management Packets 3 14 Update Software 3 14 Managing Security 3 15 Set General...

Страница 8: ...FP Module Model Numbers 5 2 Appendix A Warranty Information A 1 Appendix B Acronym and Abbreviation List B 1 List of Figures Figure 1 The 9161 Front Panel 1 1 Figure 2 Remote Fault Signal 2 4 Figure 3...

Страница 9: ...upports two ports that receive and transmit 10 Gigabit Ethernet data over single mode fiber SMF or multimode fiber MMF at 1310 or 1550 nm wavelength The 9161 front panel shown in Figure Error Referenc...

Страница 10: ......

Страница 11: ...one unit Use the standard rackmount kit with brackets and screws to install the 9161 in a 19 inch rack or use the optional 23 inch rackmount kit The 9161 includes two sets of mounting holes For a fron...

Страница 12: ...ct the Ethernet port from an intrabuilding lightning surge use a properly grounded shielded cable 9 Label each cable and connector with the signal name and direction Canoga Perkins recommends that you...

Страница 13: ...Management traffic with over temperature Management Red Diagnostic or CPU failure Table 2 9161 Interface LEDs LED Status Description Off No transmission activity Green blinking Transmission activity A...

Страница 14: ...reference Manage Traps and Alarms RMTF complies with the IEEE802 3u Remote Fault standard Usr Prt Ext Prt Rx Rx Tx Tx Usr Prt Ext Prt Rx Rx Tx Tx RMTF Local Device Remote Device Tx transmits RMTF to...

Страница 15: ...module Before you start check that these industry standard MIBs are loaded Standard MIB Dot2sd mib Etherlike mib If mib Bridge mib Pbridge mib In addition download these private mibs available from th...

Страница 16: ...hese selections Bits per second 9600 bps Data bits 8 Parity None Stop bits 1 Flow control None 6 Click OK HyperTerminal connects to the system and the VT100 terminal emulation starts Management User I...

Страница 17: ...ions for that item Tab Press Tab to move the highlight to the next column to the right Enter Press Enter to select the highlighted option for a menu item Escape Press Esc to return to the previous scr...

Страница 18: ...LAN Double Tagged 1 3 7 Telnet SSH Host Verification 1 3 8 Static ARP Table 1 4 Host Access Table 1 4 1 View Change Host 1 4 2 Add Host 1 4 3 Delete Host 1 5 Notification Destination Table 1 5 1 View...

Страница 19: ...ut Configuration 1 6 10 Lockout After Failed Attepts 1 6 11 Lockout Type 1 6 12 Lockout Time 1 6 13 Display Lockout Message 1 6 14 Lockout Message 1 6 15 Lockout Console Port 1 6 16 Inactivity Lockout...

Страница 20: ...7 VLAN Settings Traps 1 9 8 Link Up Down Traps 1 9 9 Authentication Traps 1 9 10 Spanning Tree Traps 1 10 SNTP Settings 1 10 1 SNTP Enaable 1 10 2 SNTP Server IP Address 1 10 3 Time Resync Interval in...

Страница 21: ...5 2 View Change VLAN 2 5 3 Delete VLAN s 2 5 4 List From VLAN ID 2 5 5 VLAN Id Translation 2 5 6 VLAN Priority Translation 2 5 7 Configure Port VLAN 2 6 Double Tagging Configuration 2 6 1 Enable doub...

Страница 22: ...2 View Next Page 4 6 3 Clear Table 5 Diagnostics 5 1 Latency Jitter Test 5 1 1 Test IP Address 5 1 2 Test Duration 5 1 3 Test Packets Size 5 1 4 Min Test Packets Size 5 1 5 Max Test Packet Size 5 1 6...

Страница 23: ...orts See Table Error Reference source not found Figure 5 9161 Main Menu Table 3 9161 Main Menu Opti Menu Option Functions 1 System Set values for basic system parameters communication and security as...

Страница 24: ...itional information such as additional contact information phone numbers addresses etc up to a maximum of 40 characters 7 8 Circuits Info 1 2 these two fields are used of circuit identification purpos...

Страница 25: ...he system administrator You can choose either of two methods for setting the date and time depending on your access to an external network and your need for accuracy For accuracy within a large networ...

Страница 26: ...nage SNMP and Host Access To set values for basic system parameters including some parameters used by SNMP go to the IP Settings screen and follow these steps 1 From the System menu type 3 IP Settings...

Страница 27: ...For a list of events that trigger traps see Table Error Reference source not found To set up the traps follow these steps 1 From the System menu type 9 Trap Configuration and press Enter 2 At the Trap...

Страница 28: ...steps 1 From the System menu type 8 Management Packets Filter and press Enter 2 At the Management Packets Filter screen type the number for a port then press Space to cycle between Enabled or Disabled...

Страница 29: ...hich are basic to maintaining security regardless of which security application runs on your network To set values for general parameters access the Security Configuration screen and follow these step...

Страница 30: ...ames or permissions Settings for certain values for some parameters such as SNMPv3 Authentication and Privacy Protocols can determine or limit which values you can set for other parameters To manage a...

Страница 31: ...racters SNMPv3 Privacy Key Shows the key that encrypts messages for DES Privacy Protocol this is generated automatically for the Privacy Password but can be changed if the user s host uses a different...

Страница 32: ...ccess The SNMP agent allows access to up to 24 Host IP addresses Set up and edit the Host information for the 9161 at the Host Access Table screen To access the Host Access Table follow these steps 1...

Страница 33: ...onal encryption V3 Inform Acknowledged message with SNMPv3 authentication and optional encryption 3 To finish setting up V1 Trap V2 Trap or V2c Inform notification type the community name up to 10 cha...

Страница 34: ...urn to the System Menu press Esc Managing the Network Interface The Switch Configuration menu offers options to set network parameters see Table Error Reference source not found Table 5 Network Spanni...

Страница 35: ...ble it on the customer s port The SP tag priority is derived from the port priority If you set up Pbit translation the translation occurs before the Pbit is copied to the SP tag Customer port 1 Custom...

Страница 36: ...ype 2 Port Config Status then type the port name and press Enter You can set values for these parameters Admin Mode enable or disable Flow Control enable or disable Link Trap enable or disable Physica...

Страница 37: ...or a specific port type 10 View Change Interface and press Enter then press Space to cycle through the port names You can edit various parameters such as Admin Mode Priority Path Cost and Edge Port 4...

Страница 38: ...and press Enter You can edit various parameters such as Admin Mode Priority Path Cost and Edge Port 9 To return to the Switch Configuration menu press Esc Set Up Optional Double Tagging If you are us...

Страница 39: ...Switch Configuration menu press Esc Check Global Spanning Tree Data Use the Global Spanning Tree Report screen to view Global STP parameters and interface statistics and status for the 9161 To access...

Страница 40: ...RP address follow these steps 1 From the IP Settings screen type 8 Static ARP Table and press Enter 2 At the prompt type a number to edit a port and then follow the prompts 3 To return to the IP Setti...

Страница 41: ...9161 Network Interface Device 3 27 3 22 Blank...

Страница 42: ......

Страница 43: ...ote If no minimum bend radius is specified the typical long term low stress radius is not less than 15 times the cable diameter based on Federal Standard FS 1037C Always connect the fiber optic cables...

Страница 44: ...k cable 3 Record the optical power level and compare it with the sensitivity level listed on the data sheet for the link fiber type 4 Subtract the remote power level from the value for the transmitter...

Страница 45: ...r the connector housing Clean all optical connectors before reinstalling them For details on the LED status during a normal start up see Chapter 2 The front panel LEDs show both normal and fault condi...

Страница 46: ...P Address Where the 9161 sends the packets Test Duration How long to run the test in minutes and seconds 0 means don t stop Test Packets per second How many packets to send each second Min Max Test Pa...

Страница 47: ...ETL cETL LVD UL 60950 CAN CSA C22 2 No 60950 EN IEC 60950 EMC Directive EN55022 Class A EN 55024 EN 61000 3 2 3 3 CE Mark FCC Part 15B U S ICES 003 CAN VCCI Class A Japan C Tick AS NZS 3548 Australia...

Страница 48: ...twork Interface Device 9161 XFP Module Model Numbers 10GigE XFP Modules XFP1 0265 10 GBase SR 850nm MM 300m LC XFP1 2265 10 GBase LR 1310nm SM 10km LC XFP1 3465 10 GBase ER 1550nm SM 40km LC XFP1 3665...

Страница 49: ...nty information is available on line in the Client Login Area of the Canoga Perkins web site www canoga com or by contacting Technical Support at 800 360 6642 voice or fiber canoga com email 9160 10 G...

Страница 50: ......

Страница 51: ...VLAN Registration Protocol for registering a client station in a VLAN Lag Link Aggregation Protocol LLF Link Loss Forwarding LNK Link MMF Multimode Fiber MST Multiple Spanning Tree PHY Physical Layer...

Страница 52: ......

Страница 53: ......

Страница 54: ...CANOGA PERKINS CORPORATION 20600 Prairie Street Chatsworth California 91311 6008 USA Phone 818 718 6300 FAX 818 718 6312 Web Site www canoga com Email fiber canoga com...

Отзывы: