


60Hz
-
240V~, 50
-
220
Supply Voltage
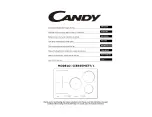
5 Zones
Cooking Zones
CIES55MCTT
/1
Cooking Hob
Specification
Technical
to the induction hob.
avoid any dangers and damages
Please do not disassemble the unit by yourself to
The above are the judgment and inspection of common failures.
cools down.
Please restart after the hob
temperature sensor
High temperature of the IGBT
E5
Please contact the supplier.
temperature sensor
coil
High temperature of the induction
E3
supply is normal.
Power on after the power
supply is normal.
Please inspect whether power
Abnormal supply voltage
E1/E2
Please contact the supplier.
failure.
Temperature sensor of the IGBT
F9/FA
the supplier.
Please contact
induction coil failure
Temperature sensor of the
F3/F4
What to do
Possible causes
Problem
automatically and display corresponding protective codes:
If an abnormality comes up, the induction hob will enter the protective state
Inspection
Failure Display and
qualified technician.
off at the wall, and contact a
the power to the induction hob
letters and numbers, switch
Please note down the error
Technical fault.
display).
in the cooking timer
with one or two digits
(typically alternating
code is displayed
sounds and an error
unexpectedly, a tone
turned itself off
cooking zone has
The induction hob or a
24
-
EN
EN-23
Hints and Tips
Problem
Possible causes
What to do
The induction hob
cannot be turned on.
No power.
Make sure the induction hob is
connected to the power supply
and that it is switched on.
Check whether there is a power
outage in your home or area. If
you’ve checked everything and the
problem persists, call a qualified
technician.
The touch controls are
unresponsive.
The controls are locked.
Unlock the controls. See section
‘Using your induction cooktop’ for
instructions.
The touch controls are
difficult to operate.
There may be a slight film of
water over the controls or you
may be using the tip of your
finger when touching the
controls.
Make sure the touch control area is
dry and use the ball of your finger
when touching the controls.
The glass is being
scratched.
Rough-edged cookware.
Unsuitable, abrasive scourer or
cleaning products being used.
Use cookware with flat and smooth
bases. See ‘Choosing the right
cookware’.
See ‘Care and cleaning’.
Some pans make
crackling or clicking
noises.
This may be caused by the
construction of your cookware
(layers of different metals
vibrating differently).
This is normal for cookware and
does not indicate a fault.
The induction hob
makes a lowhumming
noise when used on
a high heat setting.
This is caused by the technology
of induction cooking.
This is normal, but the noise should
quieten down or disappear
completely when you decrease the
heat setting.
Fan noise coming from
the induction hob.
A cooling fan built into your
induction hob has come on to
prevent the electronics from
overheating. It may continue to
run even after you’ve turned the
induction hob off.
This is normal and needs no action.
Do not switch the power to the
induction hob off at the wall while the
fan is running.
Pans do not become
hot and appears in the
display.
The induction hob cannot
detect the pan because it is not
suitable for induction cooking.
The induction hob cannot detect
the pan because it is too small
for the cooking zone or not
properly centred on it.
Use cookware suitable for induction
cooking. See section ‘Choosing the
right cookware’.
Centre the pan and make sure that its
base matches the size of the cooking
zone.
Содержание CIES55MCTT/1
Страница 114: ...AR 2 AR 3...
Страница 115: ...AR 4 MP3 AR 5...
Страница 116: ...AR 6 8 8 AR 7...
Страница 117: ...AR 8 1 2000 2600 2 1500 2000 3 1200 2600 4 1500 1800 5 2000 2600 6 2800 3500 7 8 1 2 ON OFF 3 4 5 6 7 AR 9...
Страница 118: ...AR 10 1 2 AR 11 1 2 180 120 3 5 210 140 4 160 100 240 160 270 1 2 3...
Страница 119: ...AR 12 a 1 b c 1 9 1 0 H AR 13 3 4 H H H 2500 3000 4500 6500 7400 1 2 5 3 3 2 5 3 0 5 10 1 2 3 2...
Страница 120: ...AR 14 2 10 2500 3000 4500 6500 7400 3 Pn 3600 7 7 7 9 3500 3 7 8 AR 15 5 1 b 3 P 2 5 9 3 B 9 5...
Страница 121: ...AR 16 1 A 2 0 1 AR 17 2 ll 3 1 160 270 240...
Страница 122: ...3 00 2 1 99 2 2 2 2 2 4 4 4 8 8 8 II A 9 8 7 6 5 4 3 2 1 19 AR AR 18 2 1 Lo 1 2 3 ON OFF ON OFF 10...
Страница 123: ...1 2 5 2 5 2 1 1 H 6 5 5 21 AR AR 20 10 99 0 4 0 5 5 6 30 1 2 00 3 10 99 0 4 00...
Страница 124: ...AR 22 1 2 3 4 1 2 30 3 4 2 4 1 2 3 4 5 AR 23...
Страница 126: ...AR 26 A B C D E 760 50 20 5 3 AR 27 4 A B C D 1 2 3 4 5 ST3 5 8...
Страница 127: ...WEEE WEEE WEEE WEEE WEEE EU 2012 19 29 AR AR 28 1 2 3 75 3...


