


Rev 1.0
7
3
Updating with the CANchecked Updater
The MCE18 can be flashed with the CANchecked MFD15 Updater from our website. Before running
the updater, the driver must be installed properly.
The driver can be downloaded from the Siliconlabs website:
https://www.silabs.com/developers/usb-to-uart-bridge-vcp-drivers
The update file and updater can be downloaded from our website:
MCE18 - Multifunction Can Bus Extension > Displays for Engine Management (canchecked.de)
To connect the MCE18 to the PC via USB, the 4 wires of a USB cable must be pinned into the
Superseal connector. As of board revision 0.8b, there is a redundant microUSB port on the board. To
get to it, the MCE18 must be disassembled.
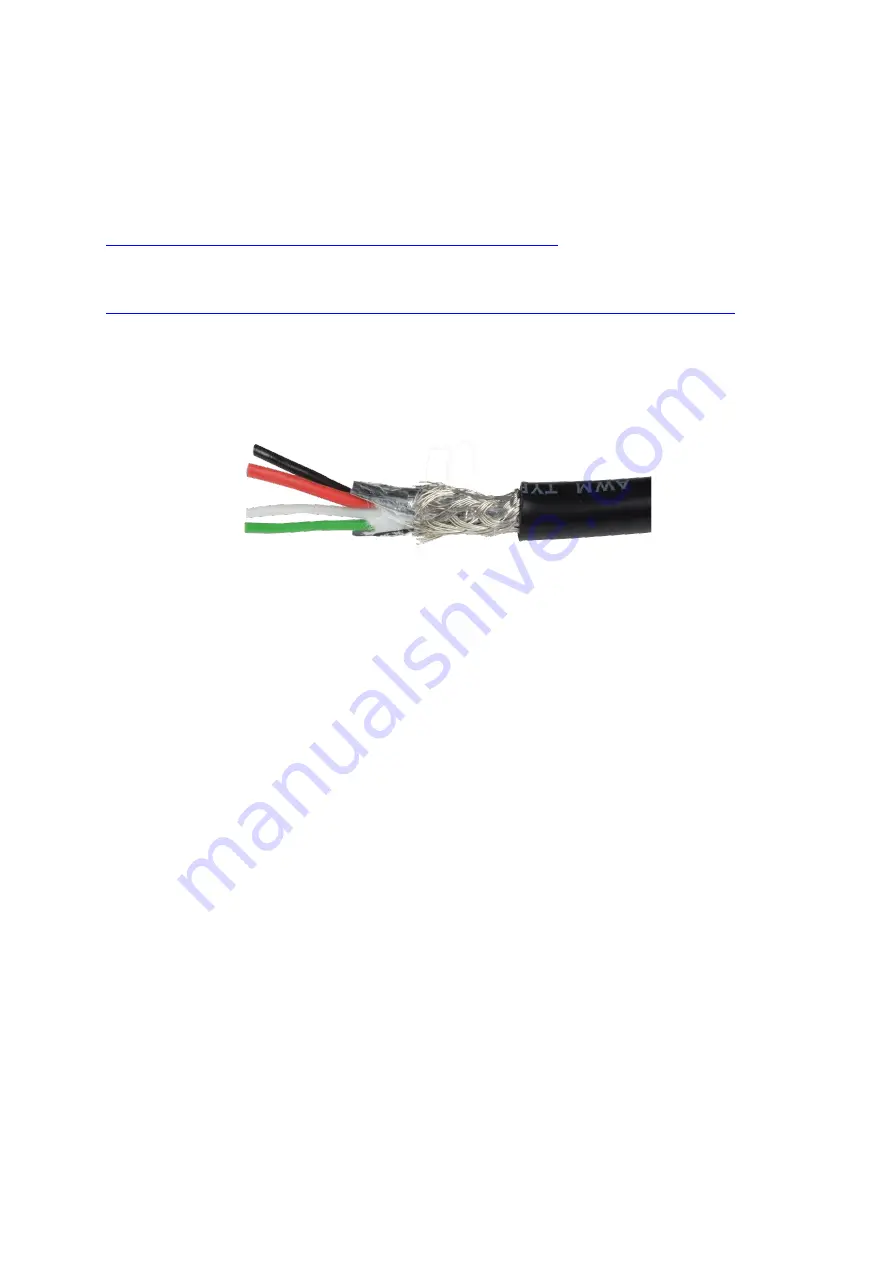
With this pinout you can pin the USB cable to the Superseal connector yourself:
Illustration 1: USB Cable Colors
•
Red:
USB 5V
->
Pin 5
•
Green:
USB Data+
->
Pin 6
•
White:
USB Data
->
Pin 7
•
Black:
USB GND
->
Pin 8
Once the MCE18 is properly wired and plugged in, it will appear as a COM port in Windows Device
Manager as well as in the Updater. If this is not the case, please check the COM port and make sure
the driver is installed successfully. For the update process, it is important that the MCE18 is only
powered via USB and does not get 12V.
Once you have started the updater, the baud rate should be set to
125000
. Click on "Select Flash
Hexfile" to select the previously downloaded hex file. Then, you need to click on "Start Bootloader".
Now the software connects to the MCE18, as soon as the button turns green, you have to press the
"Program Flash" button. Now the "Progress" bar runs through. After clicking on "Exit Bootloader" you
can disconnect the device and you are done with the update.


