


H.264 IP Camera Cywatch
H.264 IP Camera Cywatch
14
15
■
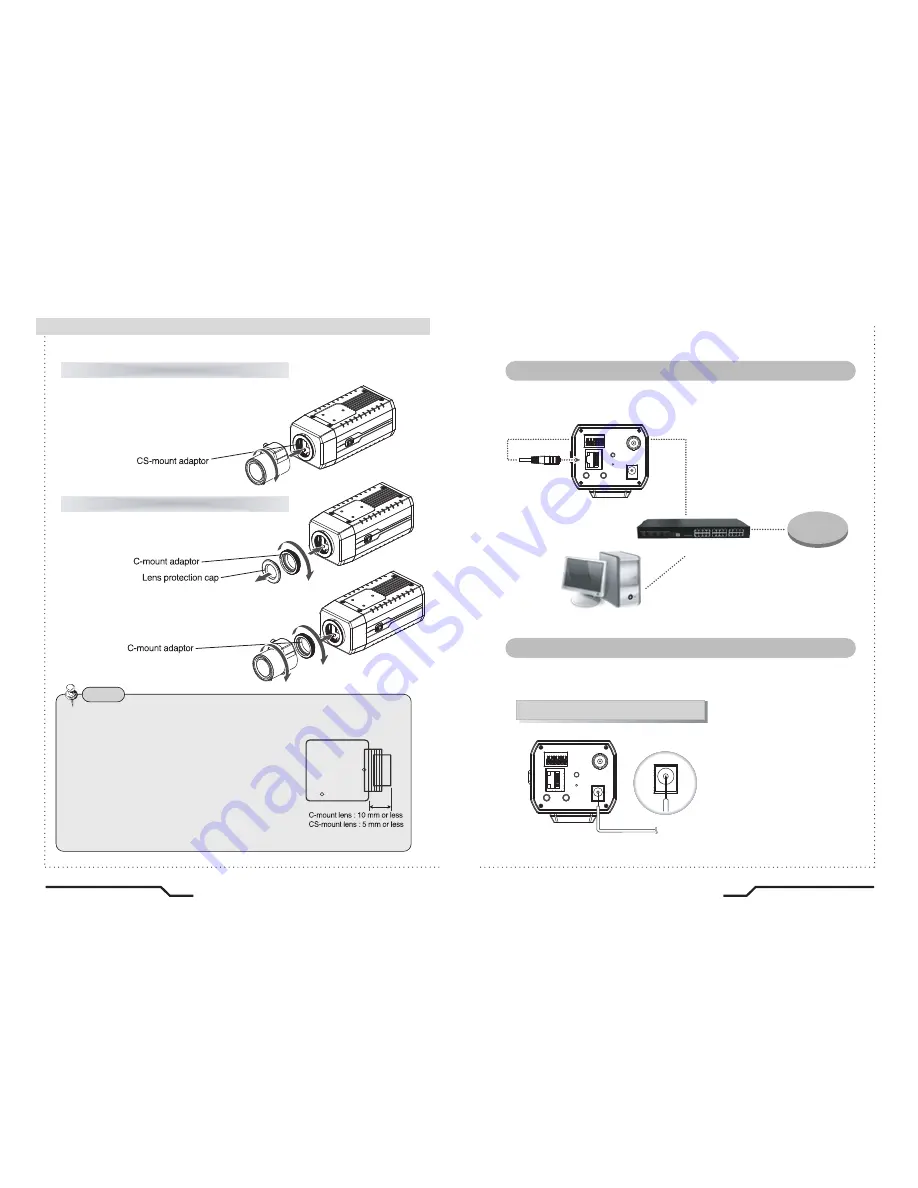
Installation
Take off the lens protection cap and attach
the CS-Mount lens to the camera by screwing it in
clockwise.
Note
ㆍ
Use the specified lens connection parts as shown in the picture below.
The use of the wrong sized parts may cause damage
to the inside of the camera or result in poor fitting.
ㆍ
Use of a lens which is too heavy affects the balance
of the camera and may cause a malfunction. Please
use a lens that weighs less than 450g.
ㆍ
Select Av mode if possible when adjusting
the automatic light control (ALC) of an auto lens.
Use of PK mode may cause hunting.
When using a CS-Mount lens
1. Take off the lens protection cap and
attach the C-mount adaptor.
2. Attach the C-Mount lens to the
camera by screwing it in clockwise.
When using a C-Mount lens
Connect the video output terminal located on the back of the camera to
the monitor.
■
Connecting to a monitor
Check the standard power requirement before connecting to power.
■
Connecting to power
DC power adapter (DC12V,1A
↑
)
VIDEO
RELAY
RS485
SENSOR
POWER
RESET
DC 12V IN
MIC
LAN
SPEAKER
DC 12V IN
WAN
Network Switch
VIDEO
RELAY
RS485
SENSOR
POWER
RESET
DC 12V IN
MIC
LAN
SPEAKER
IP Camera
PC
Содержание CTNC-5353H
Страница 6: ......
Страница 20: ...Printed in KOREA H 264 IP Camera Cywatch H 264 IP Camera Cywatch Instruction Guide...


