background image


CAMSPORTS HDMax - User Manual  - English 

Playback on the camera  

-


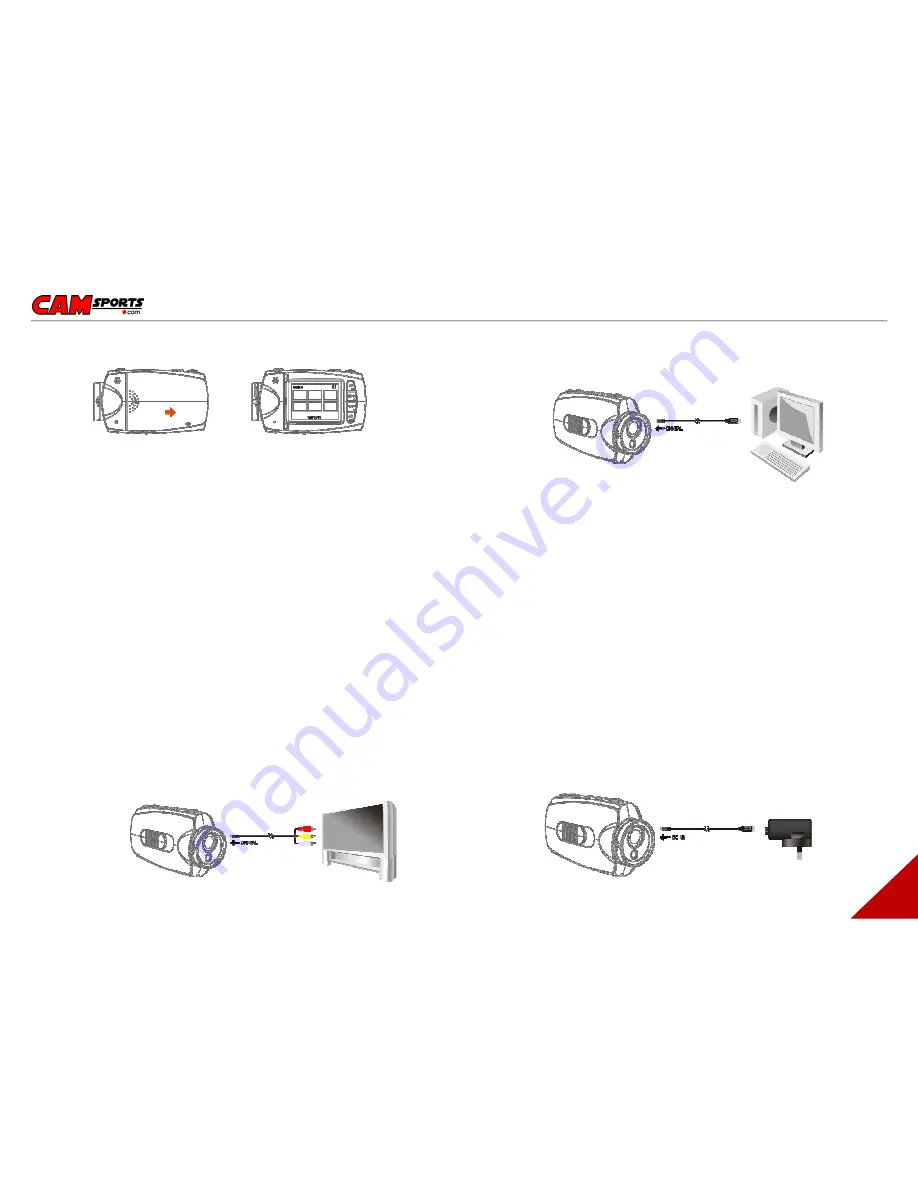
Press and push the screen cover backwards to open it. 
Gently press

LCD

key , and the screen will come on. 

-


Press

MODE

to  switch  until  you  see  the  Play  Mode,  the  screen  shows  6  video  files  per 

page in grid form.  

-


Press 

+

】【-】

to  choose  which  video  to  play,  the  video  will  be  highlighted  with  yellow 

borders, press 

【▶

to start recording, and press again to stop. 

-


When playing video, user can short press 

+

】【-】

to turn up or turn down the volume. 

-


When playing video, user can Long press 

+

】【

-

to Fast forward or reverse at X2/X4/X8. 

-


Press

MODE

to stop playback, and return to the video files listing. 

-


Gently press 

LCD

key to turn the LCD screen off. 

-


Push the rear cover back on to protect the screen when not in use. 


Playback on TV/display device 
 

-


Connect one end of AV-out cable to the DIGITAL interface on  the base of the camera, and 
connect the other end of AV-out cable to your TV or other display device. 

-


Turn on the TV or display device, and enter into the AV-in mode. 

-


Press

MODE

to  switch  to  Play  Mode,  the  screen  shows  6  video  files  per  page  in  grid 

form.  

-


Press 

+

】【

to choose which video to play, the video will be highlighted with yellow 

borders, press 

【▶

to start recording, and press again to stop. 

-


When playing video, user can short press 

+

】【

to turn up or turn down the volume. 

-


When  playing  video,  user  can  Long  press 

+

】【

to  Fast  forward  or  reverse  at 

X2/X4/X8. 

-


Press

MODE

to stop playback, and return to the video files list. 

-


Gently press 

LCD

key, and LCD Screen is off. 

-


Push the screen cover back on to protect the screen when not in use. 

Playback on a PC 
 

Connect AV-out cable to digital interface of camera, and connect the other end of AV-out cable to USB 
jack of PC. 

 
INPUT connections 
 

External MIC : Connect external MIC device to camera for capturing higher quality audio. 


OUTPUT connections 
  

HD  TV  via  HDMI  :  Connect  HDMI  cable  to  HDMI  interface  on  the  camera  and  HDMI  interface  of  TV. 
The LCD will turn off automatically when connected to TV. 
 
TV via AVOUT : Connect the AV cable to AV-OUT jack of camera and AVIN jack of TV. The LCD will turn 
off automatically when connect to TV. 


Connect to PC via USB 
 

Connect USB to the Digital interface of camera and USB port on the PC. 


Connect to power source 

 
Connect the power line to DIGITAL interface of camera, power light (Red) is on when it is connected. 
When the camera is off, connect the power line to camera, it will supply power for the camera. Power 
light (Red) is off when fully charged. 

Содержание HDmax

Страница 1: ... its products CAMSPORTS digital video cameras are exclusively intended for sports video recording and must be used in compliance with local copyright laws The user assumes full responsibility for the use reproduction and distribution of any sounds images videos captured with CAMSPORTS devices Product Overview The CAMSPORTS HDmax is a small all in one design that is convenient for you to record act...

Страница 2: ...emperature 10 60 20 Dimension 102 x 57 x 38 mm L x W x H 21 Camera weight 122 grams Using your LASER pointing device please read the safety information The laser pointing device indicates the position of the rotating lens Rotate the lens until the laser line is perfectly horizontal The laser will come on for 10 seconds when you start recording and then go out automatically To switch the laser back...

Страница 3: ...correct Polarity Push the rear cover closed 2 NOTE If you do not intend to use the produc for a long time please remove the battery Batteries contain chemical substances so they should be handled and disposed of correctly Installing the micro SD card Slide the lock on the rear cover and it will automatically open Refer to picture4 Follow the instructions Insert the SD card in the correct direction...

Страница 4: ...es while camera beeps These audio beeps can be turned off in the menu and camera is recording b To stop recording slide the switch backwards the recording indicator turns off and the camera beeps and stops recording With the LCD screen constantly on the battery will only last for approximately 30 minutes By pressing the LCD button the screen will turn off and then the battery will last for 2 3 hou...

Страница 5: ...y the video will be highlighted with yellow borders press to start recording and press again to stop When playing video user can short press to turn up or turn down the volume When playing video user can Long press to Fast forward or reverse at X2 X4 X8 Press MODE to stop playback and return to the video files list Gently press LCD key and LCD Screen is off Push the screen cover back on to protect...

Страница 6: ...me of internal MIC can be set and there are 7 grades to be selected there will be stereo when it is used with the external MIC defaults to right channel RECORD OVERWRITE When set as the RECORD OVERWRITE mode the video will default to 5 minute per file When the card is full it will start overwriting the earliest recorded files MOTION DETECTION When set in the MOTION DETECTION mode the camera will a...

Страница 7: ...up space on your camera My computer cannot play my CAMSPORTS video files Make sure your computer has the latest codec releases for the AVC1 and MP4a Further Help If you have any other enquiries or suggestions about your CAMSPORTS you can contact your local dealer or send an email to our Technical Support department at support camsports com Please note that for any Return Material Authorisation or ...

Отзывы: