7. Select the output options.
8. Click Finish and save the program. Send the program to
the data logger.
3. Test sensor
Verify sensor operation in the lab or office before installing in
the field using the
Device Configuration Utility
software
included in installations of
LoggerNet
,
RTDAQ
, and
PC400
software.
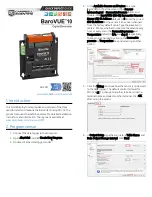
1. Open the main case by unclipping the latch and
opening the main door.
FIGURE 3-1. BaroVUE 10 with main door open
2. Open
Device Configuration Utility
.
3. Type BaroVUE 10 in the Device Type box and click
BaroVUE 10.
4. If this is the first time connecting the BaroVUE 10 to the
computer, click Install USBDriver before connecting the
cable to the computer.
5. Use the USB cable to connect the BaroVUE 10 USB port
6. Select the Communication Port in the left panel.
BaroVUE10 will appear in the selection dialog.
NOTE:
It may take a few seconds for the Communication
Port to become available for use after physically
connecting the BaroVUE 10 to the computer. If you
don't see a BaroVUE 10 device listed, check that the
USB cable is correctly inserted and that the USB
driver was installed in step 4.
7. Click Connect to access the Settings Editor.

