19
SPECIFIC INFORMATION
INSTRUCTIONS FOR USE
Selection of the crampons
These crampons are developed for use on snow in ski-mountaineering activities, for protection against the
risk of sliding. The sole of the boots must be rigid, with toe and heel lugs
(
ƬJ
). The front step must have a height
RƪWKHJURXQGDVLQGLFDWHGLQƬJ
.
)L[LQJFUDPSRQVRQERRWV
T-stop adjustment system
Adapt the height of the step height stop (
ƬJD
), insert the nut in the stop and tighten the screw with the included
7RU[NH\XQWLOWKHVWDUWRIWKHQXWURWDWLRQ3D\DWWHQWLRQWRWKHVWRSPRXQWLQJGLUHFWLRQƬJE
).
Length adjustment with rod
To switch from the L size to the S size, see
ƬJ
(size S from 210 to 260 mm or size L from 260 mm to 330 mm).
There is a double line of holes on the central rod. The most suitable position can be selected by loosening and
tightening the screw (
ƬJD
) or lifting and slightly turning the spring (
ƬJE
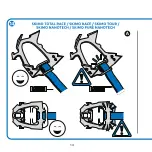
). Adjust the length of the crampon,
DOLJQLQJLWZLWKWKHOHQJWKRIWKHERRWVRWKDWWKHUHDUWLSVRIWKHKHHOGRQRWSURWUXGHIURPWKHSURƬOHFUHDWHGE\
the sole of the heel, but that they follow the same form or stay slightly inside it; (
ƬJD
). For the Total Race model,
check the position of the heel with the system inserted (
ƬJE
).
Tail adjustment
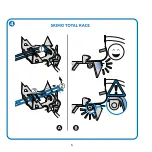
Carry out the adjustment choosing one of the two holes located on the side on the heel (
ƬJ
) and adjusting the
height of the tail to one of the 3 positions (
ƬJ
). To do this, you must loosen the tape sling, lift the safety plate and
select the desired position. If the adjustment has been carried out correctly, the closing of the tail will require some
HƪRUWƬJ
). Fasten the anchor tape sling around the ankle as illustrated in
ƬJ
.
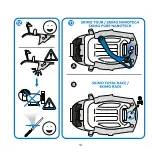
3RLQWVVKDUSHQLQJ
6KDUSHQ WKH SRLQWV ZLWK D ƬOH DV LOOXVWUDWHG LQ ƬJ
). Do not use a grinder which, heating the material, risks
modifying its mechanical properties.
Optional accessories
Dyneema adjustment tape sling (ref. 2596)
For installation of the tape sling, follow these instructions:
1.
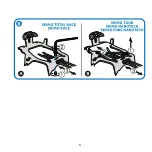
on the Tour and Nanotech models, take care to position the spring laterally (
ƬJD
), whereas on the Total Race
and Race models, remove the screw (
ƬJE
),
2.
remove the metallic rod and the heel antibott,
3.
position the stitched part of the tape sling correctly inside the heel (
ƬJD
),
4.
UHPRYH WKH IURQW ELQGLQJ DQWLERWW SDVV WKH WDSH VOLQJ WKURXJK WKH IURQW ELQGLQJ DQG LQVHUW LW LQ WKH VSHFLƬF
buckle (
ƬJE
),
5.
PRXQWWKHFUDPSRQRQWKHERRWDGMXVWWKHOHQJWKDQGSDVVWKHWDSHVOLQJEDFNLQVLGHƬUVWWKURXJKWKHEXFNOH
and then the front binding (
ƬJF
),
6.
correct adjustment requires the same attention that is illustrated in the adjustment with the rod (
ƬJ
),
7.
PDNHVXUHWKDWWKHHQGSDUWRIWKHVWUDSLVQRWORQJHUWKDQFPLQWKLVFDVHWKHH[FHVVVKDOOEHFXWZLWKDKRW
blade (
ƬJF
).
&KHFNWKHWHQVLRQRIWKHWDSHVOLQJGXULQJWKHƬUVWXVH
Semi-automatic front hook (ref. 2589)
In the case of a boot without front step, remove the stop and apply the lacing as illustrated in
ƬJ
.
REVISION
7KH VDIHW\ RI XVHUV GHSHQGV XSRQ WKH FRQWLQXHG HƯFLHQF\ DQG GXUDELOLW\ RI WKH HTXLSPHQW ,Q DGGLWLRQ WR WKH
Содержание SKIMO TOTAL RACE
Страница 5: ...3...
Страница 6: ...4...
Страница 7: ...5...
Страница 8: ...6...
Страница 9: ......
Страница 10: ...8...
Страница 11: ...9...
Страница 12: ...10...
Страница 13: ...11...
Страница 14: ...12...
Страница 15: ...13...
Страница 16: ...14...
Страница 17: ...15...
Страница 18: ...16...
Страница 19: ......
Страница 68: ...66 C A M P SpA C A M P C A M P SpA s T stop a 7RU E L S S L...
Страница 69: ...a E a Total Race E Dyneema 1 Tour Nanotech a Total Race Race E 2 3 a 4 E 5 c 6 7 c 2...
Страница 74: ...IGSV OZ 4 q q 3 6 9V 3 6 9V YZUV G UX H 2 9 9 2 G H G UZGR 8GIK H...
Страница 75: ..._TKKSG 1 U X 4GTUZKIN G UZGR 8GIK 8GIK H 2 3 G 4 H 5 I 6 7 I 3 6 9V...
Страница 76: ...0 0 3 ZZZ FDPS LW 8 1 r r...
Страница 77: ...0 3 6S 7 VWRS 6 6 PP PP 1...
Страница 78: ...2 3 4 5 6 7 FP F FP...
Страница 79: ...8 2 0 3 YYY ECOR KV 8 1 0 3 6S...
Страница 81: ...FP 2033 0 3 6S 8 9 8 2...


