background image

16

PL

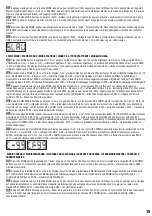
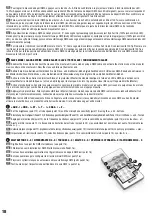
Naciskać przycisk MODE, dopóki na wyświetlaczu nie pojawi się napis „SUxx”. Tryb Sterowanie muzyką uruchomi się natychmiast. Czułość, z jaką reflektor 

będzie reagował na sygnały muzyczne, można ustawić za pomocą przycisków UP i DOWN (SU00 = czułość minimalna, SU99 = czułość maksymalna).

IT

Premere più volte il tasto MODE finché sul display non appare “SUxx”. La modalità Controllo tramite musica si avvia immediatamente. La sensibilità 

con cui il faro reagisce ai segnali musicali (impulsi gravi) si imposta con i tasti UP e DOWN (SU00 = sensibilità minima, SU99 = sensibilità massima).

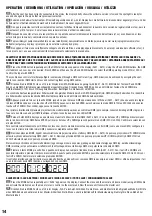
ENABLE & LOCK OPERATION VIA IR REMOTE CONTROL / BEDIENUNG DURCH IR-FERNBEDIENUNG ERMÖGLICHEN & SPERREN /              

AUTORISER & VERROUILLER L’UTILISATION PAR TÉLÉCOMMANDE INFRAROUGE / HABILITAR&DESHABILITAR EL MANDO A DISTANCIA / 

UMOŻLIWIANIE&BLOKADA OBSŁUGI ZA POMOCĄ PILOTA / CONSENTIRE & BLOCCARE L’UTILIZZO MEDIANTE TELECOMANDO A INFRAROSSI

EN

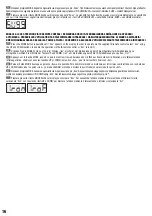
Press the MODE button repeatedly until “Irxx” appears on the display. In order to operate via the supplied IR remote control, select “Iron” using 

the UP and DOWN buttons, to enable the operation via the IR remote control or “Irof” to lock it.)

DE

Drücken Sie die MODE-Taste so oft, bis im Display „Irxx“ erscheint. Um die Bedienung durch die mitgelieferte IR-Fernbedienung zu 

ermöglichen, wählen Sie mit Hilfe der Tasten UP und DOWN „Iron“, um die Bedienung durch die IR-Fernbedienung zu sperren, „Irof“.

FR

Appuyez sur la touche MODE, jusqu’à ce que la mention «Irxx» apparaisse dans l’afficheur. Pour autoriser l’utilisation via la télécommande 

infrarouge livrée, choisissez avec les touches UP et DOWN la mention «Iron» ; pour la verrouiller, choisissez «Irof».

ES

Pulse el botón MODE hasta que aparezca «Irxx» en la pantalla. Para habilitar el mando a distancia por infrarrojos suministrado, con los botones 

UP y DOWN seleccione la opción «Iron», y para deshabilitar el mando a distancia por infrarrojos, seleccione la opción «Irof».

PL

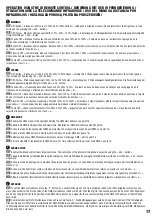
Naciskać przycisk MODE, dopóki na wyświetlaczu nie pojawi się napis „Irxx”. Aby umożliwić obsługę za pomocą dołączonego pilota na podczerwień, 

wybrać za pomocą przycisków UP i DOWN opcję „Iron”. Aby zablokować obsługę za pomocą pilota, wybrać opcję „Irof”.

IT

Premere più volte il tasto MODE finché sul display non compare “Irxx”. Per consentire l’utilizzo mediante il telecomando a infrarossi fornito, 

selezionare “Iron” con l’ausilio dei tasti UP e DOWN; per bloccare l’utilizzo mediante il telecomando a infrarossi, selezionare “Irof”.

Содержание CLUVBAR200IR

Страница 1: ...1 USER S MANUAL BEDIENUNGSANLEITUNG MANUEL D UTILISATION MANUAL DE USUARIO INSTRUKCJA OBS UGI MANUALE D USO UVBAR 200 IR 12 X 3W UV LED BAR WITH IR REMOTE CLUVBAR200IR...

Страница 2: ...s Make certain that wall mounts are properly installed and secured Make certain that the equipment is installed securely and cannot fall down 7 During installation observ e the applicable safety regul...

Страница 3: ...levels SPL that can lead to irreversible hearing damage in performers employees and audience members For this reason avoid prolonged exposure to volumes in excess of 90 dB CAUTION IMPORTANT INFORMATIO...

Страница 4: ...erunterfallen kann wodurch Personen verletzt werden und oder andere Sch den auftreten k nnen Verlegen Sie Ihre Kabel daher immer sorgf ltig 31 Entfernen Sie Netzkabel und Netzadapter aus der Steckdose...

Страница 5: ...spondent bien la valeur et la fr quence de la tension secteur locale Si l appareil poss de un s lecteur de tension ne le branchez sur la prise murale qu apr s avoir v rifi que la valeur r gl e corresp...

Страница 6: ...os recomendados por el fabricante 15 No abra el equipo ni intente modificarlo 16 Una vez conectado el equipo compruebe que en toda la longitud del cableado no hay peligro de que provoque una ca da por...

Страница 7: ...przestrzega zalece 4 Nale y przestrzega wszystkich wskaz wek ostrzegawczych Nie wolno usuwa wskaz wek bezpiecze stwa ani innych informacji znajduj cych si na urz dzeniu 5 U ywa urz dzenia wy cznie w...

Страница 8: ...isowy Tr jk t r wnoboczny z symbolem b yskawicy sygnalizuje nieizolowane niebezpieczne napi cie we wn trzu urz dzenia kt re mo e spowodowa pora enie pr dem Tr jk t r wnoboczny z wykrzyknikiem oznacza...

Страница 9: ...tinua a saltare rivolgersi a un centro di assistenza autorizzato 29 Per staccare completamente il dispositivo dalla rete elettrica rimuovere il cavo di rete o l adattatore di rete dalla presa 30 Per s...

Страница 10: ...g Musiksteuerung EIGENSCHAFTEN DMX 512 Steuerung Master Slave Betrieb Musiksteuerung ber eingebautes Mikrofon Universelle Montagem glichkeiten Betriebsspannung 100V 240V AC 50 60Hz Leistungsaufnahme 3...

Страница 11: ...erowanie muzyk CECHY Sterowanie DMX 512 tryb pracy Master Slave sterowanie muzyk poprzez wbudowany mikrofon uniwersalne mo liwo ci monta u napi cie robocze 100 V 240 V AC 50 60 Hz pob r mocy 35 W OBS...

Страница 12: ...ntaktowa si z autoryzowanym centrum serwisowym IT Presa di rete CEI con portafusibili integrato Collegamento tramite il cavo di alimentazione CEI incluso nella fornitura NOTA IMPORTANTE sostituire il...

Страница 13: ...n de configuraci n del sistema ENTER permite seleccionar la intensidad y la frecuencia de destellos del estrobo UP y DOWN permiten modificar la intensidad la frecuencia de destellos del estrobo y defi...

Страница 14: ...cheinwerfer auf eine identische DMX Startadresse stellen und mit Hilfe von DMX Kabeln verbinden FR Appuyez plusieurs fois sur la touche MODE jusqu ce que l adresse DMX apparaisse dans l afficheur A001...

Страница 15: ...effet Stroboscope d sactiv CF01 fr quence d clairs minimale CF99 fr quence d clairs maximale ES Pulse el bot n MODE hasta que aparezca C xx en la pantalla Ahora con los botones UP y DOWN ajuste la in...

Страница 16: ...or Irof to lock it DE Dr cken Sie die MODE Taste so oft bis im Display Irxx erscheint Um die Bedienung durch die mitgelieferte IR Fernbedienung zu erm glichen w hlen Sie mit Hilfe der Tasten UP und D...

Страница 17: ...e dei 3 livelli di velocit stroboscopica La regolazione fine della velocit stroboscopica si imposta con i tasti e 3 DMX MODE EN Enables the DMX mode of the spotlight Setting the DMX start address see...

Страница 18: ...aktivieren in der Master Einheit den Static Modus oder die Betriebsart f r Musiksteuerung Nun folgt die Slave Einheit der Master Einheit FR Active le mode Slave Reliez le projecteur Slave et le projec...

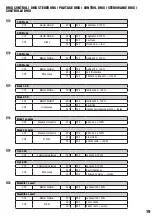
Страница 19: ...0 100 CH2 strobe 000 000 no strobe 001 255 strobe slow fast 2 CH Modus CH1 Master Dimmer 000 255 Helligkeit 0 100 CH2 Stroboskop 000 000 kein Stroboskop 001 255 Stroboskop langsam schnell Mode 2 CH CH...

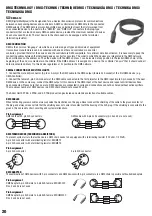
Страница 20: ...the first DMX device e g DMX Controller 2 Connect the female 3 pin XLR connector of the DMX cable connected to the first projector to the DMX input male 3 pin socket of the next DMX device In the same...

Страница 21: ...B DMX Controller 2 Verbinden Sie den weibliche XLR Stecker des an den ersten Scheinwerfer angeschlossenen DMX Kabels mit dem DMX Eingang m nnliche XLR Buchse des n chsten DMX Ger ts Verbinden Sie den...

Страница 22: ...r XLR m le de l appareil DMX suivant Reliez la sortie DMX de cet appareil selon le m me m thode l entr e DMX de l appareil DMX suivant et ainsi de suite Veillez ce que tous les appareils DMX soient re...

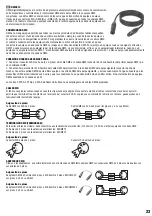
Страница 23: ...embra del cable DMX del primer foco a la entrada DMX del equipo siguiente conector de chasis macho Conecte la salida DMX de este ltimo equipo a la entrada DMX del equipo siguiente y as sucesivamente T...

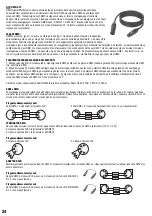
Страница 24: ...sk wtyczk XLR kabla DMX pod czonego do pierwszego reflektora pod czy do wej cia DMX m skie gniazdo XLR nast pnego urz dzenia DMX Wyj cie DMX tego urz dzenia pod czy w taki sam spos b do wej cia DMX na...

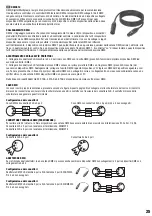
Страница 25: ...o proiettore DMX con l ingresso DMX presa XLR maschio del successivo dispositivo DMX Analogamente collegare l uscita DMX di questo dispositivo con l ingresso DMX del dispositivo seguente e cos via Ten...

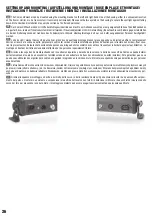
Страница 26: ...passez une lingue dans les illets de s curit se trouvant sur le bo tier du projecteur Attention Le montage en hauteur doit tre exclusivement effectu par du personnel sp cialement form ES Gracias a los...

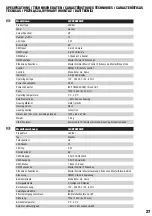
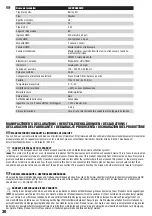
Страница 27: ...e washer Colour Spectrum UV Number of LEDs 12 LED Type 3 W Beam Angle 65 DMX Input 3 pin XLR male DMX Output 3 pin XLR female DMX Mode 1 channel 2 channel DMX Functions Master Dimmer Stroboscope Stand...

Страница 28: ...50 60 Hz Consommation lectrique 35 W Branchement Secteur Embases IEC IN et OUT Fusible Type T1AL 250V 5 x 20 mm Temp rature d utilisation 0 C 40 C Taux d hygrom trie relative 85 sans condensation Mat...

Страница 29: ...5 Wej cie DMX m skie 3 stykowe XLR Wyj cie DMX e skie 3 stykowe XLR Tryb DMX 1 kana owy 2 kana owy Funkcje DMX ciemnianie g wne stroboskop Funkcje standalone ciemnianie g wne sterowanie muzyk strobosk...

Страница 30: ...eated as household waste This is to avoid environmen tal damage or personal injury due to uncontrolled waste disposal Please dispose of this product separately from other waste and have it recycled to...

Страница 31: ...y condiciones de su contrato de compra venta Este producto no debe mezclarse con otros residuos industriales PL GWARANCJA PRODUCENTA I OGRANICZENIE ODPOWIEDZIALNO CI Nasze aktualne warunki gwarancji i...

Страница 32: ...32 WWW CAMEOLIGHT COM Adam Hall GmbH Daimlerstrasse 9 61267 Neu Anspach Germany Tel 49 0 6081 9419 0 Fax 49 0 6081 9419 1000 web www adamhall com e mail mail adamhall com REV 02...

Отзывы: