page
9
of
17
EtherSync User Guide
document revision 1.01
2)
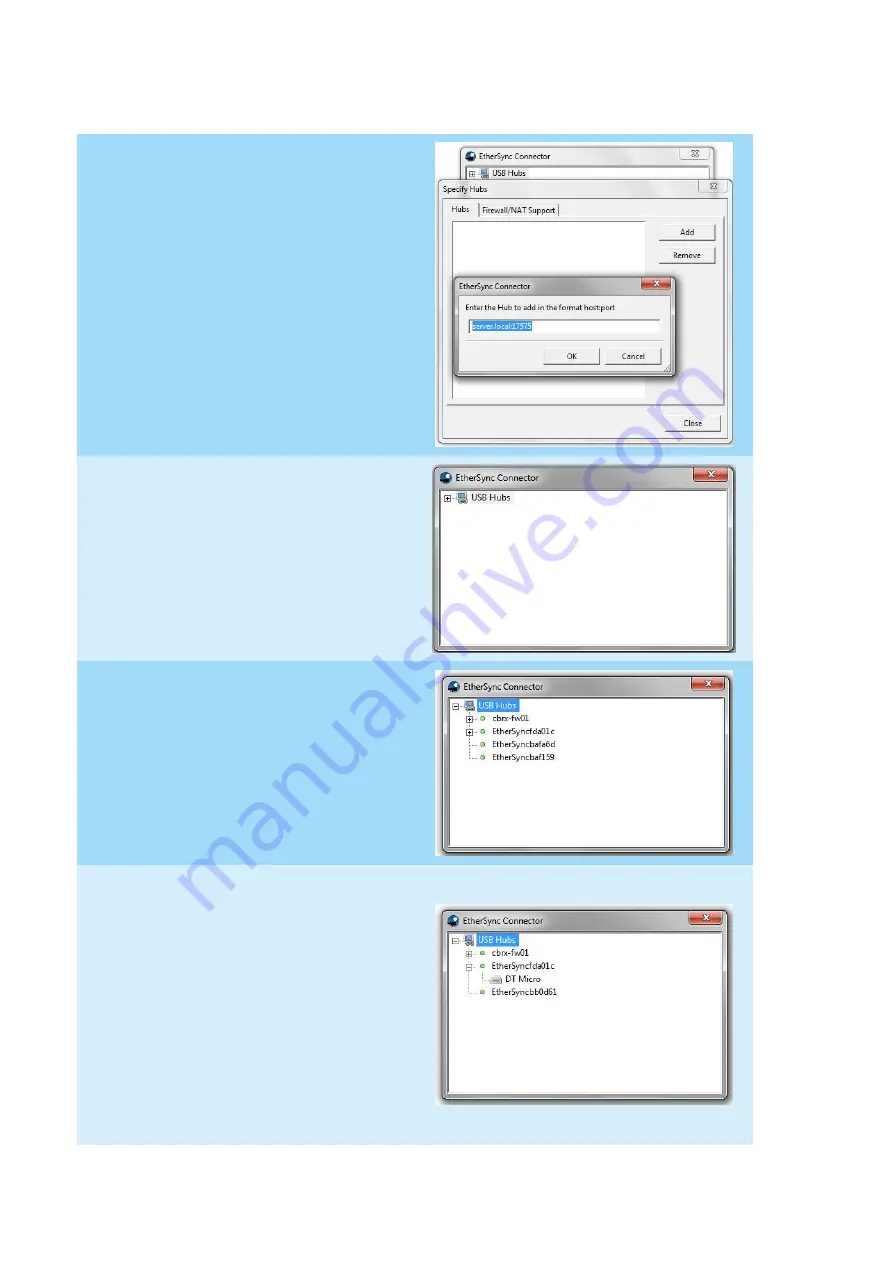
Click ‘Add’ and enter the correct
location of the desired EtherSync.
Other EtherSyncs specified can also be
removed from this section by
highlighting the desired EtherSync and
clicking ‘Remove’.
Note
The TCP Port 17575 must be open to
the remote subnet.
3)
Ensure EtherSyncs are connected to the
same subnet as the client computer
and open the EtherSync Connector
application.
4)
Click on the ‘+’ symbol to expand the
‘USB Hub’ list displaying all EtherSyncs
connected to the network.
5)
Click th
e ‘+’ sign next to the EtherSync
called ‘EtherSyncXXYYZZ’
(where
XXYYZZ are the last 6 digits of the Mac
address) to display the devices
connected to that EtherSync.
Note
It is possible to rename an EtherSync by
right clicking on the desired EtherSync
and selecting
‘R
ename
’
. However, this
only renames the EtherSync on the
connector application, not its host
name as used on the Webmin
Interface.
Содержание EtherSync
Страница 1: ......


