20
9. Screen saver
Allows you to turn on/off the screen saver function. The screen saver is designed to
minimize burn-in concerns for plasma and CRT display devices.
On (default)
– After about 3 minutes of inactivity, the player will show an animated
logo moving on a black background. This allows most areas of the screen time to
rest and gives all areas an equal opportunity to refresh.
Off
– The screen saver will not be activated. Only use this option if your TV does
not have any burn-in issues.
Energy Saver
– Video output will be turned off after 3 minutes of inactivity. Many
projectors and LCD TVs will go into a standby or sleep mode and turn off their
projection lamp or LCD backlight lamp, thus saving energy and prolonging the lamp
life. When you press any button on the remote control or the player’s front panel,
the screen saver will be canceled and video output will be restored. If your TV is
already in standby or sleep mode, you may need to wake up the TV by pressing a
button on its remote or control panel.
10. Parental control
This is used to set parental control ratings in order to prevent minors from watching
inappropriate content. This function does depend on the disc being properly rated
and encoded.
Press the Enter button to bring up the rating selection menu.
To adjust the parental control settings, you must enter the current parental control
password. If you have not set a parental control password yet, the default password
is "0000".
The parental control menu contains the following sub-items:
BD Ratings
– Use the Nagivation buttons to select the rating allowed for Blu-ray
Discs. "Off" means no ratings control and all discs are allowed to play. Numbers 1
to 21 corresponds to the age limit. Discs encoded with an age limit that is equal
to or above the selected age will be blocked, and any rating below the selected
age will be allowed.
DVD Ratings
– Use the Navigation buttons to select the rating to allow for DVD.
The available ratings are Kid, G, PG, PG-13, PGR, R, NC17, Adult and Off. The
selected rating and below will be allowed, and any rating above will be blocked. If
"Off" is selected, all discs are allowed to play.
Area Code
– Some Blu-ray Discs may have different parental control ratings for
different geographical areas. At this time the player only supports the parental
control ratings used in the United Kingdom.
Change Password
– To change the parental control password, enter a 4-digit
number as the new password. Enter the new password again to confirm. If the
two entries are matching, the new password replaces the old parental control
password.
Video output setup
Setup Menu
Playback Setup
Video Output Setup
Audio Output Setup
Device Setup
Network Setup
Exit
Picture Adjustment
HDR Setting
Output Resolution
Custom Resolution
Color Space
Color Depth
TV Aspect Ration
● Auto
● UHD Auto
● Auto
● Auto
● 16:9 Wide / Auto
Exit
Set the auto play mode for CD, SACD, DVD and BD
The "Video Output Setup" section of the Setup Menu system allows you to
configure various video output options.
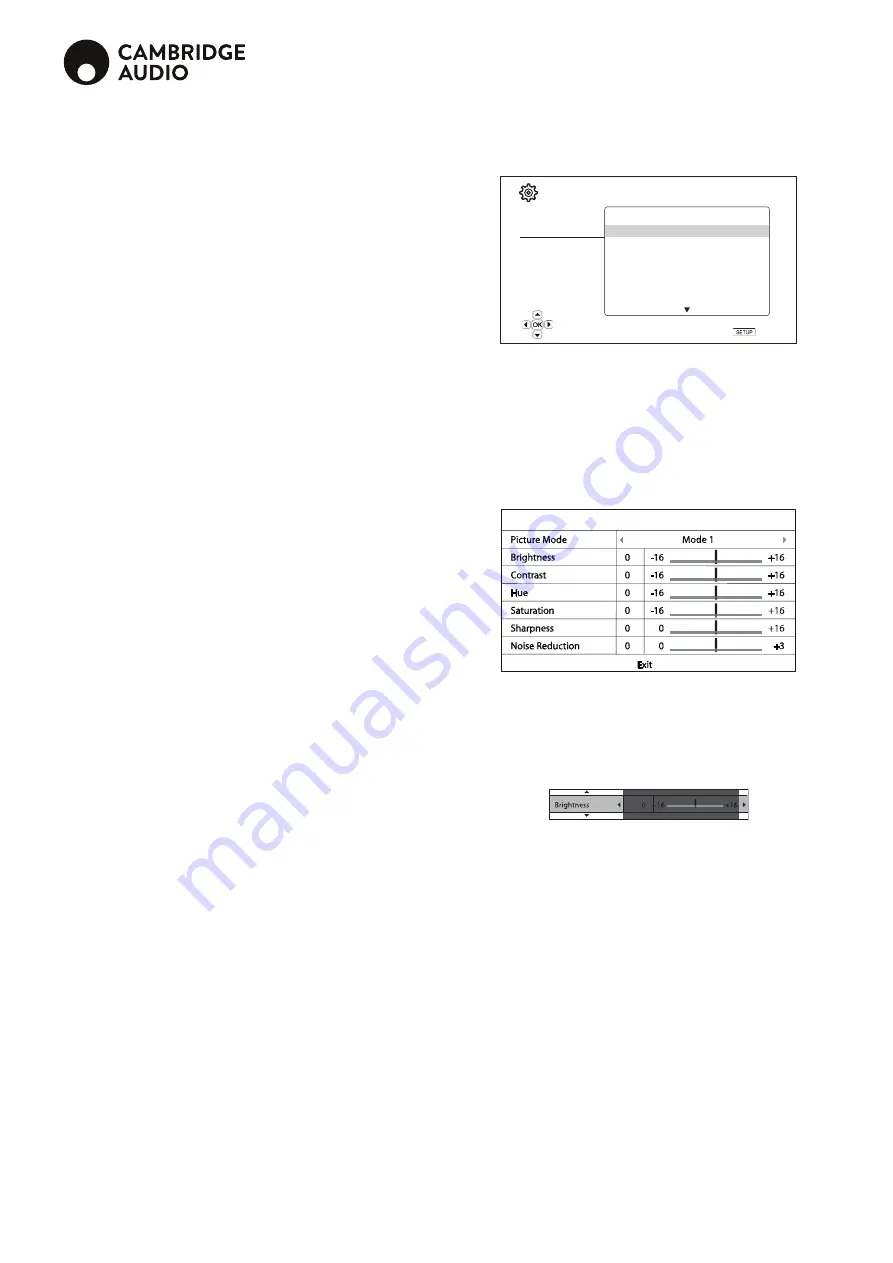
1. Picture adjustment
To fine tune picture control parameters in order to achieve the optimal picture quality
and visual result. To use Picture adjustment, press the Setup menu button on the
remote control to enter the player's Setup Menu, and then choose "Video Setup >
Picture adjustment", then select the video output to be adjusted.
Since the player is equipped with only the HDMI OUT (Main) output port for video
output, the Picture Adjustment menu will come up directly for HDMI output.
Picture Adjustment
To change a picture adjustment parameter, use the Navigation
buttons to
highlight the parameter and to change its value.
To aid in the adjustment of picture control parameters, the picture adjustment menu
will be reduced to only show the parameter being adjusted once you press the
/
buttons (except the Picture Mode, which you will directly see the mode name
switches between Mode 1, 2 and 3, and all the other parameters are adjusted
automatically). The reduced menu will be positioned near the bottom of the screen.
Adjust the parameters using the Navigation
buttons. Press the Enter
button to return to the large Picture Adjustment menu.
To exit the Picture Adjustment menu and return to the Setup Menu, either select
"Exit" or press the Return button.
The following picture adjustment controls are available, for HDMI 1 and HDMI 2:
Picture Mode
– The CXUHD allows you to save up to three (3) customized video
modes. Press the
/
buttons to switch the mode and all parameters will be
automatically adjusted to their stored values. Changes to the current parameter
values will be stored automatically when you exit the Picture Adjustment screen or,
switch to another Picture Mode.
Brightness
– To adjust the brightness (black level) of the video output.
Contrast
– To adjust the contrast (white level) of the video output.
Note:
Proper brightness and contrast settings are necessary for a quality video
output. If you do not have the correct black and white levels, your images can
appear washed out or can lose detail in shadows when watching darker scenes.
Televisions have brightness (black level) and contrast (white level) controls; however
it may require a combination of tweaking both the player and your television to get
the optimal result. First adjust the television's picture controls for the best possible
picture. Once that is done, try changing the player's settings to further refine the
picture to the optimal result.
Hue
– Adjusts the hue (tint) of the video output.
Saturation
– Adjusts the saturation (colour intensity level) of the video output.
Содержание CXUHD
Страница 1: ...CXUHD UNIVERSAL DISC PLAYER ...


