Chapter 5: Troubleshooting Guide
Quick Installation procedure for Router
Page
5-7
Quick Installation procedure for Router
1.
Power ON the wireless router using the power supply/PoE. POWER LED will glow after 5
seconds of powering ON and wait for 2 minutes to boot up device properly.
2.
Insert the Ethernet cable to any LAN port on the RJ45 port labeled LAN1 to LAN4 and connect
other end of the cable to Ethernet port of PC
3.
LAN LED will turn ON after connecting the LAN cable
4.
Configure the LAN interface of your PC to acquire the IP address using DHCP. The LAN
interface of the PC will get an IP address from the 192.168.11.x/24 subnet
5.
Connect to the wireless router by typing
6.
Enter default username “admin” and password “admin”
7.
Change the default password by going to Administration->Management->Password Reset
option.
8.
Go to Network tab and select INTERNET mode as DHCP/STATIC or PPPoE based on the
internet service provided by the ISP. Most common mode of connection would be DHCP
(Please refer your ISP’s instruction).
9.
Go to wireless tab and change the SSID name from default value to your choice of SSID. For
selecting the security password for SSID go to Wireless ->Wireless Security and select the
SSID from SSID drop down list and select the security type and password. It is recommended
to change the wireless security password.
10.
Connect the WAN port of the wireless router to the ISP device (eg. ADSL, Cable Modem).
Notice that WAN LED will start glowing now.
11.
Save the configuration and reboot the device.
12.
cnPilot Home R200P/R201P model has PoE out functionality on WAN port which can power a
single PMP450 or ePMP 1000 SM (Subscriber Module).
13.
Again open
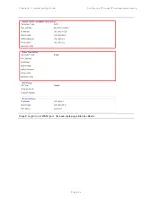
and go to STATUS tab and see the “Network Status” for details
of internet connectivity and statistics.
14.
Now the connection is established for configured SSID and browsing internet.
Содержание cnPilot Home R200
Страница 8: ...Tables Page vi Table 83 Operating mode 3 107 Table 84 System log 3 108 Table 85 Logout 3 108...
Страница 43: ...Chapter 3 System planning Status Page 3 3 Status Table 15 Status Page...
Страница 44: ...Chapter 3 System planning Status Page 3 4...
Страница 104: ...Chapter 3 System planning FXS1 Page 3 64 Answered Calls Missed Calls...
Страница 105: ...Chapter 3 System planning FXS2 Page 3 65 FXS2 The settings of FXS2 are the same as FXS1 See FXS1 on page 3 49...
Страница 107: ...Chapter 3 System planning Security Page 3 67 Content Filtering Table 63 Content filtering...
Страница 157: ...Chapter 4 Managing device via cnMaestro Configuring the Devices Page 4 9 Figure 8 Configure devices...


