


17
14
announcement on that other program, and TA, TP will be displayed on LCD
* TA interruption function:
The current traffic announcement is cancelled by pressing TA button shortly.
* When TA is on, SEEK, (SCAN), AUTO MEMORY function can be received or saved
only when traffic program identification code has been received.
4. Disc, USB and SD card Operation
4.1 Load/unload disc,CARD or USB
To play files in a disc,directly insert the disc into the disc slot.
To unload a disc , press the STOP button twice to stop playback, then press the
EJECT button to eject disc from the disc slot.
To play files in a card,press the REL button to release the front panel and remove it,
then insert the
SD/MMC card to the card slot.
To unload a CARD , press the STOP button twice to stop playback, then press the
REL button to release the front panel and remove it.
Push the card firstly and pull it
out of the card slot.
To play files in a USB, insert the USB into the USB jack on the front panel.
To unload a USB, press the STOP button twice and then remove the USB .
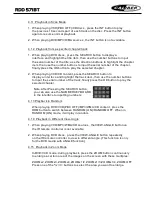
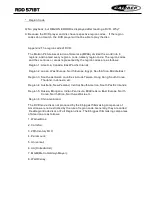
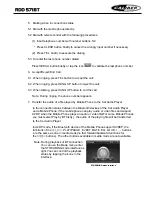
In USB or CARD mode, select your desired mode as below:
Remark: the icon is for audio files; the icon is
for video files; the icon is for image files.
Tap the icon to turn to mode menu, tap the icon
to turn to folder interface.
In the UAB/CARD mode interface, the icons
are same as the buttons MUTE,STOP, RDM,REPEAT,
|<<,PLAY/PAUSE, >>|
on the remote control.
The icons in the interface are for fast backward and fast forward playback.
USB INTERFACE
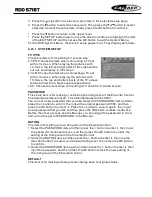
CARD INTERFACE
Note
:The USB input with charging function.
from the unit)
.
( not all products can be charged
3. Press the direction buttons to select your desired chapter, finally press the
OK or PLAY button to play the selected chapter.
During playback, pressing the MENU button can directly display the root
menu of the title that is playing.
In VCD mode
1. When starting to turn on the PBC function, it will play from the beginning of
the disc till it display the PBC menu on the screen if the disc include the PBC
menu.
2. Press the number buttons to select your desired track to play.
In MP3/WMA mode
1. The root menu is displayed on the monitor screen all the time(and the TITLE
or MENU button is not available).
2. Tap the icon to turn to FOLDER interface,then tap the file name to open the
file,finally tap the file you desired to playback.
Note: After open the FOLDER, you can also use the direction button or on
the remote control to turn to next or previous page, then use the button or
to select the file.
Finally press OK button to playback.
In CD mode, the TITLE, PBC, MENU buttons are disabled.
4.7 Playback with Speed
During normal playback, press and hold the >>|/|<< button on the remote
control continuously to fast forwards or backwards at the following speeds:
x2, x4, x8, x16, 20,normal.
During speed playback, press the PLAY button to resume normal playback.
4.8 Playback with Slow Speed
During VIDEO playback , press the SLOW_FWD button to execute the Slow
function.
With each consecutive pressing of the SLOW_FWD button, the playback
speed decreases. The speed levels in Slow Forward as follows:
x1/2,x1/3,x1/4,x1/5,x1/6,x1/7,normal.
Forward


