background image

5. AUX IN OPERATION

Tap AUX IN icon to select AUX IN mode.

6. SET FEATURE (CLOCK)

Tap Clock icon to check the current phone clock.

7. SET FEATURE (INFO)

Tap INFO icon to scan APP version information.

8. IPOD OPERATION 

Tapping the iPod icon will return the operator to the home screen.

Open the Music App* and tap the Airplay icon   

   to select the unit as the audio output.

*Airplay Music streaming availability dependent on device and App.

*iPod App experience may differ by device*.

Note: 

You can still use the controls on the AM-3200BTA to adjust Volume etc whist connected to the App

BLUETOOTH OPERATION


Bluetooth is a technology for wireless radio connection of devices over short distances. Bluetooth technology enables 

hands-free use of mobile phones. 

This unit offers you the option of using a Bluetooth-enabled mobile phone. The function radius is limited to around 3 

meters depending on the device.

Do not set the volume too high. Doing so may lead to feedback (whistling) from th

e speakers.

PAIRING DEVICES (PAIRING)

Before you can use the car radio to make phone calls, you must pair the unit.

• Select the Bluetooth menu in your mobile phone and register the car radio in your mobile phone. To do so, refer to 

the user manual of your mobile phone. The device “CAR-BT” display on your mobile phone.

• Depending on the device manufacturer, model and software versions, now enter the password “0000“ in your mobile 

phone.

• When pairing has been completed successfully, “CONNECT” will appear on the LCD screen.

ANSWERING CALLS

For incoming calls press the BT button to answer the call.

ENDING CALLS

Press the BT button to hang up the call.

REJECTING CALLS

To reject an incoming call, press and hold the BT button.

CALL TRANSFER (PRIVACY)

During a call, press and hold the BT button to transfer the call to the mobile phone. Repeat to transfer the call back to 

the car receiver.

RCD 235BTi • Manual

REDIAL

The unit stores the all the incoming call numbers automatically. To access the call list, proceed as follows: Short press 

BT key to go into BT menu and rotate the VOL knob to show the sequence in below: CALL LIST --> L-DAI.

When CALLLIST is shown on the display, press BT key to go to BT menu. Rotate VOL knob to choose phone number 

(only stores incoming calls) and then press button on the panel to dial out the number.

When L-DIAL is shown on the display, press press button on the panel to call the last number. The LCD displays “DI

-

ALING” and phone displays the phone number and name if the number stored to phone book.

INCOMING CALLS *

When there is an incoming call the LCD display will show the phone number and name if the number is stored in the 

phone book. 

CALLER ID NOTES *

 The incoming caller ID name or number is not guaranteed to display on this device as this function varies between 

different phone manufacturers, models and service providers


MUSIC PLAYBACK VIA A2DP

This involves a cross-manufacturer Bluetooth profile. Stereo-audio signals are transmitted wirelessly via streaming 

between the playback unit (source) and receiver unit. To control the source remotely, the playback unit must support 

the AVRCP profile (Audio Video Remote Control Profile).

Full functionality cannot be guaranteed due to the different unit manufacturers, models and software versions.

• After you have connected the units to each other, start playing the music in your mobile phone.

• Use the 

7

 or 

8

 button to select the next or previous track.

HANDLING DISCS

- Dirty, scratched or warped discs may cause skip ping or noise.

- Handle the disc only by the edges. Do not touch its surface to 

 keep it clean. 

- Discs should be stored in their cases after use to avoid scratches.

- Do not expose discs to direct sunlight, high humidity, high temperature or dust.

- Prolonged exposure to extreme temperature can wrap the disc (such as leaving the discs in your car during summer 

time).

- Do not stick or write anything on either side of disc. Sharp writing instruments, or the ink used in some felt-tip pens, 

may damage its surface.

- Do not touch the unlabeled side. Do not attach any seal, label or data protection sheet to either side of a disc.
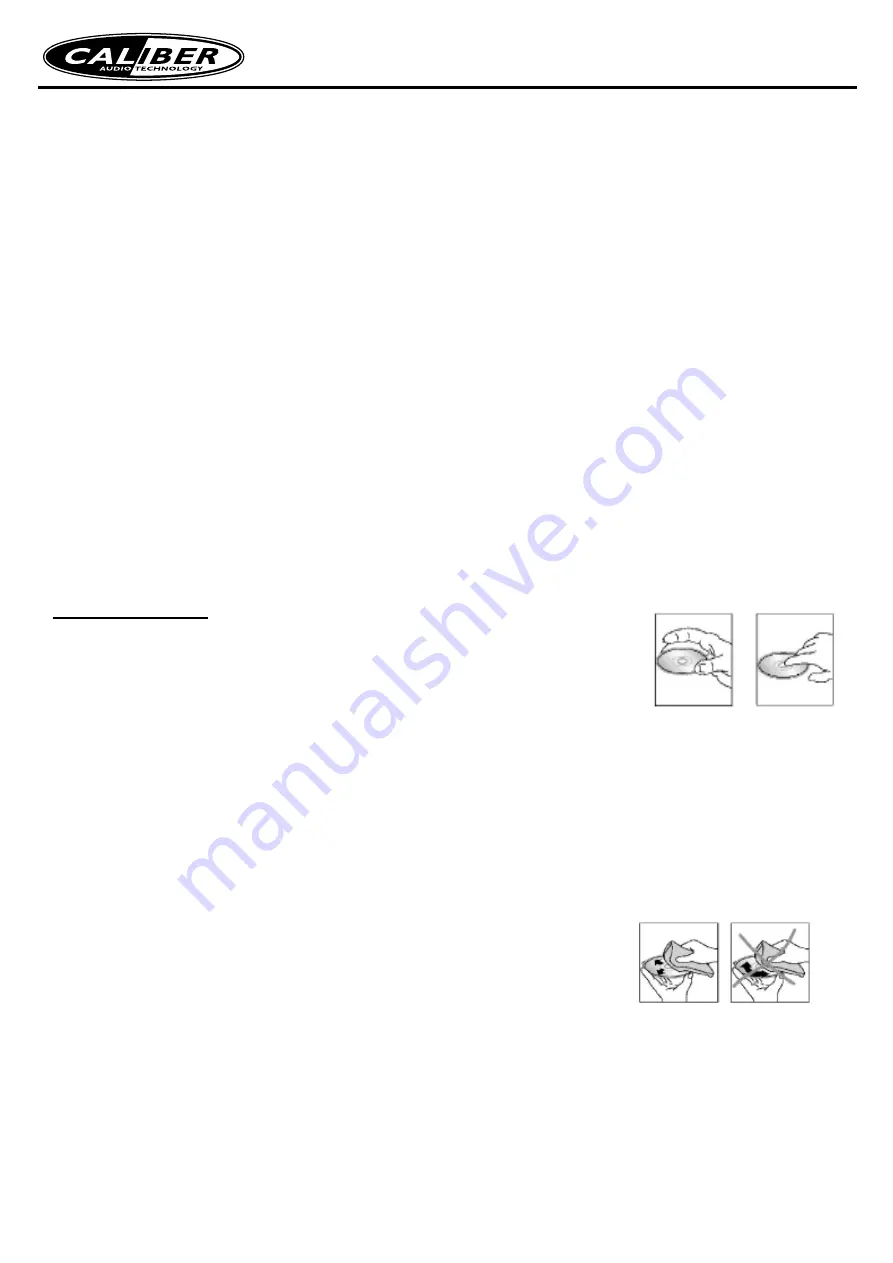
CLEANING

Cleaning discs

Fingerprints should be carefully wiped from the surface of disc with a soft cloth. Unlike conventional records, compact 

discs have no grooves to collect dust and macroscopic dirt, so gently wiping them with a soft cloth should remove 

most dust or stains. Wipe in a straight motion from the center to the edge.

Caution:

 Never use a thinner benzine, record cleaner or anti static 

spray on a compact disc. Such chemicals can damage its plastic 

surface.

Содержание RCD 235BTi

Страница 1: ...RCD 235BTi manual GB ...

Страница 2: ... 4 LCD Layout 4 General operations 5 Digital Tuner Operations 5 DISC USB iPod SD Card Operation 6 iPod iPhone Operation 7 Android Device operation 7 1 Radio Operation 8 2 Set Feature RDS TUNER 8 3 Memory CD Operation 8 4 Set Feauture EQ Play 8 5 AUX IN Operation 11 6 Set Feature Clock 11 7 Set Feature Display 11 8 A2DP Operation 11 Apple Device Operation 7 1 Radio Operation 8 2 Set Feature TUNER 8...

Страница 3: ...r flow or cooling The apparatus should not be exposed to dripping or splashing Take care that foreign objects do not enter or liquids are not spilled into the case through any openings If this should happen refer to qualified service personnel before attempting to use Playing at high volume can hinder the driver s concentration on traffic and road conditions and constitutes a safety hazard WEEE ma...

Страница 4: ...r installation and operation of the unit 1 Washer Spring Washer M5 Nut 1 each 2 Mounting Strap 1 3 Bolt 1 4 Screw 4 6 4 5 Mounting Sleeve 1 6 Release Key 2 7 Rubber cushion 1 8 Screw 5 20 1 Power Cable and Speaker Cable User Manual Panel with carry case Bluetooth External Microphone ...

Страница 5: ...it where it does not get in the driver s way and cannot injure the passenger if there is a sudden stop like an emergency stop If installation angle exceeds 30 from horizontal the unit might not give its optimum performance 30 Avoid installing the unit where it would be subject to high temperature such as from direct sunlight or hot air from the heater or where it would be subject to dust dirt or e...

Страница 6: ...tion of the unit to the two ISO connectors of your vehicle Connect the antenna cable of the vehicle antenna to the antenna adapter of the unit If necessary also secure your unit against theft Fasten the screws to the mounting bracket and to the mounting material on the engine firewall of the car Slide the unit carefully into the mounting sleeve until it clicks into place After all connections have...

Страница 7: ...left side of the front panel to the unit by inserting the hole into the left holder Then slightly push it leftwards and attach the right side hole into the right holder Finally push up the front panel REMOVING AND PROTECTING DETACHABLE FRONT PANEL The front panel of the unit may be removed as a theft deterrent After removing the front panel use the case provided to keep the front panel from gettin...

Страница 8: ...re a special power harness other than provided Contact your authorized car dealer before installing this unit 7 Wiring Diagram CAUTION 12V DC NEGATIVE GROUND Do not connect any speaker wires to the metal body or chassis of the vehicle Do not connect the speaker common wires to each other Connect each speaker wire directly to each speaker terminal All speaker common must remain floating WARNING Do ...

Страница 9: ...er Panel 15 SD MMC slot 16 Eject button 17 Light indicator 18 Disc slot 19 Reset button NOTE Pressing RESET hole will erase the clock setting and stored stations Panel status indicator lights up when you slide the panel down flashes when you remove the panel 8 USB button 9 seek buttons 10 seek buttons 11 Mode button 12 MEM PAUSE button 13 LCD 14 AUX in jack ...

Страница 10: ... indicator 12 Equalizer graph 13 TP Traffic Programme function indicator 14 Display shows information according to set mode 15 Bluetooth function indiactor 16 Lights up if a disc is inserted 17 PTY Programme Type function indicator 18 INT Introduction function indicator 19 EON Enhanced other Network function indicator 20 RPT Repeat function indicator 21 AF Alternative Frequency function indicator ...

Страница 11: ...an the socket on the back of the control panel RESET THE UNIT Operating the unit for the first time or after replacing the car battery you must reset the unit Press OPEN button on the panel to open the panel and press RESET button to restore the unit to its original factory settings POWER ON OFF Press power button to turn on the unit Press and hold PWR button on front panel to switch the unit off ...

Страница 12: ...ates the second function of this button Beep all mode The beep sound is on when any key is pressed Beep off mode The beep sound is disabled TA VOL When TAVOL is selected rotate the volume knob clockwise to boost the TA volume rotate the volume knob counter clockwise to decrease the TA volume EON When EON is selected ON is default rotate the volume knob to select EON ON or OFF EQ When DIGITAL SOUND...

Страница 13: ...n MODE SETTING Press MODE button to select a mode FM1 CD SD MMC USB when iPod device is inserted the unit displays iPod BT AUDIO when BT is connected with the mobile phone AUX IN FM1 CD USB iPod and SD MMC modes will only show on the display when a disc a USB device a iPod device or a memory card is inserted into the unit AUX jack AUX in jack is intended for a connecting external audio equipment t...

Страница 14: ...nd hold BAND button on the front panel Default is OFF 2 When TA function is activated it will search the station with TA information automatically If there is no TA informa tion it will search the station with TP information automatically if there is no TP information either it will return to the previous station after searching 3 When receiving the station with TP information but without TA infor...

Страница 15: ...ry track for 10 seconds in sequence REP Repeating the same track continuously RDM playing all the tracks in random order FILE FOLDEr SEARCH for MP3 files The search modes only work with MP3 discs and USB SD MMC iPod with MP3 files File Number Search Press AS PS button once to enter file number search the 01 or 001 is displayed the first number blinks on the display meaning the unit is ready to acc...

Страница 16: ...use the search function to search for songs from the iPod Menu 1 Press the AS PS button to activate the search function 2 Turn the Volume knob to open a submenu Play list Artists Albums Songs Genres Composer 3 Press the SEL button to confirm the selection Turn the Volume knob to select the required title Press to play selection ANDROID DEVICE OPERATION The unit supports operation using the Android...

Страница 17: ...t station to the favorite present number 8 Setting button About detail please see below 2 Set Feature TUNER Press icon to set EQ PLAY RDS and tuner RDS and TUNE are only available in Radio mode Note RDS Radio Data System service availability varies with areas Please understand if RDS service is not available in your area the following service is not available either When RDS is on you can set the ...

Страница 18: ...ote Some operations can be performed on the unit Such as volume adjustment and track selection 4 Set Feature EQ Play Set Bass Treble up down Fader Front Rear Balance Left Right Choose a predefined equalizer sound effect Rock Pop Jazz Class and Flat Touch RESET button to set the unit to initial state Choose repeat playback mode Repeat one Repeat folder and then set the mode on or off Choose shuffle...

Страница 19: ... screen 8 A2DP Operation 1 Source display A2DP 2 Volume adjustment sidebar 3 Touch the center of the screen to pause play the track 4 Exit source 5 Touch to open all of song list 6 Play pause indicator 7 Touch to play previous or next track 8 Setting button About detail please see above 9 Current playback time 10 Total playback time Note You can still use the controls on the AM 3200BTA to adjust V...

Страница 20: ...hed searching for devices tap the Bluetooth device CAR BT to pair When prompted enter the password 0000 to connect When pairing has been completed successfully CONNECT will appear on the LCD screen Once the device has been paired and connected tap the RADIOVIEW1012 icon on the home screen to open the App s main menu 1 Radio operation Tap the Radio icon to open the Radio interface The operating opt...

Страница 21: ...ice is not available in your area the following service is not available either When RDS is on you can set the AF PTY TRAFFIC TA VOL PTY type and EON etc When these options were set on you can operation AF TA PTY EON and REG on the RADIO interface When select a PTY type you can drag PTY icon to button to search The screen will show PTY Search If PTY code is different or not available searching wil...

Страница 22: ...ice is not available in your area the following service is not available either When RDS is on you can set the AF PTY TRAFFIC TA VOL PTY type and EON etc When these options were set on you can operation AF TA PTY EON and REG on the RADIO interface When select a PTY type you can drag PTY icon to button to search The screen will show PTY Search If PTY code is different or not available searching wil...

Страница 23: ... playback time Note Some operations can be performed on the unit Such as volume adjustment and track selection 4 Set Feature EQ Play Set Bass Treble up down Fader Front Rear Balance Left Right Choose a predefined equalizer sound effect Rock Pop Jazz Class and Flat Touch RESET button to set the unit to initial state Choose repeat playback mode Repeat one Repeat folder and then set the mode on or of...

Страница 24: ...phone The function radius is limited to around 3 meters depending on the device Do not set the volume too high Doing so may lead to feedback whistling from the speakers Pairing devices PAIRING Before you can use the car radio to make phone calls you must pair the unit Select the Bluetooth menu in your mobile phone and register the car radio in your mobile phone To do so refer to the user manual of...

Страница 25: ...e Audio Video Remote Control Profile Full functionality cannot be guaranteed due to the different unit manufacturers models and software versions After you have connected the units to each other start playing the music in your mobile phone Use the 7 or 8 button to select the next or previous track Handling Discs Dirty scratched or warped discs may cause skip ping or noise Handle the disc only by t...

Страница 26: ...D Signal to Noise Ratio 60dBA Frequency Range 20Hz 20KHz CD Mechanism Anti Skip Buffer Audio CD 8 seconds USB SECTION USB version 2 0 1 1 compatible device USB Class Mass storage Flash device File system FAT 16 32 Playback Decoding MP3 WMA ID3 Tag compatible Maximum output current 1A 5VDC HDD note May not read portable HDDs due to voltage incompatibility issues Bluetooth section Bluetooth Version ...

Страница 27: ...EM terminal and the unit s antenna lead is incorrect or antenna output lead of the unit is short circuit to ground Properly connect the REM terminal of the external amplifier and the unit s antenna output lead The microprocessor has malfunctioned Turn off the power Then press the OPEN button and remove the front panel Press the RESET button for about 2 seconds General Nothing happens when buttons ...

Страница 28: ...WWW CALIBER NL Parallelweg 2a 4261 GA Wijk en Aalburg The Netherlands Tel 31 416 699 000 Fax 31 416 699 001 ...

Отзывы: