Thank you for purchasing the Taku Air Exchanging Hatch Fan!
The Taku is ideal for hatches 19” or larger. On smaller hatches, check for interference
with handles.
Read and Save these instructions!
1. Installation
The Taku is equipped with four EPDM UV-resistant suction cup mounts. To best apply
the suction cups to the hatch follow these instructions:
1. Clean hatch surface and suction cups with glass cleaner and lint-free cloth.
2. Allow to dry.
3. Ensure all surfaces are free of marks, scratches and damage.
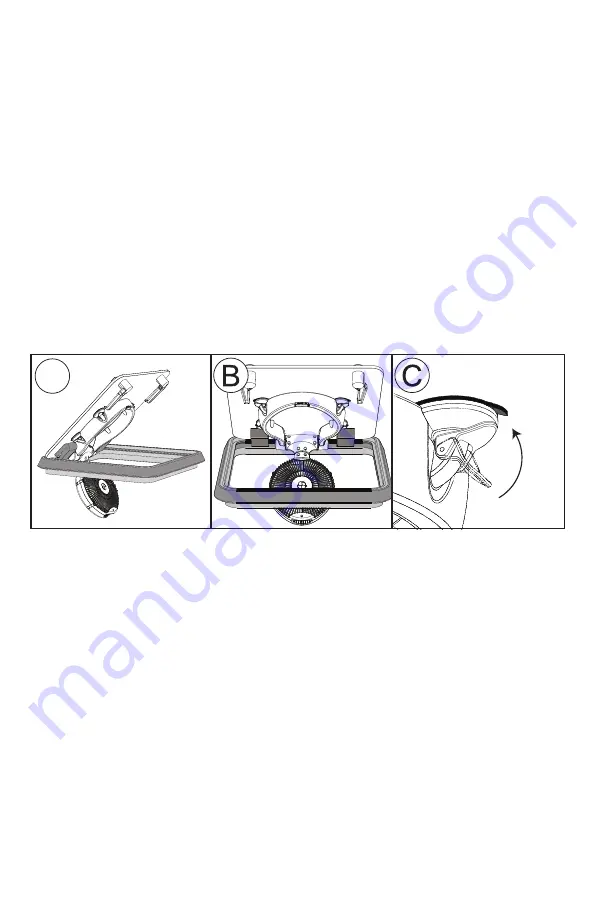
4. Locate hatch fan so the control panel is located closest to the hatch hinges.
(Figure A/ B below)
5. Press firmly onto each suction cup while closing cam to lock. (Figure C)
IMPORTANT!
Unlock and repeat Step 5 every few days to ensure fan is fully attached
and no suction cups have released.
LOCKED
A
2. Safety Lanyards
Suction cups will release over time. Two safety lanyards are included to protect the
Taku from inadvertently falling, causing injury or damaging property.
Do NOT operate fan without installing both safety lanyards.
Mount fan using the four suction cups, adjust the lanyard straps, mount cleats towards
outer edges of hatch and secure straps to cleats. Alternately, the lanyards can be secured
around a post (i.e. hatch strut or handle). Adjust straps to provide a loose fit. See
illustrations to adjust and fit the straps. Once adjusted correctly, simply trim the excess
strap 2” from the buckle. Seal cut ends of straps using heat to prevent fraying.
Содержание Taku
Страница 20: ......


