
77
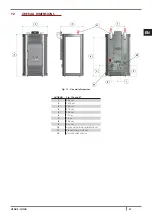
VENUS - GIOIA
EN
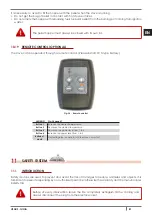
10.4
USER MENU
By once pressing P3 key you can hace access to user parameter controlling. To let them slide press P5 and
P6 keys. They are:
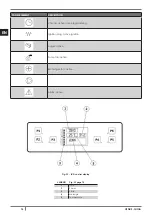
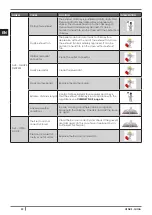
POS.
REFERENCE
DESCRIPTION
1
FAN ADJUST
(supplementary)
Press once P3: Nr2 and Nr3 fan appears (see
FAN ADJUSTMENT page 80
).
2
SET CLOCK
Set date and time. The board is provided with a lithium battery which enables a clock
autonomy of 3/5 years. See
CLOCK SETTING page 79
.
3
SET CHRONO
Press once P3: “CHRONO ENABLE” appears. Press P3 again and with P1 and P2
put in “OFF” or “ON”. For daily, week-end or weekly programming, see
DAILY
PROGRAMMING page 79
. CAUTION: do not active if STAND-BY function is active!
4
SELECT
LANGUAGE
Press once P3 key and with P1 and P2 keys select the desired language.
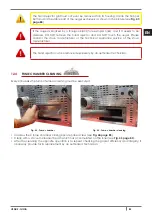
5
STAND-BY MODE
It activates a function which, if the set ambient temperature has been exceeded for
more then 10 minutes, start the switching off phase up. If the ambient temperature
has fall at more than 2°C, the stove will restart automatically up, starting from
START
UP page 77
. Press once P3 key and with P1 and P2 keys put in “OFF” or “ON”.
CAUTION: do not activate if CHRONO function is active!
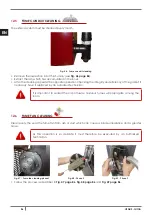
6
BUZZER MODE
(audio alarm)
Press once P3 key and with P1 and P2 keys put in “OFF” or “ON”.
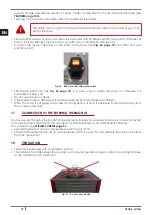
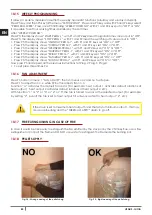
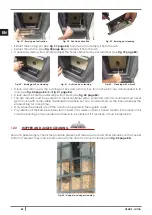
7
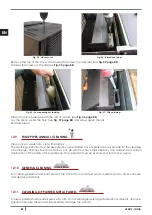
INITIAL LOAD
When the stove has its first ignition, the auger is completely empty. If it should be
necessary do a precharge by pressing P3 key, then P1 key for starting up and P4 key
for stop.
8
STOVE STATE
It shows all parameters connected to the stove state: this is a menu for the Authorized
Techinician
9
TECHNICA
SETTING
Only for the Authorized Technician.
10
FLAME SETTING
It enables to set the flame dipending on the draught of the chimney flue.
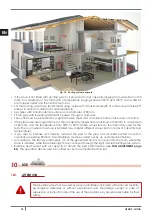
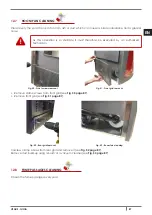
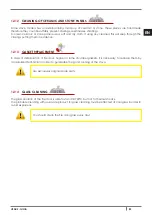
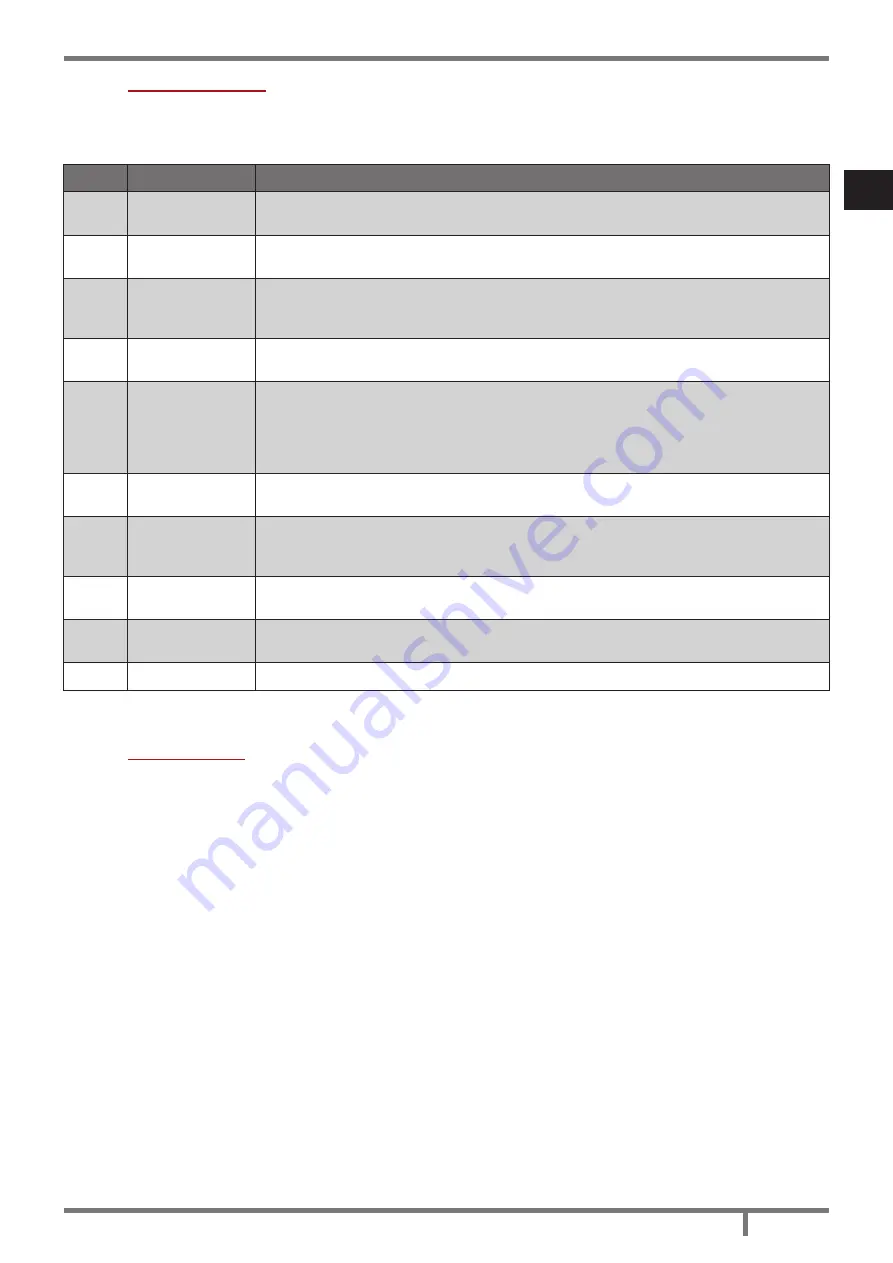
10.5
START UP
We remind you that the first ignition must be carried out by a specialized and authorixed technician who
will check that all is installed in compliance with current regulations and checks the efficiency.
• If inside the combustion chamber there are booklets, manuals, etc..., remove them.
• Check if the door is correctly closed.
• Check if the stove is correctly inserted in the electric socket.
• Before switching the stove on, assure you the burning pot is clean.
• To start the stove up, keep pressed P4 key for an instant till it will be shown “START” and “PREHEATI WAIT”:
the preheating of the ingnition resistance starts. After 2 minutes about, it will be shown “PELLET LOAD,
FIRE WAIT”, in this phase the auger loads the pellet and the heating of the resistance continues. When
the temperature is sufficiently high (after 7-10 minutes about), the ignition is considered as happened
and on the display shows “FLAME PRESENT”.
• Completed the phase “FLAME PRESENT”, the control unit enter the “WORK” phase showing the set
calorific power and ambient temperature. It is in this phase that P5 and P6 keys settle the stove power
from 1 to 5. If the value of the ambient temperature exceeds the limit set on the keyboard on the
temperature setting, the calorific power will be carried at the minimum showing “WORK, MODULAT”.
When the ambient temperature turns back below the set temperatur, the stove turns back to the set
power.
Содержание VENUS
Страница 2: ......
Страница 49: ...49 VENUS GIOIA IT 14 3 RICAMBI Fig 60 Ricambi...
Страница 52: ...52 VENUS GIOIA IT 14 4 DICHIARAZIONE DI CONFORMIT Fig 61 Dichiarazione di Conformit...
Страница 98: ...98 VENUS GIOIA EN 14 3 SPARE PARTS Fig 60 Spare parts...
Страница 101: ...101 VENUS GIOIA EN 14 5 DECLARATION OF CONFORMITY Fig 61 Declaration of Conformity...
Страница 148: ...148 VENUS GIOIA FR 14 3 PI CES D TACH ES Fig 60 Pi ces d tach es...
Страница 151: ...151 VENUS GIOIA FR 14 5 D CLARATION DE CONFORMIT Fig 61 D claration de Conformit...
Страница 197: ...197 VENUS GIOIA ES 14 3 REPUESTOS Fig 60 Repuestos...
Страница 200: ...200 VENUS GIOIA ES 14 5 DECLARACI N DE CONFORMEDAD Fig 61 Declaraci n de conformedad...
Страница 247: ...247 VENUS GIOIA NL 14 3 RESERVEONDERDELEN Fig 60 Reserveinderdelen...
Страница 250: ...250 VENUS GIOIA NL 14 5 CONFORMITEITSVERKLARING Fig 61 Conformiteitsverklaring...
Страница 297: ...297 VENUS GIOIA PT 14 3 PE AS SOBRESSALENTES Fig 60 Pe as sobressalentes...
Страница 300: ...300 VENUS GIOIA PT 14 5 DECLARA O DE CONFORMIDADE Fig 61 Declara o de conformidade...
Страница 302: ...302 VENUS GIOIA EL 1 MANUAL...
Страница 305: ...305 VENUS GIOIA EL 7 2 Fig 2 LEGEND Fig 2 305 1 2 3 4 5 3 5 mt Fig 2 305 1 2 3 u 4...
Страница 306: ...306 VENUS GIOIA EL 7 3 Fig 3 LEGEND Fig 3 306 1 0 5 mt 2 10 3 90 4 90 1 3 mt 20 mm 120 mm 180 mm CE EN 1443...
Страница 307: ...307 VENUS GIOIA EL Fig 4 7 4 350 3 5 meters 7 5 7 6 Fig 5 Fig 5 307 Fig 3 306...
Страница 308: ...308 VENUS GIOIA EL 7 7 Fig 6 LEGEND Fig 6 308 1 2 3 4 5 6 7 8 9 10...
Страница 309: ...309 VENUS GIOIA EL 7 8 Fig 7 Fig 8 LEGEND Fig 7 309 Fig 8 309 1 2 3 4 Fig 7 309 Fig 8 309 80 cm2 4 0 Pa EN 13384...
Страница 310: ...310 VENUS GIOIA EL 7 9 Fig 9 LEGEND Fig 9 310 1 1 5 mt 2 0 3 mt 3 3 4 5 350 60 mm 2 90 Fig 9 310...
Страница 312: ...312 VENUS GIOIA EL 7 11 Fig 10 1 LEGEND Fig 10 312 1 2 100 80 mm 3 4 0 5 mt 120 mm Fig 11 2...
Страница 317: ...317 VENUS GIOIA EL Fig 15 Fig 16 Fig 15 317 Fig 16 317 Fig 17 Fig 18 Fig 17 317 majolica Fig 18 317...
Страница 318: ...318 VENUS GIOIA EL Fig 19 Fig 20 majolica Fig 19 318 Fig 20 318 9 5 GIOIA MODEL Fig 21 Fig 22 Fig 21 318 Fig 22 318...
Страница 319: ...319 VENUS GIOIA EL Fig 23 Fig 24 2 Fig 23 319 Fig 24 319 Fig 25 Fig 25 319 9 6 350...
Страница 320: ...320 VENUS GIOIA EL Fig 26 320 Fig 26 O I Fig 26 320 9 7 WIRING SCHEME 346 7 C 7 C and 03 01 9 8 Fig 27...
Страница 321: ...321 VENUS GIOIA EL 9 9 2 Fig 28 Fig 29 1 Fig 28 321 Fig 29 321 Fig 30 Fig 31 1 1 Fig 30 321 Fig 31 321...
Страница 323: ...323 VENUS GIOIA EL 10 10 1 10 2 1 2 pellet 1 5...
Страница 324: ...324 VENUS GIOIA EL 10 3 PANEL ELEMENT DESCRIPTION P1 P2 6 C 40 C P1 2 P3 P4 P5 and P6 1 5 Chrono...
Страница 330: ...330 VENUS GIOIA EL 10 18 PELLET Fig 34 pellet Fig 35 pellet pellet pellet pellet 10 19 12V Fig 36...
Страница 333: ...333 VENUS GIOIA EL 12 12 1 12 2 2 Fig 37 Fig 38 Fig 39 Fig 37 333 Fig 38 333 Fig 39 333...
Страница 334: ...334 VENUS GIOIA EL Fig 40 Fig 41 Fig 42 Fig 40 334 Fig 41 334 pellet Fig 42 334 12 3 pellet Fig 43 334 Fig 43 Fig 43 334...
Страница 335: ...335 VENUS GIOIA EL 12 4 4 8 Fig 44 Fig 45 2 Fig 44 335 Fig 45 335 12 5 Fig 46...
Страница 336: ...336 VENUS GIOIA EL Fig 46 335 12 6 Fig 47 1 Fig 48 2 Fig 49 3 Fig 47 336 Fig 48 336 Fig 49 336 12 7...
Страница 337: ...337 VENUS GIOIA EL Fig 50 Fig 51 Fig 50 337 Fig 51 337 Fig 52 Fig 53 Fig 52 337 Fig 53 337 12 8 Fig 54 Fig 55...
Страница 338: ...338 VENUS GIOIA EL Fig 54 337 Fig 54 337 Fig 56 Fig 57 Fig 56 338 Fig 57 338 12 9 12 10 12 11 M 12 12...
Страница 339: ...339 VENUS GIOIA EL 12 13 12 14 700 C...
Страница 340: ...340 VENUS GIOIA EL 13 13 1 AL 1 BLACK OUT AL 2 EXHAUST PROBE AL 3 HOT EXHAUST pellet 5 pellet AL 4 FAN FAILURE pellets...
Страница 341: ...341 VENUS GIOIA EL AL 5 NO IGNITION Pellet pellets AL 6 NO PELLET AL 7 THERMAL SAFETY...
Страница 342: ...342 VENUS GIOIA EL AL 8 FAILURE DEPRESS pellets 304 AL 9 OPEN DOOR...
Страница 343: ...343 VENUS GIOIA EL 13 2 4A 250V pellet ACTIVE ALARM...
Страница 345: ...345 VENUS GIOIA EL WORK MODULATI...
Страница 346: ...346 VENUS GIOIA EL 14 14 1 WIRING SCHEME Fig 58 Wiring scheme 14 2 Fig 59 347...
Страница 347: ...347 VENUS GIOIA EL Fig 59 Fig 60 348 3 5 8 7 10 9 6 1 4 3 3 2...
Страница 348: ...348 VENUS GIOIA EL 14 3 Fig 60...
Страница 351: ...351 VENUS GIOIA EL 14 5 Fig 61...