SmartCell ZX-250 User Guide 2-7
Switch Installation and Setup
Installing the Switch
¢•
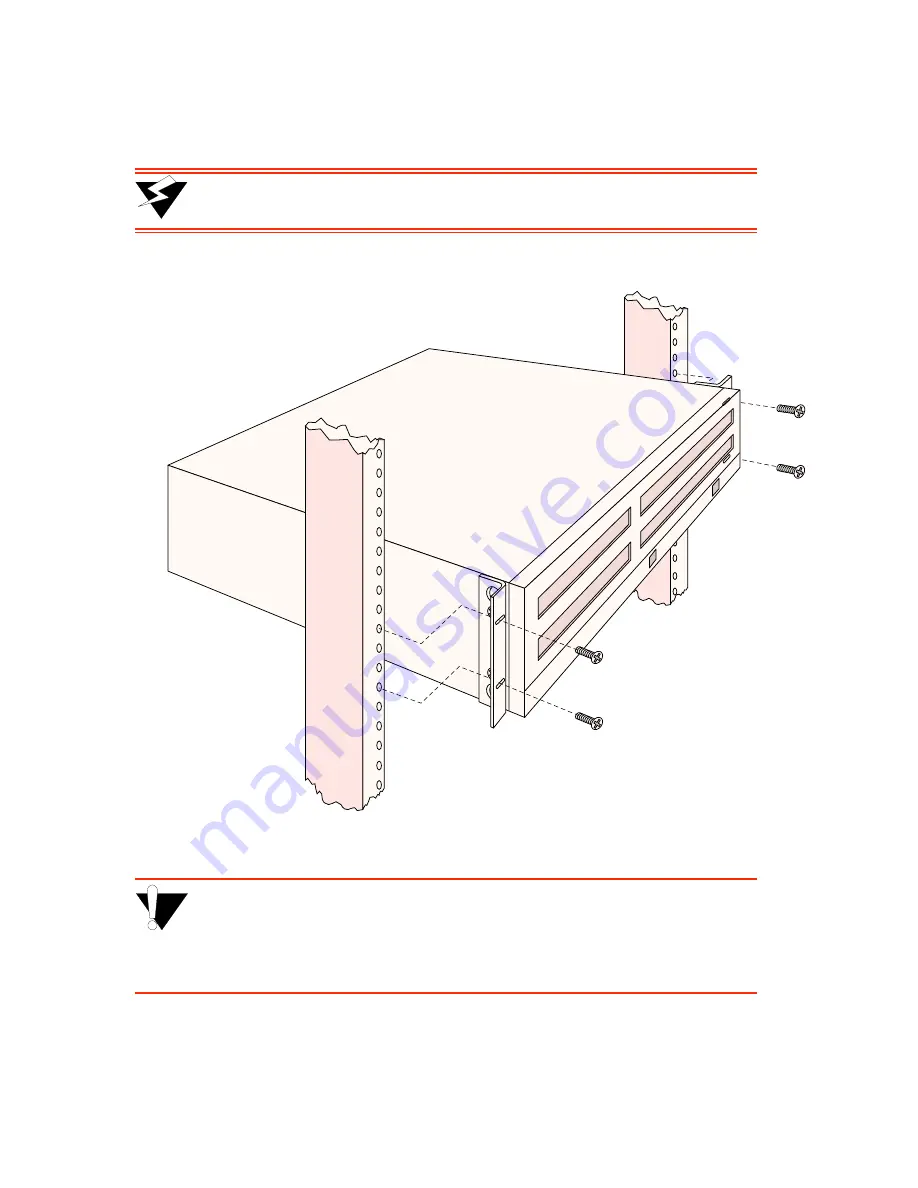
With the brackets in front of the rack’s uprights, attach the brackets to the rack, using two (2) #10-32
x 0.50 flat-head screws on each side (see Figure 2-6).
>
"•mamV
The ZX-250 switch is heavy enough to make one-person installation difficult.
For this reason, it is advisable to have someone assist you.
Figure 2-6 After brackets are attached, mount the switch in the rack.
%
"¤›apm
The mounting brackets must be attached to the switch before mounting the
switch on the rack. Each switch must be mounted to the rack with all four (4)
screws. Every switch must be supported by its own brackets. DO NOT stack a
unit directly on top of a mounted switch. DO NOT use rack-mounted shelves
that interfere with air flow.
Содержание SmartCell ZX-250
Страница 12: ...xii SmartCell ZX 250 User Guide Table of Contents...
Страница 16: ...xvi SmartCell ZX 250 User Guide List of Tables...
Страница 18: ...1 2 SmartCell ZX 250 User Guide Introduction...
Страница 46: ...3 8 SmartCell ZX 250 User Guide Creating an Emulated LAN IP Over ATM and LANE...
Страница 92: ...4 46 SmartCell ZX 250 User Guide Performing Hardware Maintenance Switch Administration...
Страница 98: ...5 6 SmartCell ZX 250 User Guide Troubleshooting Congestion Troubleshooting...
Страница 110: ...A 12 SmartCell ZX 250 User Guide Acronyms...
Страница 124: ...C 8 SmartCell ZX 250 User Guide Managing the SmartCell ZX 250 Agent Support...


