


SmartSwitch 9000-6 Slot Chassis Installation
2-6
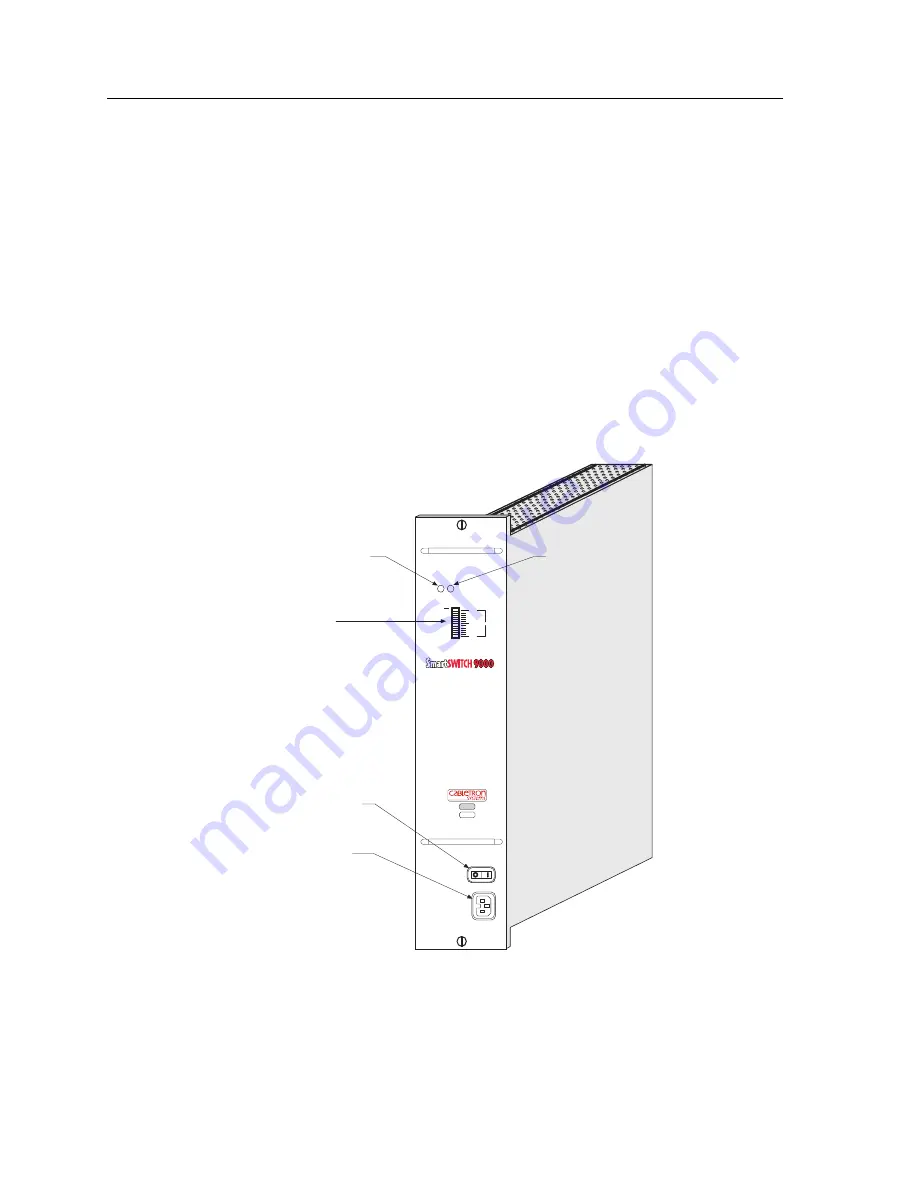
c. Firmly plug the power supply into the corresponding connector on the
back of the chassis by pushing the power supply until its frame touches
the surface of the SmartSwitch 9000-6 Slot chassis.
d. Do not force the power supply in place. If significant resistance is
encountered before the frame is flush with the chassis, remove the power
supply, realign it, and push it in again.
e. Secure the power supply to the chassis by tightening the two slotted
screws on the top and bottom of the power supply. For proper chassis
grounding, the screws must be properly tightened.
5. If you are installing a second power supply, remove the blank plate from the
second power supply slot (keep the blank plate in the event you need to
remove the power supply), and repeat steps 1Ð4.
Figure 2-2. Installing a Power Supply
P O W E R
R E D U N D A N C Y
L O A D
1 0 0 %
5 0 %
0 %
O L
9 C 4 0 6
100-125 ~ 4.0A
200-250V ~ 2.0A
50/60 Hz
SN
Power Switch
AC Power
Socket
Power Supply
Level Indicator
Power LED
Power
Redundancy
LED
Содержание 9C106
Страница 1: ...9031993 02 SmartSwitch 9000 6 Slot 9C106 and 9C706 Chassis Setup and Installation Guide ...
Страница 2: ......
Страница 6: ...Notice iv ...
Страница 14: ...Introduction 1 6 Figure 1 3 The 9C306 System Monitor STATUS C O M 1 C O M 2 EPIM LNK EPIM T SM 9C306 ...
Страница 18: ...Introduction 1 10 ...
Страница 22: ...SmartSwitch 9000 6 Slot Chassis Installation 2 4 Figure 2 1 Rack Mounting the Chassis FAN 9C406 ...
Страница 30: ...SmartSwitch 9000 6 Slot Chassis Installation 2 12 ...
Страница 34: ...9C206 1 Power Supply Operation 3 4 ...
Страница 40: ...SmartSwitch 9000 6 Slot Chassis Security Bars A 4 ...