12. Then bring the free ends of the strings back to the cart and insert them through the first chrome
eyelet, then into the locking anchors (cleats) and finally into the second chrome eyelet. Pull both
strings until you feel the same resistance. You can adjust the length of string to different exercise
requirements by locking it at the cleats.
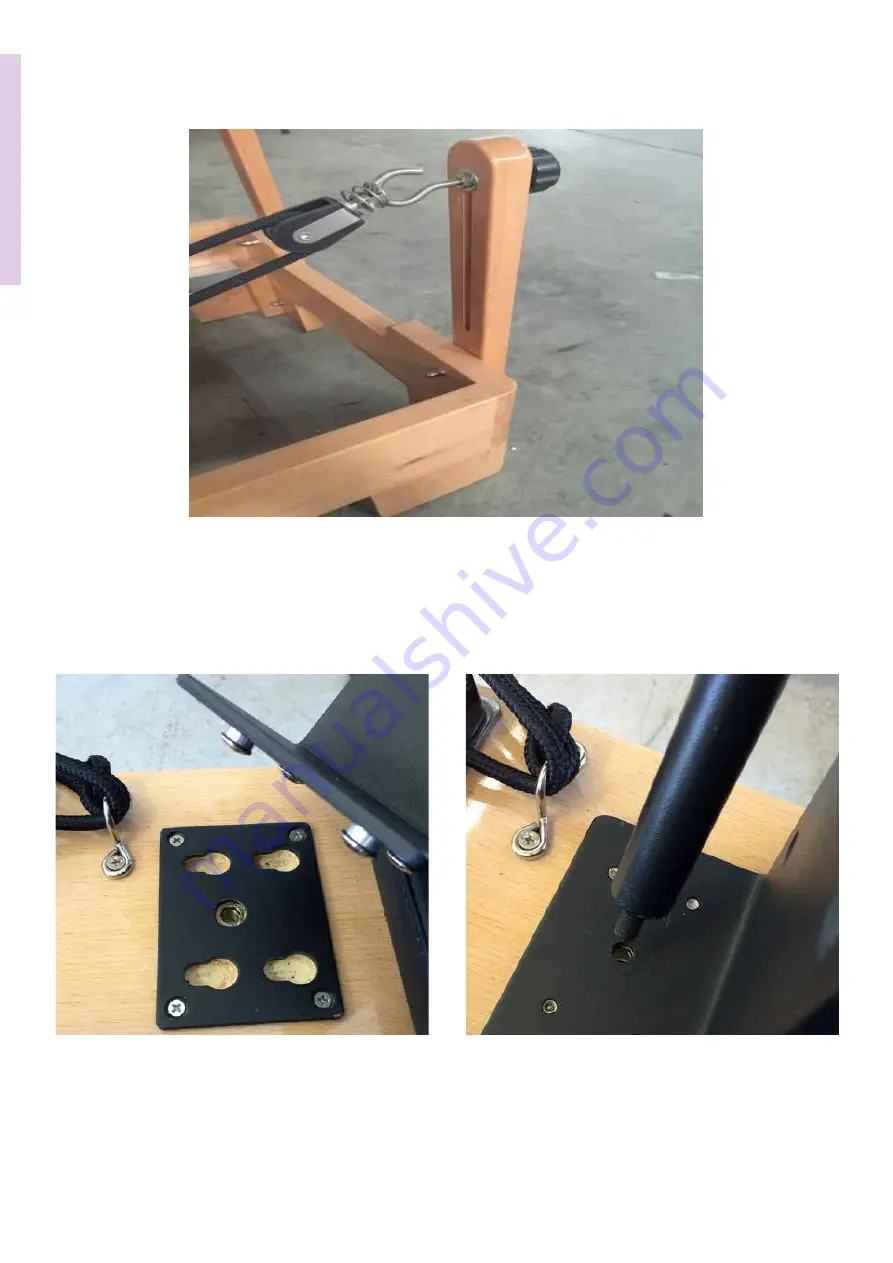
13. Screw on the shoulder pads by placing the pads on the silver brackets and screwing in the pole to
lock them in place..
Now your reformer should be ready to go! We hope you are happy using our product. Please do not
hesitate to contact us with any questions, we are here to help.
Kind regards,
Byron Bay Pilates Co.
10. The toolkit contains two wooden poles with pulleys and black knobs attached to them.
10. Install the poles by screwing them into the reformer frame as per the picture below. Secure the
screws with washers and tighten the inside bolt with a wrench.
Содержание Pilates Studio Reformer
Страница 1: ...Pilates Studio Reformer Assembly Instruction Manual...
Страница 2: ......
Страница 3: ...ENGLISH FRAN AIS IT ALIANO DEUTSCH ESPA OL Pilates Studio Reformer Assembly Instruction Manual...
Страница 4: ......


