background image

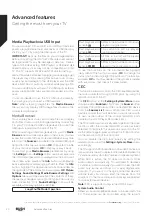
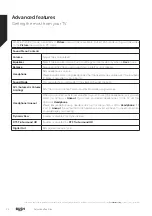
control of the TV. To activate this feature set the 

Speakers


option in the 

Settings>System>More

 menu as 

Amplifier

The TV speakers will be muted and the sound of the 
watched source will be provided from the connected 
sound system.

Note:

 The audio device should support System Audio 

Control feature and 

CEC

 option should be set as 

Enabled

.

Configuring Parental Settings

The 

Parental

 menu options can be used to prohibit users 

from viewing of certain programmes, channels and using 
of menus. These settings are located in the 

Settings> 

System>Parental

 menu.

To display parental lock menu options, a PIN should be 
entered. After coding the correct PIN, 

Parental

 menu 

will be displayed.

Menu Lock:

 This setting enables or disables access to all 

menus or installation menus of the TV. 

Guidance:

 This setting enables or disables access some 

of the MHEG applications. Disabled applications can be 
released by entering the right PIN.

Set PIN:

 Defines a new PIN number. 

Default CICAM PIN:

 This option will appear as greyed 

out if no CI module is inserted into the CI slot of the TV. 
You can change the default PIN of the CI CAM using this 
option.

Note: 

Default PIN could have been set to 

0000

 or 

1234

. If 

you have defined the PIN(is requested depending on the 
country selection) during the 

First Time Installation

 use 

the PIN that you have defined.

Some options may not be available depending on the 
country selection in the 

First Time Installation

.

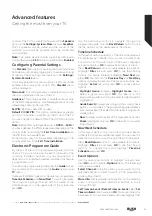
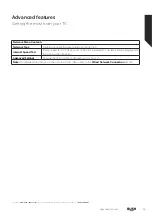
Electronic Programme Guide

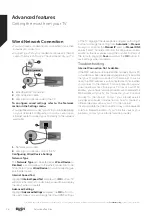
By means of electronic programme guide function 
of your TV you can browse the event schedule of the 
currently installed channels on your channel list. It 
depends on the related broadcast whether this feature 
is supported or not.

To access the programme guide, press the 

Guide

 button 

on your remote. You can also use the 

Guide

 option under 

TV 

menu.

There are 2 different types of schedule layouts available, 

Timeline Schedule

 and 

Now/Next

. To switch between 

these layouts highlight the tab with the name of the 
alternative layout on the upper side of the screen and 
press 

OK

.

Use the directional buttons to navigate through the 
programme guide. Use the 

Back/Return

 button to use 

the tab options on the upper side of the screen. 

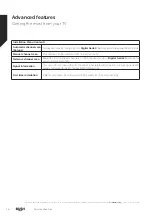
Timeline Schedule

In this layout option, all events of the listed channels will 
be displayed by timeline. You can use the directional 
buttons to scroll through the list of the events. Highlight 
an event and press 

OK

 to display event options menu.

Press 

Back/Return

 button to use available tab options. 

Highlight 

Filter

 tab and press 

OK

 to see the filtering 

options. To change the layout highlight 

Now/Next

 and 

press 

OK

. You can use the 

Previous Day

 and 

Next


Day


options to display the events of the previous and next day.

Highlight

 Extras

 tab and press 

OK

 to access below 

options.

Highlight Genre: 

Displays 

Highlight Genre

 menu. 

Select a genre and press 

OK

. The events in the 

programme guide matching the selected genre will be 
highlighted.

Guide Search:

 Displays searching options. Using these 

options, you can search the programme guide database 
in accordance with the selected criteria. Matching results 
will be listed.

Now:

 Displays current event of the highlighted channel.

Zoom:

 Highlight and press 

OK

 to see events in a wider 

time interval.

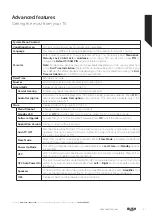
Now/Next Schedule

In this layout option, only the current and next events 
of the listed channels will be displayed. You can use the 
directional buttons to scroll through the list of the events.

Press 

Back/Return

 button to use available tab options. 

Highlight 

Filter

 tab and press 

OK

 to see the filtering 

options. To change the layout highlight 

Timeline


Schedule

 and press 

OK

.

Event Options

Use the directional buttons to highlight an event and 
press 

OK

 button to display 

Options

 menu. The following 

options are available.

Select Channel:

 Using this option, you can switch to the 

selected channel in order to watch it. The programme 
guide will be closed.

More Info:

 Display detailed information on the selected 

event. Use up and down directional buttons to scroll 
through the text.

Set Timer on Event / Delete Timer on Event:

 Select 

Set 

Timer on Event

 option and press 

OK

. You can set timers for 

future events. To cancel an already set timer, highlight that 

Advanced features

Getting the most from your TV

Advanced features

21

or online at 

www.bush-support.com 

If you still require further assistance, call one of our experts on 

0345 604 0105

.

Содержание DLED49FHD

Страница 1: ......

Страница 2: ......

Страница 3: ...by Notifications 18 Using the Channel List 18 5 Advanced features Media Playback via USB Input 20 CEC 20 Configuring Parental Settings 21 Electronic Programme Guide 21 Teletext Services 22 Software Upgrade 22 3 AM search and upgrade mode 22 Settings Menu Contents 23 Wired Network Connection 28 6 Other information Specification 30 Product fiche 30 PC Input Typical Display Modes 31 AV and HDMI Signa...

Страница 4: ......

Страница 5: ...Safety information 1 ...

Страница 6: ...ions concerning use of the appliance by a person responsible for their safety Children should be supervised to ensure that they do not play with the appliance Children may not recognize dangers The swallowing of batteries can be fatal Keep batteries always out of reach of small children If a battery is swallowed seek immediate medical attention Keep the packaging films out of reach of children ther...

Страница 7: ...rating mode when you leave your house Positioning the TV Ŕ For ventilation please leave a clear space of at least 10cm all around the TV Ŕ Do not block the ventilation openings Ŕ Do not place the TV on sloping or unstable surfaces the TV may tip over Ŕ To prevent damage to the TV do not place any objects on top of the TV Power cord and plug Ŕ Do not place the set a piece of furniture etc on the po...

Страница 8: ...ot dispose of batteries with normal household waste take to a local recycling centre CAUTION Insert the batteries rechargeable batteries in the correct polarity Don t try to recharge non rechargeable batteries and under no circumstances throw them into fire Danger of explosion Do not use unequal batteries old and new Alkaline and carbon etc simultaneously If you will not use the device for a long t...

Страница 9: ...uctions before mounting your TV on the wall Ŕ The wall mount kit is optional You can obtain from your local dealer if not supplied with your TV Ŕ Do not install the TV on a ceiling or on an inclined wall Ŕ Use the specified wall mounting screws and other accessories Ŕ Tighten the wall mounting screws firmly to prevent the TV from fall Do not over tighten the screws WARNING Apparatus connected to the...

Страница 10: ...Class 1 Laser Product This product containsClass1lasersourcethatissafe under reasonably foreseeable conditions of operation The illustrations and the OSD in this operation manual are for explanation purposes and may vary slightly from the actual operations Hereby VESTEL Elektronik Sanayi ve Ticaret A Ş declares that the radio equipment type TFT IDTV is in compliance with Directive 2014 53 EU The f...

Страница 11: ...Getting to know your TV 2 ...

Страница 12: ...finition Multimedia Interface and the HDMI Logo are trademarks or registered trademarks of HDMI Licensing Administrator Inc in the United States and other countries Manufactured under license from Dolby Laboratories Dolby Dolby Audio and the double D symbol are trademarks of Dolby Laboratories For DTS patents see http patents dts com Manufactured under license from DTS Licensing Limited DTS the Sym...

Страница 13: ...g On Off To Switch the TV On Connect the power cord to a power source such as a wall socket 220 240V AC 50 Hz To switch on the TV from standby mode either Press the Standby button Programme or a numeric button on the remote control Ŕ Press the middle of the side function switch on the TV in To Switch the TV Off Press the Standby button on the remote control or press the middle of the side function...

Страница 14: ... media such as movies 12 No function 13 Coloured Buttons Follow the on screen instructions for coloured button functions 14 Play Starts to play selected media 15 Stop Stops the media being played 16 Fast Forward Moves frames forward in media such as movies 17 Pause Pauses the media being played 18 Exit Closes and exits from displayed menus or returns to previous screen 19 Info Displays information...

Страница 15: ...Connections 3 ...

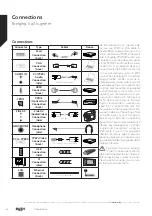
Страница 16: ...t be available via the scart socket When using the wall mounting kit available from a third party in the market if not supplied we recommend that you plug all your cables into the back of the TV before mounting on the wall Insert or remove the CI module only when the TV is SWITCHED OFF You should refer to the module instruction manual for details of the settings The Each USB input of your TV suppo...

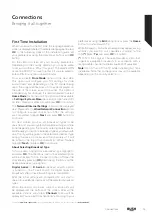
Страница 17: ... the selected broadcast type during the search process and the channels of it will be listed on the top of the channel list When finished highlight Next and press OK to continue About Selecting Broadcast Type To turn a search option for a broadcast type highlight it and press OK The checkbox next to the selected option will be checked To turn the search option off clear the checkbox by pressing OK ...

Страница 18: ......

Страница 19: ...Standard features 4 ...

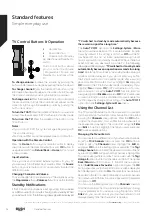
Страница 20: ...ticallybecausenooperationwasmadeforalong time BeforetheTVswitchesintostandbymodeadialogue window will be displayed If you do not press any button the TV will switch into the standby mode after a waiting period of about 5 minutes You can highlight Yes and press OK to switch the TV into standby mode immediately If you highlight No and press OK the TV will remain on You can also choose to cancel the ...

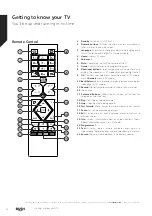
Страница 21: ...Advanced features 5 ...

Страница 22: ...de Operation Start playback and activate Allfilesinthelistwillbecontinuously played in original order Start playback and activate The same file will be played continuously repeat Start playback and activate All files in the list will be played once in random order Start playback and activate Allfilesinthelistwillbecontinuously played in the same random order To use the functions on the information ba...

Страница 23: ...through the programme guide Use the Back Return button to use the tab options on the upper side of the screen Timeline Schedule In this layout option all events of the listed channels will be displayed by timeline You can use the directional buttons to scroll through the list of the events Highlight an event and press OK to display event options menu Press Back Return button to use available tab o...

Страница 24: ...ration method may differ depending on the contents of the digital teletext Follow the instructions displayed on digital teletext screen Press the Text button to returs to television broadcast Software Upgrade Your TV is capable of finding and updating the firmware automatically via the broadcast signal or via Internet Software upgrade search via user interface On the main menu select Settings System...

Страница 25: ...n the Picture Zoom setting Highlight and press OK then use directional buttons to shift the picture upwards or downwards Film Mode Films are recorded at a different number of frames per second to normal television programmes Turn this feature on when you are watching films to see the fast motion scenes clearly Skin Tone Skin tone can be changed between 5 and 5 Colour Shift Adjust the desired colour...

Страница 26: ...n fixed output level between programmes Headphone Lineout When you connect an external amplifier to your TV using the headphone jack you can select this option as Lineout If you have connected headphones to the TV set this option as Headphone Please ensure before using headphones that this menu item is set to Headphone If it is set to Lineout the output from the headphone socket will be set to maxim...

Страница 27: ...yed on the screen when finished Advanced Settings Change the IP and DNS configurations of your TV Note For detailed information on the options of this menu refer to the Wired Network Connection section Advanced features Getting the most from your TV Advanced features 25 or online at www bush support com If you still require further assistance call one of our experts on 0345 604 0105 ...

Страница 28: ...r aerial network channels Signal Information You can use this menu item to monitor signal related information such as signal level quality network name etc for available frequencies First time installation Deletes all stored channels and settings resets TV to factory settings Advanced features Getting the most from your TV Advanced features 26 If you require any technical guidance or find that you...

Страница 29: ...dby LED If set as Off the standby LED will not light up when the TV is in standby mode Software Upgrade Ensures that your TV has the latest firmware Press OK to see the menu options Application Version Displays current software version Auto TV OFF Sets the desired time for the TV to automatically go into standby mode when not being operated This option can be set from 1 to 8 hours in steps of 1 hou...

Страница 30: ...ess Left or Right button to change the setting from Automatic to Manual Now you can enter the Manual IP and or Manual DNS values Select the related item in the drop down menu and enter the new values using the numeric buttons of the remote Highlight Save and press the OK button to save settings when complete Troubleshooting Internet Connection Not Available If the MAC address a unique identifier nu...

Страница 31: ...Other information 6 ...

Страница 32: ...0 C up to 40 C 85 humidity max VESA WALL MOUNT MEASUREMENTS Hole Pattern Sizes mm W H 200 200 Screw Sizes Length X min mm 10 max mm 13 Thread Y M6 WƌŽĚƵĐƚ ĮĐŚĞ Commercial Brand BUSH Product No 10120042 Model No DLED49FHD Energy efficiency class A Visible screen size diagonal approx inch cm 49 inches 124 cm On mode average power consumption Watt 48 0 W Annual energy consumption kWh annum 70 kWh Sta...

Страница 33: ...x480 60 Hz 2 800x600 56 Hz 3 800x600 60 Hz 4 1024x768 60 Hz 5 1024x768 66 Hz 6 1280x768 60 Hz 7 1280x960 60 Hz 8 1280x1024 60 Hz 9 1360x768 60 Hz 10 1400x1050 60 Hz 11 1600x1200 60 Hz 12 1920x1080 60 Hz Other information Helpful technical information Other information 31 or online at www bush support com If you still require further assistance call one of our experts on 0345 604 0105 ...

Страница 34: ...0Hz O X Not Available O Available In some cases a signal on the TV may not be displayed properly The problem may be an inconsistency with standards from the source equipment DVD Set top box etc If you do experience such a problem please contact your dealer and also the manufacturer of the source equipment Other information Helpful technical information Other information 32 If you require any techn...

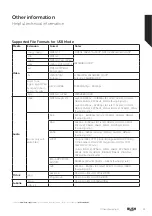
Страница 35: ...rate 32kHz 44 1kHz 48kHz Sampling rate AAC 16Kbps 576Kbps Bit rate 48kHz 44 1kHz 32kHz 24kHz 22 05kHz 16kHz 12kHz 11 025kHz 8kHz Sampling rate EAC3 32Kbps 6Kbps Bit rate 32kHz 44 1kHz 48kHz Sampling rate LPCM Unsigned 8bit PCM Signed Unsigned 16bit PCM big little endian 24bit PCM big endian DVD LPCM 16 20 24bit Bit rate 6kHz 8kHz 11 025kHz 12kHz 16kHz 22 05kHz 24kHz 32kHz 44 1kHz 48kHz 88 2kHz 96k...

Страница 36: ... to the latest DVB specifications at the time of manufacture we cannot guarantee compatibility with future DVB transmissions due to changes that may be implemented in broadcast signals and technologies Some digital television functions may not be available in all countries We continually strive to improve our products therefore specifications may change without prior notice For advice on where to pu...

Страница 37: ...Product support 7 ...

Страница 38: ... balance settings from Sound menu Remote control no operation Ŕ The batteries may be exhausted Replace the batteries Input sources can not be selected Ŕ If you cannot select an input source it is possible that no device is connected If not Ŕ Check the AV cables and connections if you are trying to switch to the input source dedicated to the connected device The Image is not centered in VGA source ...

Страница 39: ...a sticker or metal plate on the rear of your TV This will be shown on your receipt Local call rates applies Lines open 8am 7pm Monday to Saturday and 10am 4pm Sunday Calls to Bush enquiry lines may attract a charge and set up fee from residential lines depending on your call plan tariff Mobile and other providers costs may vary see www bt com pricing for details For security and training purposes ...

Страница 40: ...ducts please contact your local municipal office your household waste disposal service or the shop where you purchased the product Penalties may be applicable for incorrect disposal of this waste in accordance with national legislation Business users If you wish to dispose of this product please contact your supplier and check the terms and conditions of the purchase contract Other Countries outsi...

Страница 41: ...rantee does not cover accidental damage misuse cabinet parts knobs or consumable items Ŕ The product must be correctly installed and operated in accordance with the instructions contained in the manual Ŕ It must be used solely for domestic purposes The guarantee will be rendered invalid if the product is re sold or has been damaged by inexpert repair Ŕ Specifications are subject to change without ...

Страница 42: ......

Страница 43: ......

Страница 44: ......

Отзывы: