SKU 66704
For technical questions, please call 1-800-444-3353.
Page 5
Keep the Monitor Sliding “ON/OFF”
8.
Switch on A (Audio) unless you need
to see a picture. This will save bat-
tery life. The AV (Audio Visual) po-
sition uses battery energy rapidly.
Leave the unit connected to an AC
outlet whenever possible.
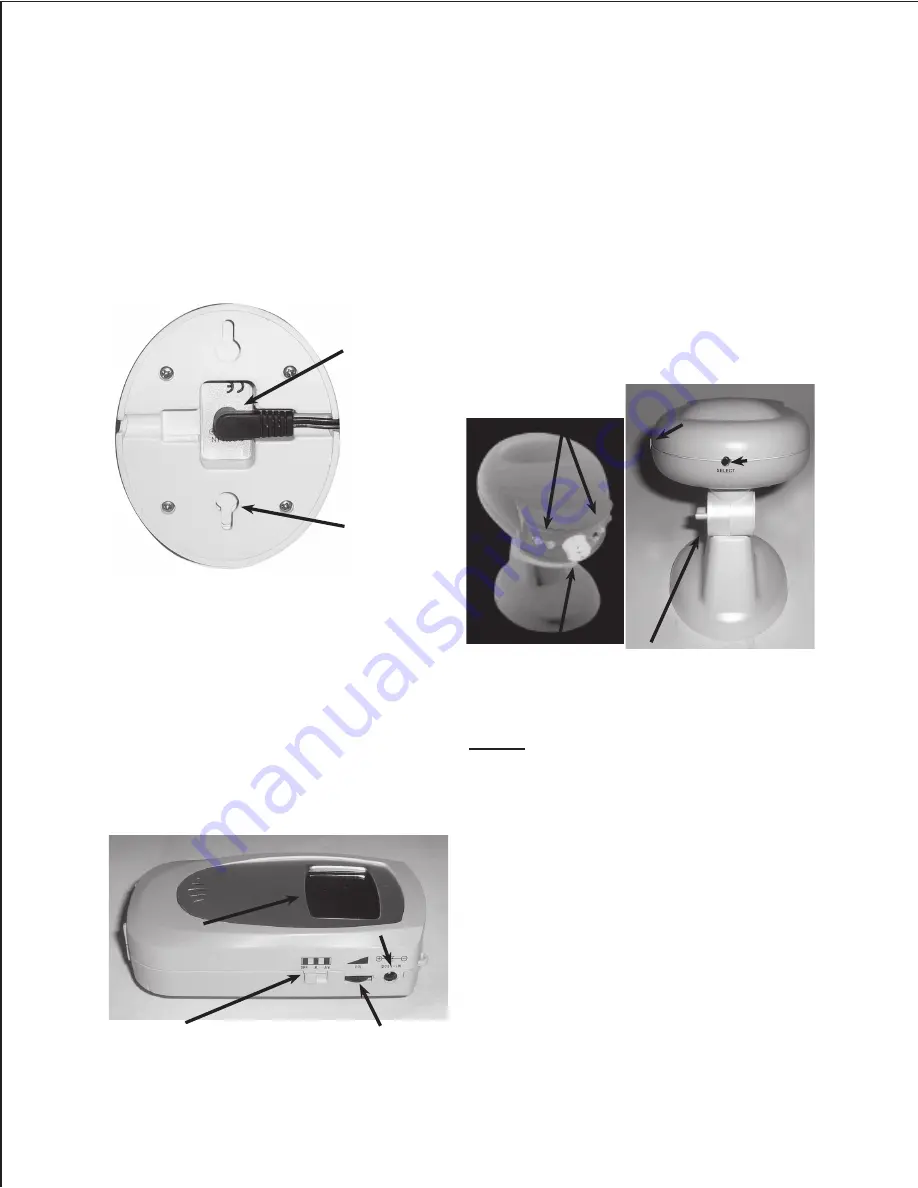
Figure 1
Power
Cord (8)
Camera
Table/
Wall Mount
Base with
Bracket
Holes
9.
Remove the lens cap and slide
Switch on Monitor to AV (Audio/
Visual) and look at Monitor Screen,
see
Figure 2.
Tilt Camera to proper
angle for best view by loosening the
Bracket Adjustment Knob. When
Camera is focused on area you de-
sire, tighten the Bracket Adjustment
Knob to hold position. See
Figure 3.
If a picture is required, move Sliding
10.
Switch on Monitor to “AV” (Audio Vi-
sual), until the picture is not needed.
To conserve battery energy (if only
batteries are used to power the Moni-
tor) when a picture is not required,
turn the Monitor to its Audio setting.
See
Figure 2.
Adjust volume on Monitor using the
11.
Volume Control. See
Figure 2.
Figure 3
Camera Lens Bracket Adjustment Knob
ON/OFF Switch
Infrared Lights
Select
12. Camera (1) has Infrared Lights for vi-
sion in dark. See
Figure 3.
NOTE: The Monitor may be used with
just battery power if you wish
to carry it from place to place in
your pocket, or on your belt using
the Clip on the back. Use the AC
Adapter (included) for both power
and to recharge the AA recharge-
able batteries when the Room
Monitor is stationary.
Figure 2
Sliding Switch (OFF, A, AV) Volume
Adapter Jack
Monitor Screen


