background image

Maintenance/servicing

11

6.3 

Replace module HB 1

Required tools


•  1 Allen key 3 mm 

•  1 open-end wrench 11 mm

1

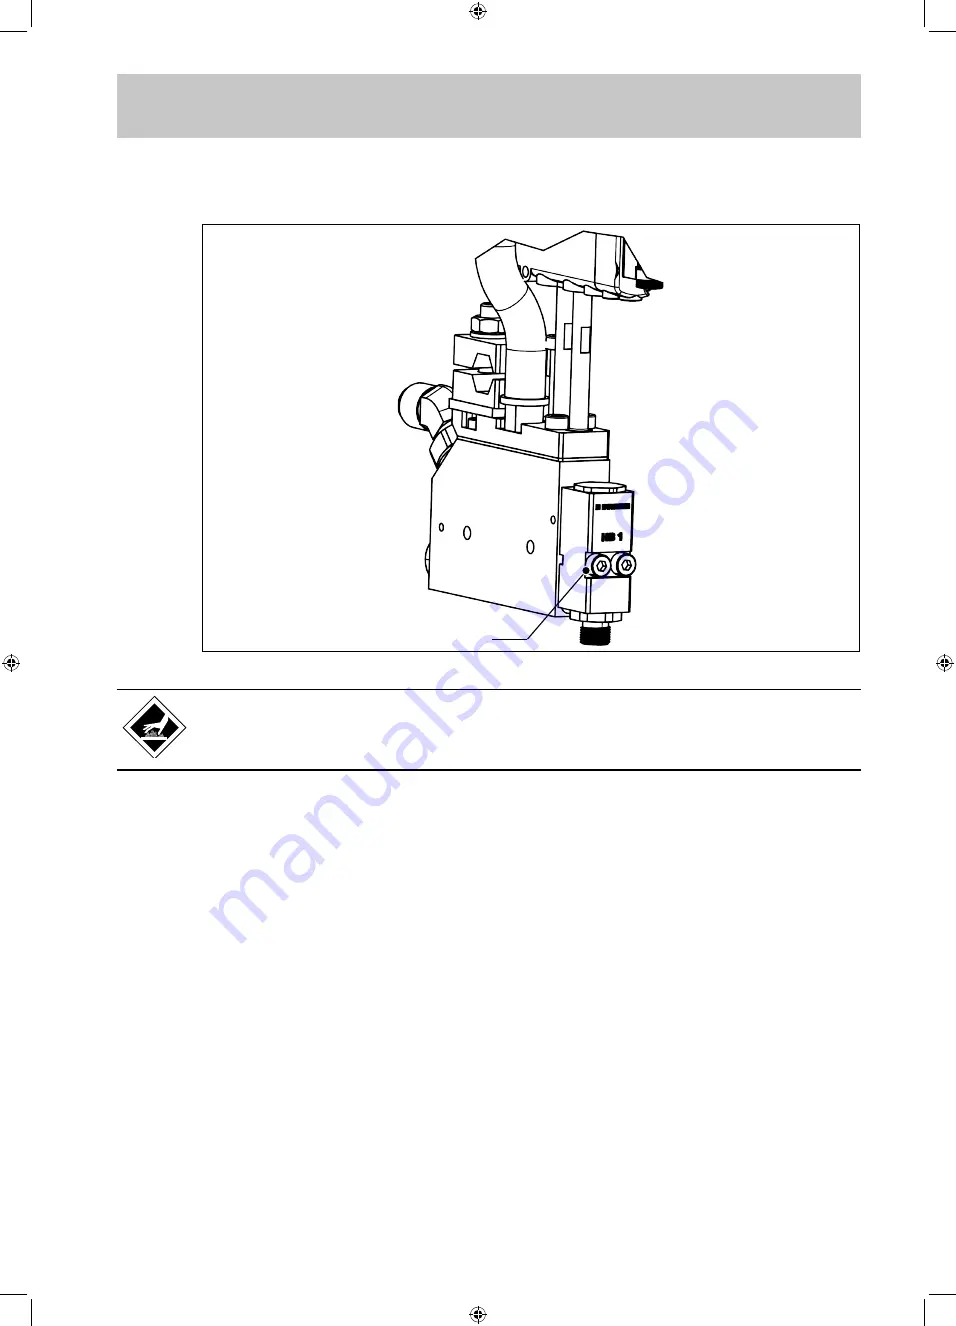
Figure 3: Replacement of module HB 1

Danger of burns! 

The module and melted hot melt adhesive can reach temperatures over 200°C. Wear 

heat protection gloves for the following work steps. 

To replace the module HB 1, carry out the following steps:
1.  Heat up the application head to operating temperature.
2.  Unscrew the nozzle with the open-end wrench (11 mm).
3.  Release the screws (1, M4) shown in 

Figure 3

 using an Allen key (3 mm).

4.  Remove the module.

FCH0479-2XM_EN_191107.indd   11

07.11.19   14:03

Содержание HB 11

Страница 1: ...Translation of the Original Operating Instructions Micro Application Head HB 11 FCH0479 2XM Issue 11 2019 FCH0479 2XM_EN_191107 indd 1 07 11 19 14 03 ...

Страница 2: ...Operation 8 4 1 Initial operation 8 4 2 Adjusting the adhesive dosage 8 4 3 Interruptions in work End of shift 8 4 4 Processing PU hot melt adhesives 8 5 What happens if 9 5 1 Troubleshooting and repair 9 6 Maintenance servicing 10 6 1 Maintenance intervals 10 6 2 Cleaning 10 6 2 1 Clean nozzle 10 6 3 Replace module HB 1 11 7 Repairs 12 8 Warranty 12 9 Disposal 12 10 Spare parts 13 Declaration of ...

Страница 3: ...tes Have a doctor remove the cooled adhe sive If nauseous after inhaling va pours Provide fresh air For persistent malaise consult a doc tor After swallowing For persistent malaise consult a doctor 1 2 Notes on safe operation To avoid functional disruptions and faulty operation comply exactly with the following notes at all times The maximum permissible operating pressure of the hot melt adhesive ...

Страница 4: ...Solenoid valve plug The nozzle is specific to application and not included in the delivery Please order separately Weight kg 0 62 Supply voltage for solenoid valve V DC 24 Solenoid valve capacity W 12 Heating capacity W 100 Class of protection IP40 Operating temperature C up to 195 Warming up period min 15 Temperature sensor Pt 100 or Ni 120 alternatively NTC or FeCuNi Compressed air connection ba...

Страница 5: ...General 5 2 3 Dimensioned drawing Figure 1 Dimensioned drawing FCH0479 2XM_EN_191107 indd 5 07 11 19 14 03 ...

Страница 6: ...onnections HB 11 Cons No Function 1 Compressed air connection 2 Valve connection for PLC controller 3 Clamping screw 4 Opening for holding rod 5 Connection heatable hose 6 Module HB 1 7 Filter 8 Nozzle foot FCH0479 2XM_EN_191107 indd 6 07 11 19 14 03 ...

Страница 7: ... activating the solenoid valve to the supplied plug and then con nect the plug to the solenoid valve and screw it in place 4 Apply the free ends of the cable to the corresponding connections of the controller PLC 5 Connect the plug in connector at the end of the cable 5 to the mating connector at the heatable hose Danger of burns If the heater is not switched off see step 1 the application head ca...

Страница 8: ...less than those of the other com ponents tank system heatable hose After the tank system has heated the application head can be put into operation immedi ately Additional preparations are not necessary 4 2 Adjusting the adhesive dosage The adhesive discharge per timing cycle depends on the parameters Adhesive pressure Nominal diameter of the nozzle Opening time of the solenoid valve After initial ...

Страница 9: ...back into operation Have the device inspected and repaired by a qualified service centre 5 1 Troubleshooting and repair Fault Possible Cause Remedy see chapter Nozzle drips Module HB 1 defective Clean nozzle foot needle Replace module 6 3 Too little or no hot melt material is discharged Operating pressure too low Increase operating pres sure max 80 bar Compressed air supply interrupted Check compr...

Страница 10: ...nts For cleaning we recommend BÜHNEN Cold Cleaner Art No F91997 Replace parts that cannot be cleaned e g due to burnt or fully cured hot melt material completely We recommend having this work done by BÜHNEN Service Remove the residues of hot melted material and other contaminations by mechanical means only e g using a cloth soft brush wood spatula or similar 6 2 1 Clean nozzle Required tool 1 open...

Страница 11: ...esive can reach temperatures over 200 C Wear heat protection gloves for the following work steps To replace the module HB 1 carry out the following steps 1 Heat up the application head to operating temperature 2 Unscrew the nozzle with the open end wrench 11 mm 3 Release the screws 1 M4 shown in Figure 3 using an Allen key 3 mm 4 Remove the module FCH0479 2XM_EN_191107 indd 11 07 11 19 14 03 ...

Страница 12: ...logy First time purchasers receive warranty on function material and processing according to statutory regulations Normal wear and tear is excluded The warranty is void if improper handling use of force third party repairs and installation of spare parts other than the original has been determined The warranty extends to servicing or replacing according to our choice Warranty beyond our scope of d...

Страница 13: ...set NI120 3 B29 082 0501 1 Cord set PT100 4 NKT0230 2 Fillister head screw 5 B50 027 0100 1 Heating cartridge HB 11 6 B26 001 0004 2 Air tube 7 NKT1507 1 5 2 way valve 8 NKT0182 1 Adapter 45 UNF 9 16 9 NKT0218 2 O ring 21 95 x 1 78 10 NKT0229 1 O ring 11 NKT0451 1 Head filter unit Series BM 12 NKT0591 1 Module HB 1 FCH0479 2XM_EN_191107 indd 13 07 11 19 14 03 ...

Страница 14: ...he product Applicator Head HB 11 to which this declaration refers complies with the following Standards or normative documents in its supplied condition EN 55014 1 2012 05 EN 55014 2 2016 01 EN 60204 1 2007 06 EN 60519 1 2017 06 EN 60519 2 2007 05 EN 61000 3 2 2015 03 EN 6100 3 3 2014 03 in accordance with the stipulations of guideline 2006 42 EC 2011 65 EU 2014 30 EU Bremen August 2018 Hermann Kr...

Отзывы: