4
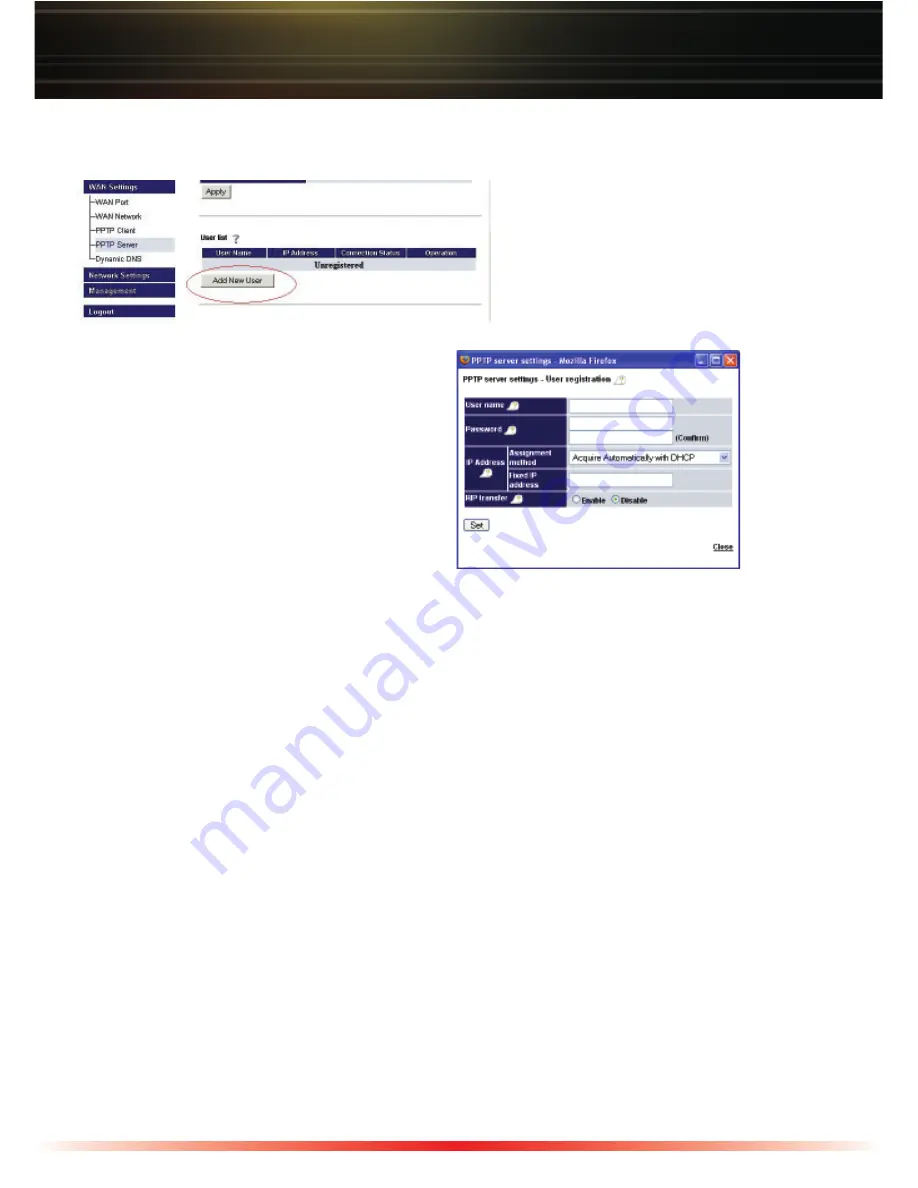
Add VPN Usernames and Passwords to the Database:
◗
Press on the
‘Add New User’
button.
A window will appear to add the new
user.
◗
Enter a
‘User Name’
. It can be
up to 16 characters. Alphanumeric
characters, double quotation ("), single
quotation ('), slash (/) and any symbol
other than space may be used. The
user name is case sensitive.
◗
Enter a
‘Password’
. Re-enter the password to confirm. It can be up to 16 characters.
Alphanumeric characters, double quotation ("), single quotation ('), slash (/) and any
symbol other than space may be used. The password is case sensitive.
◗
Select the
‘IP Address
Assignment Method’
from the drop down list. You have 3
choices.
•
Acquire Automatically with DHCP
– The next available address in the DHCP
server's list will be offered to the VPN Client.
•
Obtain from PPTP Server Range
– An IP Address will be given from the list you
created in the PPTP Server’s Remote IP Addresses list.
•
Fixed IP Address
– This option allows you to enter a Fixed IP Address for the user.
◗
Enable/Disable RIP Transfer -
The default setting is “Disable”. Enable this feature if
you desire to pass RIP packets to the remote user. This setting would be used if the
AirStation is also configured as a PPTP (VPN) Endpoint Client. Please see the manual
on the CD-ROM for more information regarding PPTP (VPN) Endpoint Clients.
Press the
‘Apply’
button to register the user. You can register up to 100 users. VPN user
status can be seen in the registered user list. An LED on the front of the AirStation (below
the WAN LED) will illuminate when a user has initiated a VPN session.


