4
Tank Assembly
Logalux SM300/1 - SM400/1 - Technical specifications are subject to change without prior notice.
12
4
Tank Assembly
4.1
SM300/1 Placement and Installation
4.1.1
Installation of tank feet
V
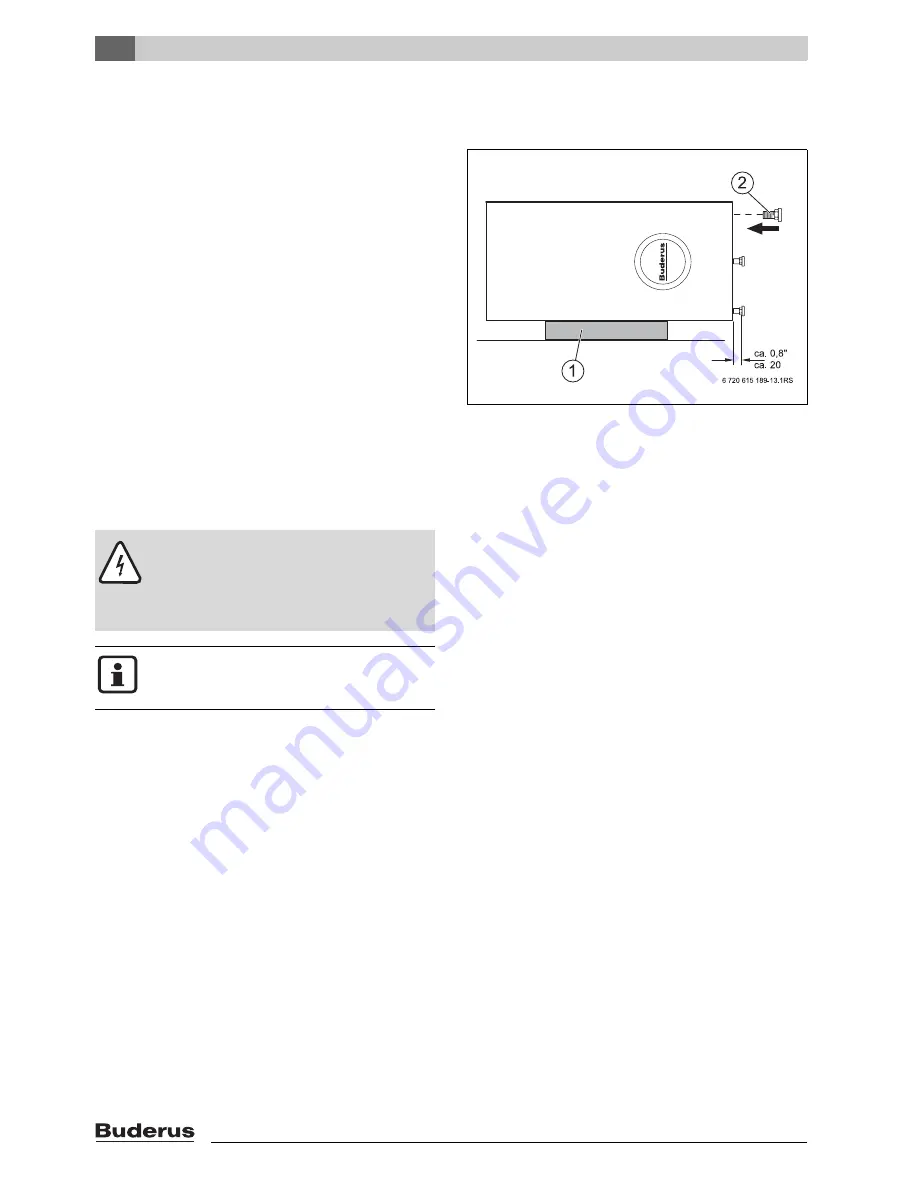
Place top foam material on the floor [1].
V
Carefully place the solar tank on its side on top of the
foam material.
V
Remove the tank support bolts M10x30 from the Styro-
foam packaging and screw into the bottom of the tank
[2].
V
Put solar tank straight-up and level by adjusting the
tank bolts [2].
Fig. 8
Installation of tank bolts
1
Foam packaging material
2
Tank bolts
4.1.2
Installation of tank aquastat or temperature
sensor
V
To measure and secure the DHW water temperature
an installed temperature sensor or aquastat on the
DHW tank is reqiured.
Danger:
Due to electricity.
V
Electrically disconnect the system.
For DHW temperature control, one can
use an aquastat or tank sensor depending
on the selected control strategy.
Follow the directions supplied by the manu-
facturer of the aquastat or tank sensor re-
garding electrical wiring connections.
Содержание Logalux SM300/1
Страница 37: ...7 Logalux SM300 1 SM400 1 Technical specifications are subject to change without prior notice 37 Notes ...
Страница 38: ...7 Logalux SM300 1 SM400 1 Technical specifications are subject to change without prior notice 38 Notes ...
Страница 39: ...7 Logalux SM300 1 SM400 1 Technical specifications are subject to change without prior notice 39 Notes ...


