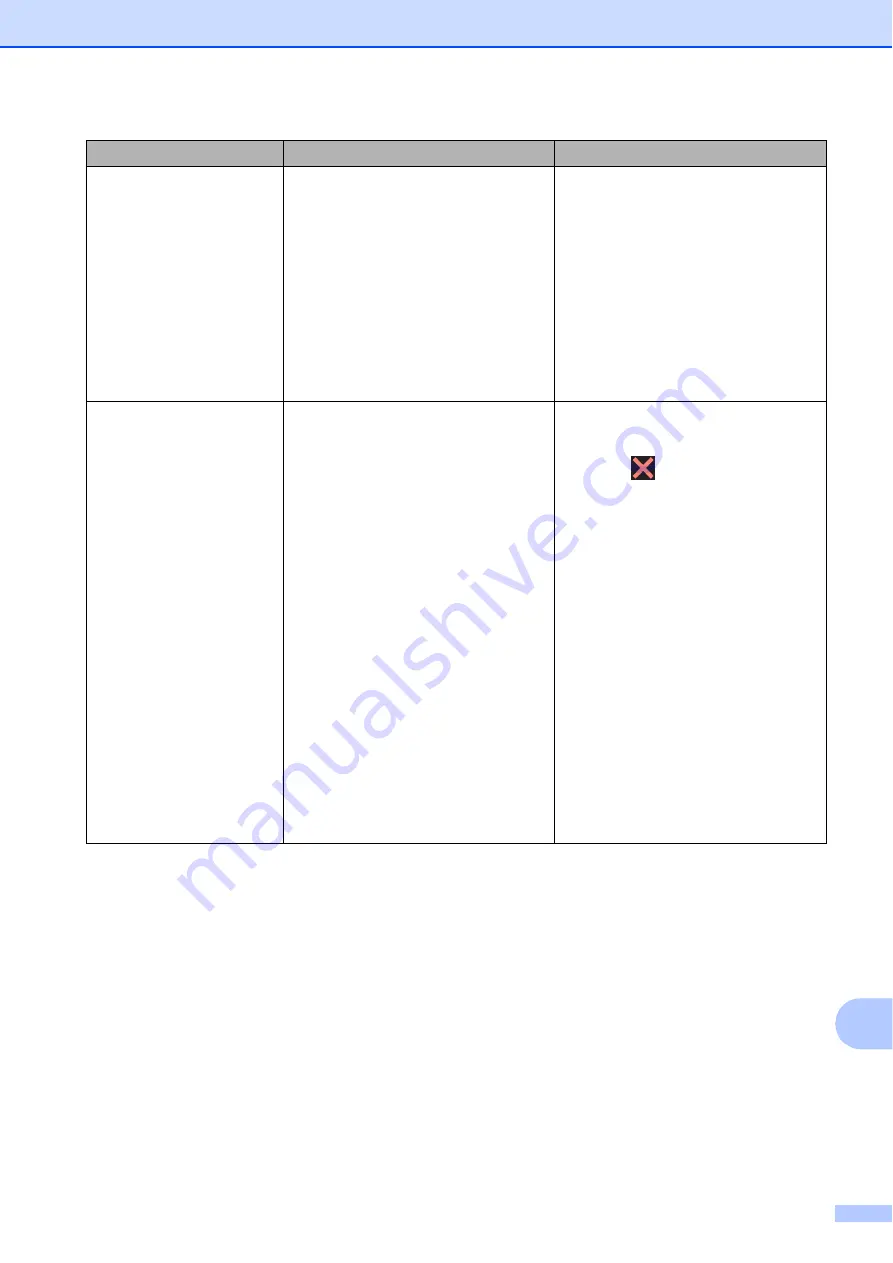
Brother Work Smart MFC-J650dw Скачать руководство пользователя страница 115

Troubleshooting 

105

B

Out of Fax Memory

The fax memory is full.

Do one of the following:

Clear the data from the memory. 
To gain extra memory, you can 
turn off Memory Receive. 
(See Advanced User’s Guide: 

Turning off Memory Receive 
operations

.)

Print the faxes that are in the 
memory. (See Advanced User’s 
Guide: 

Printing a fax from the 

memory

.)

Out of Memory

The machine's memory is full.

If a fax sending or copy operation 
is in process:

Press , 

Quit

 or 

Close

 and 

wait until the other operations that 
are in progress finish, and then try 
again.

Press 

Send Now

 to send the 

pages scanned so far.

Press 

Partial Print

 to copy 

the pages scanned so far.

Clear the data in the memory. To 
gain extra memory, you can turn 
off Memory Receive. 
(See Advanced User’s Guide: 

Turning off Memory Receive 
operations

.)

Print the faxes that are in the 
memory. (See Advanced User’s 
Guide: 

Printing a fax from the 

memory

.)

Error Message

Cause

Action

Содержание Work Smart MFC-J650dw

Страница 1: ...Basic User s Guide MFC J650DW MFC J870DW Version 0 ARL ASA NZ ...

Страница 2: ...del number Serial Number 1 Date of Purchase Place of Purchase 1 The serial number is on the back of the unit Retain this User s Guide with your sales receipt as a permanent record of your purchase in the event of theft fire or warranty service Register your product on line at http www brother com registration 2013 Brother Industries Ltd All rights reserved ...

Страница 3: ...bout using the Brother ControlCenter utility using your machine in a network environment and frequently used terms HTML file CD ROM Web Connect Guide This Guide provides useful information about accessing Internet services from the Brother machine as well as downloading images printing data and uploading files directly to Internet services PDF file Brother Solutions Center 2 AirPrint Guide This Gu...

Страница 4: ...hanging the keyboard setting 12 Shortcut Settings 12 Adding Copy Shortcuts 12 Adding Fax Shortcuts 13 Adding Scan Shortcuts 14 Adding Web Connect Shortcuts 15 Changing Shortcuts 15 Editing Shortcut Names 16 Deleting Shortcuts 16 Recalling Shortcuts 16 Volume Settings 17 Ring Volume 17 Beep Volume 17 Speaker Volume 17 Touchscreen LCD 18 Setting the backlight brightness 18 2 Loading paper 19 Loading...

Страница 5: ...ettings 43 Ring Delay 43 F T Ring Time Fax Tel mode only 43 Fax Detect 44 Fax Preview Monochrome only MFC J870DW 45 How to preview a received fax 45 Turning off Fax Preview 47 6 Telephone and external devices 48 Voice operations 48 Tone or Pulse Not Available for New Zealand 48 Fax Tel mode 48 Telephone Service for Australia 49 Distinctive Ring 49 Caller ID 50 How Does the Caller ID Work 51 The Ca...

Страница 6: ...toring a pause 64 Storing Address Book numbers 64 Changing or deleting Address Book names or numbers 65 8 Making copies 66 How to copy 66 Stop copying 66 Copy options 67 Paper Type 67 Paper Size 68 9 Printing photos from a memory card or USB Flash drive 69 PhotoCapture Center operations PHOTO mode 69 Using a memory card or USB Flash drive 69 Getting started 70 Print Images 72 View Photos 72 PhotoC...

Страница 7: ...g the date and time 94 B Troubleshooting 96 Identifying your problem 96 Error and maintenance messages 98 Error animations 111 Transferring your faxes or Fax Journal report 111 Document jam 112 Printer jam or paper jam MFC J650DW 114 Printer jam or paper jam MFC J870DW 120 Disc Jam MFC J870DW 127 If you are having difficulty with your machine 129 Dial Tone detection 140 Telephone line interference...

Страница 8: ...cifications 180 General 180 Print media 182 Fax 183 Copy 184 PhotoCapture Center 185 PictBridge 186 Scanner 187 Printer 188 Interfaces 189 Network 190 Computer requirements 191 Consumable items 192 E Index 193 ...

Страница 9: ...e only Remote Retrieval Additional receiving operations Polling overview 5 Dialling and storing numbers MFC models Additional dialling operations Additional ways to store numbers 6 Printing reports Fax reports MFC models Reports 7 Making copies Copy options 8 Printing photos from a memory card or USB Flash drive PhotoCapture Center operations Print Images PhotoCapture Center print settings Scan to...

Страница 10: ...viii ...

Страница 11: ...ic Courier New Text in the Courier New font identifies messages on the Touchscreen of the machine WARNING WARNING indicates a potentially hazardous situation which if not avoided could result in death or serious injuries CAUTION CAUTION indicates a potentially hazardous situation which if not avoided may result in minor or moderate injuries IMPORTANT IMPORTANT indicates a potentially hazardous sit...

Страница 12: ...er Printer Scanner PC Fax and Network features When you are ready to learn detailed information about these operations you can read the Advanced User s Guide and Software and Network User s Guide in HTML format that are on the CD ROM Viewing User s Guides 1 Windows 1 Windows XP Windows Vista Windows 7 Windows Server 2003 Windows Server 2008 Windows Server 2008 R2 To view the documentation from Sta...

Страница 13: ...ist of User s Guides appears choose the guide you want to read Macintosh 1 a Turn on your Macintosh Insert the Brother CD ROM into your CD ROM drive The following window will appear b Double click the User s Guides icon c Select your model and language if needed d Click User s Guides If the country screen appears choose your country e After the list of User s Guides appears choose the Guide you wa...

Страница 14: ...can view and download these Guides from the Brother Solutions Center at http solutions brother com Click Manuals on your model s page to download the documentation Web Connect Guide 1 This Guide provides useful information about accessing Internet services from the Brother machine as well as downloading images printing data and uploading files directly to Internet services AirPrint Guide 1 This Gu...

Страница 15: ...reativeCenter To return to the top menu click Back or if you have finished click Exit Accessing Brother Support Macintosh 1 You can find all the contacts you will need such as web support Brother Solutions Center on the CD ROM Double click the Brother Support icon The following screen will appear To download and install Presto PageManager click Presto PageManager MFC J870DW To download and install...

Страница 16: ...s Guide show the MFC J870DW 1 2 7 67 5 mm Touchscreen LCD Liquid Crystal Display This is a Touchscreen LCD You can access the menus and options by pressing them as they are displayed on this screen You can adjust the control panel angle to read the Touchscreen more easily Hold the edge of the control panel to avoid accidentally pressing any of the Touchscreen options 1 ...

Страница 17: ...s set to WLAN MFC J650DW The WiFi light is on when WLAN Enable is set to On 4 Power On Off Press to turn on the machine Press and hold down to turn off the machine The Touchscreen LCD will show Shutting Down and will stay on for a few seconds before turning off If you have connected an external telephone or TAD it is always available If you turn off the machine using it will still periodically cle...

Страница 18: ... press For more information see Software and Network User s Guide 7 Wireless Status A four level indicator on the Ready mode screen shows the current wireless signal strength if you are using a wireless connection If you see at the top of the screen you can easily configure the wireless settings by pressing it For more information see Quick Setup Guide 8 Settings Lets you access the main settings ...

Страница 19: ...Faxes in memory You can see how many received faxes are in the memory 1 Press Print to print the faxes 1 MFC J870DW When Fax Preview is set to Off 12 New Fax es MFC J870DW When Fax Preview is set to On you can see how many new faxes you have received and stored in the memory Press View to see your faxes on the Touchscreen 13 Warning icon The warning icon appears when there is an error or maintenan...

Страница 20: ...ss to change the Paper Size setting if needed 4 Receive Mode See the current Receive Mode Fax Fax Only Fax Tel External TAD Manual NOTE For Australia Singapore and Hong Kong When the Distinctive Ring feature is turned on the Touchscreen shows D R For details Distinctive Ring on page 49 and 54 for your relevant country For New Zealand When the FaxAbility feature is turned on the Touchscreen shows D...

Страница 21: ... the power cord or turning on the machine Doing this may cause an error The following steps show how to change a setting in the machine In this example the Receive Mode setting is changed from Fax Only to Fax Tel a Press Settings b Press All Settings c Press a or b to display Fax d Press Fax e Press a or b to display Setup Receive f Press Setup Receive g Press a or b to display Receive Mode h Pres...

Страница 22: ...asily You can add a maximum of 12 Shortcuts Adding Copy Shortcuts 1 The following settings can be included in a Copy Shortcut Quality Paper Type Paper Size Enlarge Reduce Density Stack Sort Page Layout 2 sided Copy Advanced Settings a Press Shortcuts b Press where you have not added a Shortcut c Press a or b to display Copy d Press Copy e Read the information on the Touchscreen and then confirm it...

Страница 23: ...ber If the Shortcut is to be used for broadcasting press Options and choose Broadcasting in step h before entering the fax number in step f You can enter up to 20 fax numbers if the Shortcut is for broadcasting The fax numbers can be entered in any combination of Group numbers from the Address Book and individual fax numbers from the Address Book or entered manually See Advanced User s Guide Broad...

Страница 24: ...Press OK to confirm USB is chosen as the PC Name Go to step m When the machine is connected to a network Press a or b to display the PC Name and then press it Press OK to confirm the PC Name you have chosen Go to step m h Press Options i Press a or b to display the available settings and then press the setting you want to change or store j Press a or b to display the available options for the sett...

Страница 25: ... service g Press your account If the account needs a PIN enter the PIN for the account using the keyboard on the Touchscreen Press OK h Choose the function you want to use NOTE The functions that can be set vary depending on the chosen service i Read and confirm the displayed list of functions you have chosen and then press OK j Enter a name for the Shortcut using the keyboard on the Touchscreen F...

Страница 26: ... edit c Press and hold the Shortcut until the options appear NOTE You can also press Edit Delete and then press the Shortcut you want d Press Edit Shortcut Name e To edit the name hold down to delete the current name and then enter a new name using the keyboard on the Touchscreen For help entering letters see Entering Text on page 179 Press OK f Press Deleting Shortcuts 1 You can delete a Shortcut...

Страница 27: ... press the Touchscreen or Touchpanel or if you make a mistake or after you send or receive a fax You can choose from a range of sound volume levels a Press Settings b Press All Settings c Press a or b to display General Setup d Press General Setup e Press a or b to display Volume f Press Volume g Press Beep h Press a or b to display Low Med High or Off and then press the option you want to set i P...

Страница 28: ...ase or to increase the speaker volume level Each press changes the volume to the next setting e Press Hook Touchscreen LCD 1 Setting the backlight brightness 1 If you are having difficulty reading the Touchscreen LCD try changing the brightness setting a Press Settings b Press All Settings c Press a or b to display General Setup d Press General Setup e Press a or b to display LCD Settings f Press ...

Страница 29: ...re information about paper size weight and thickness see Choosing the right print media on page 30 a Pull the paper tray completely out of the machine NOTE If the paper support flap 1 is open close it and then close the paper support 2 When you load a different paper size in the tray you will need to change the paper size setting in the menu of the machine at the same time See Paper Size on page 2...

Страница 30: ...press and hold the universal guide release button 1 as you slide out the front of the paper tray Only available for some countries d Fan the stack of paper well to avoid paper jams and misfeeds NOTE Always make sure that the paper is not curled or wrinkled e Gently put the paper into the paper tray print side down and top edge in first Check that the paper is flat in the tray IMPORTANT Be careful ...

Страница 31: ...d multiple pages f Gently adjust the paper width guides 1 to fit the paper Make sure the paper width guides lightly touch the sides of the paper g Close the output paper tray cover h Slowly push the paper tray completely into the machine i While holding the paper tray in place pull out the paper support 1 until it locks into place and then unfold the paper support flap 2 IMPORTANT DO NOT use the p...

Страница 32: ...orrectly That are of a baggy construction That have windows That are embossed have raised writing on them That have clasps or staples That are pre printed on the inside Occasionally you may experience paper feed problems caused by the thickness size and flap shape of the envelopes you are using Loading envelopes 2 a Before loading press the corners and sides of envelopes to make them as flat as po...

Страница 33: ...de 2 to fit the size of the envelopes If you have problems printing on envelopes with the flap on the short edge try the following 2 a Open the envelope flap b Put the envelope into the paper tray with the address side down and the flap positioned as shown in the illustration c Select Reverse Print Windows or Reverse page orientation Macintosh in the printer driver s dialog box and then adjust the...

Страница 34: ...ger and thumb and push the photo paper tray forward until it locks into the photo printing position 2 b Press and slide the paper width guides 1 and paper length guide 2 to fit the paper size c Put the photo paper into the photo paper tray and gently adjust the paper width guides to the paper Make sure the paper width guides touch the sides of the paper Check that the paper is flat in the tray NOT...

Страница 35: ...using your right index finger and thumb and pull the photo paper tray back until it locks into place 2 IMPORTANT If you do not return the photo paper tray to the Normal printing position after printing photos you will get a No Paper Fed error when you use cut sheet paper Photo paper tray in the normal printing position Photo paper tray in the photo printing position 1 2 ...

Страница 36: ... The machine can print in the shaded areas of cut sheet paper when the Borderless print feature is available and turned on See Software and Network User s Guide NOTE The Borderless print feature is not available for envelopes and 2 sided printing Cut Sheet Paper Envelopes Top 1 Left 2 Bottom 3 Right 4 Cut Sheet 3 mm 3 mm 3 mm 3 mm Envelopes 22 mm 3 mm 22 mm 3 mm 1 3 2 4 1 3 4 2 ...

Страница 37: ...n you use transparencies or glossy paper remove each sheet at once to prevent smudging or paper jams Paper Size 2 You can use the following sizes of paper for printing copies A4 A5 Photo 10 15 cm Letter and Legal 1 and three sizes for printing faxes A4 Letter and Legal 1 When you change the size of paper you load in the machine you will need to change the paper size setting at the same time so you...

Страница 38: ...once to prevent smudging or paper jams Avoid touching the printed surface of the paper immediately after printing the surface may not be completely dry and may stain your fingers Recommended print media 2 To get the best print quality we suggest using the Brother paper in the table If Brother paper is not available in your country we recommend testing various papers before purchasing large quantit...

Страница 39: ...l may cause jams to occur Extremely shiny or highly textured paper Paper that cannot be arranged uniformly when stacked Short grain paper Paper capacity of the output paper tray cover 2 Up to 50 sheets of 80 gsm A4 paper Transparencies and photo paper must be picked up from the output paper tray cover one page at a time to avoid smudging 1 1 ...

Страница 40: ...n Yes JIS B5 1 182 257 mm 7 2 10 1 in Yes A5 148 210 mm 5 8 8 3 in Yes Yes A6 105 148 mm 4 1 5 8 in Yes Cards Photo 10 15 cm 4 6 in Yes Yes Yes Photo L 89 127 mm 3 1 2 5 in Yes Photo 2L 13 18 cm 5 7 in Yes Yes Index Card 127 203 mm 5 8 in Yes Envelopes C5 Envelope 162 229 mm 6 4 9 in Yes DL Envelope 110 220 mm 4 3 8 7 in Yes Com 10 105 241 mm 4 1 8 9 1 2 in Yes Monarch 98 191 mm 3 7 8 7 1 2 in Yes...

Страница 41: ...71 260 gsm paper is especially designed for Brother inkjet machines Paper Type Weight Thickness No of sheets Cut Sheet Plain Paper 64 to 120 gsm 0 08 to 0 15 mm 100 1 Inkjet Paper 64 to 200 gsm 0 08 to 0 25 mm 20 Glossy Paper Up to 220 gsm Up to 0 25 mm 20 2 3 Cards Photo Card Up to 220 gsm Up to 0 25 mm 20 2 3 Index Card Up to 120 gsm Up to 0 15 mm 30 Envelopes 80 to 95 gsm Up to 0 52 mm 10 Trans...

Страница 42: ...is feeding DO NOT use paper that is curled wrinkled folded ripped stapled paper clipped glued or taped DO NOT use cardboard newspaper or fabric with the ADF Instead use the scanner glass Make sure documents written with ink or modified with correction fluid are completely dry a Unfold the ADF Document Support 1 b Fan the pages well c Adjust the paper guides 1 to fit the width of your documents d P...

Страница 43: ... to fax copy or scan single pages or pages of a book Document Sizes Supported 3 How to load documents 3 NOTE To use the scanner glass the ADF must be empty a Lift the document cover b Using the document guidelines on the left and top place the document face down in the upper left corner of the scanner glass 1 document cover c Close the document cover IMPORTANT If you are scanning a book or thick d...

Страница 44: ...tings in the application you are using The figures show the unscannable areas 1 The unscannable area is 1 mm when you use the ADF Usage Document Size Top 1 Bottom 3 Left 2 Right 4 Fax A4 3 mm 3 mm 1 Letter 4 mm Legal Copy All paper sizes 3 mm 3 mm Scan 1 mm 1 mm 1 3 2 4 ...

Страница 45: ...e the ADF If you send a mono fax from the ADF when the memory is full it will be sent in real time You can use the scanner glass to fax pages of a book one at a time The documents can be up to A4 or Letter size Since you can only scan one page at a time it is easier to use the ADF if you are sending a multiple page document b MFC J650DW Press Fax MFC J870DW Do one of the following When Fax Preview...

Страница 46: ... Transmission Cancelling Waiting Jobs Polled Transmit d Enter the fax number Using the dial pad Using Address Book Address Book Using Call History Outgoing Call Caller ID history NOTE MFC J870DW You can preview a fax message before sending it by setting Preview to On See How to preview an outgoing fax MFC J870DW on page 38 e Press Fax Start Faxing from the ADF 4 The machine starts scanning the doc...

Страница 47: ...A4 g Press OK h Enter the fax number i Press Fax Start NOTE You can save the setting you use most often by setting it as the default setting See Advanced User s Guide Setting your changes as a new default This setting is only available for sending documents from the scanner glass Colour fax transmission 4 Your machine can send a colour fax to machines that support this feature Colour faxes cannot ...

Страница 48: ...then Sending Faxes c Press Options d Press a or b to display Preview e Press Preview f Press On g Press OK h Enter the fax number using the dial pad or Address Book i Press Fax Start The machine starts scanning the document and the outgoing fax appears on the Touchscreen When the fax is displayed press the Touchscreen to perform the following operations j Press Start NOTE To send a colour fax do n...

Страница 49: ...ng Off Image Prints a report if your fax is unsuccessful due to a transmission error A portion of the fax s first page appears on the report a Press Settings b Press All Settings c Press a or b to display Fax d Press Fax e Press a or b to display Report Setting f Press Report Setting g Press Transmission h Press a or b to display On On Image Off or Off Image and then press the option you want to s...

Страница 50: ...e follow the instructions a Press Settings b Press All Settings c Press a or b to display Fax d Press Fax e Press a or b to display Setup Receive f Press Setup Receive g Press a or b to display Receive Mode Receiving a fax 5 Do you want to use the telephone features of your machine if available an external telephone or external telephone answering device connected on the same line as the machine Y...

Страница 51: ...feature is set to Off See Turning off Distinctive Ring on page 50 and 54 for your relevant country For New Zealand If you cannot change the Receive Mode make sure the FaxAbility feature is set to Off See How to Turn FaxAbility OFF or ON on page 52 i Press a or b to display Fax Only Fax Tel External TAD or Manual and then press the option you want j Press ...

Страница 52: ...our machine If you use Fax Tel mode see F T Ring Time Fax Tel mode only on page 43 and Ring Delay on page 43 Manual 5 To receive a fax in Manual mode lift the handset of an external telephone or press Hook When you hear fax tones short repeating beeps press Fax Start and choose Receive You can also use the Fax Detect feature to receive faxes by lifting a handset on the same line as the machine See...

Страница 53: ...en somebody calls your machine you and your caller will hear the normal telephone ring The number of rings is set by the ring delay setting If the call is a fax then your machine will receive it However if it is a voice call then the machine will sound the F T Ring a fast double ring for the time you have set in the F T Ring Time setting If you hear the F T Ring it means that you have a voice call...

Страница 54: ...tart then press Receive to receive the fax If you answered at an extension or external telephone press l 5 1 l 9 1 for New Zealand See Operation from external and extension telephones on page 59 NOTE If this feature is set to On but your machine does not connect a fax call when you lift an extension or external telephone handset press the remote activation code l 5 1 l 9 1 for New Zealand If you s...

Страница 55: ...arding and PC Fax Receiving operations even if you have set Backup Print to On Using Fax Preview 5 When you receive a fax you will see a pop up message on the Touchscreen For example New Fax es 01 View a Press View The Touchscreen will display the fax list NOTE The fax list includes the old faxes and the new fax The new fax is indicated by a blue mark next to the fax If you want to see a fax that ...

Страница 56: ...o step g Press Print From Displayed to print from the displayed page to the last page Go to step g f Do one of the following To delete the fax press Yes To keep the fax in the memory press No g Press Description Enlarge the fax Reduce the fax or Scroll vertically or Scroll horizontally Rotate the fax clockwise Delete the fax Press Yes to confirm Go back to the previous page Go to the next page Go ...

Страница 57: ...s press a or b to display Delete All New Faxes Press Delete All New Faxes To delete all old faxes press a or b to display Delete All Old Faxes Press Delete All Old Faxes e Press Yes to confirm f Press Turning off Fax Preview 5 a Press Settings b Press Fax Preview c Press Off d Press Yes to confirm e If there are faxes stored in the memory do one of the following If you do not want to print the sto...

Страница 58: ... you are finished with the call the machine will return to the Pulse dialling service Fax Tel mode 6 When the machine is in Fax Tel mode it will use the F T Ring fast double ring to alert you to pick up a voice call If you are at an external telephone lift the handset of the external telephone and then press Pickup to answer If you are at an extension telephone you ll need to lift the handset duri...

Страница 59: ...ng is set to on How does your telephone company s Distinctive Ring service work 6 Using Distinctive Ring service of your telephone company is the most efficient way to receive both fax and telephone calls on the same line When the voice call comes in all phones extension and external and the fax machine will ring to alert you to pick it up If a fax call comes in the fax machine will answer automat...

Страница 60: ...eous g Press Distinctive h Press Off i Press NOTE If you turn off Distinctive Ring the machine will stay in Manual receive mode You will need to set the Receive Mode again Choose the Receive Mode on page 40 Caller ID 6 Caller ID is a telephone service that allows the subscriber to see a display of the caller s phone number or name as the telephone rings It is a fast way to screen your calls You ca...

Страница 61: ... Time Phone Number Caller ID name and type of Call Comment if available See Advanced User s Guide How to print a report Telephone Service for New Zealand 6 FaxAbility 6 FaxAbility is a service offered by Telecom that allows you to have an additional number on one phone line with its own distinctive ring pattern This way when you get an incoming call you can identify the number being called by its ...

Страница 62: ...de to the other mode while the FaxAbility is set to on When FaxAbility is on the LCD will show D R as the Receive Mode How to Turn FaxAbility OFF or ON 6 The FaxAbility function is designed to accommodate the FaxAbility service provided by Telecom To change the setting repeat steps a j Step h is where you can choose either On or Off Call Waiting beeps caused by incoming calls on your main number c...

Страница 63: ... calls Businesses that provide mail order services money lending services or provide confidential information can protect themselves from false orders or acceptance of false identification At Home Residential customers can protect themselves from unwanted calls How Does the Caller ID Work 6 The Caller ID Appears on the Display When Your Telephone Rings 6 As your telephone rings the display shows y...

Страница 64: ...inctive Ring 6 Very Important After you have set the Distinctive Ring feature to on the receive mode is set to Manual automatically Unless you have a TAD or Voice Mail set up on the Distinctive Ring number Manual mode means you must answer all the calls yourself You cannot change the receive mode to another mode while the Distinctive Ring is set to on When Distinctive Ring is on the LCD will show ...

Страница 65: ...y means the caller has intentionally blocked transmission of information NOTE You can print a list of Caller ID information received by your machine See Advanced User s Guide How to print a report Caller ID service varies with different carriers Call your local phone company to determine the kind of service available in your area Voice over Internet Protocol VoIP 6 VoIP is a type of phone system t...

Страница 66: ...xternal TAD telephone answering device 6 You may choose to connect an external answering device However when you have an external TAD on the same telephone line as the machine the TAD answers all calls and the machine listens for fax calling CNG tones If it hears them the machine takes over the call and receives the fax If it does not hear CNG tones the machine lets the TAD continue playing your o...

Страница 67: ...of the machine MFC J870DW Carefully guide the telephone line cord from the LINE socket into the cable channel and out the back of the machine Remove the protective cap 1 from the right side of the machine and insert it into 2 so that it is not lost Carefully guide the telephone line cord from the EXT socket into the cable channel and out the right side of the machine c Lift the scanner cover to re...

Страница 68: ...rother recommends that all our machines be connected to a discreet dedicated line Although a particular PABX may appear to work with a particular model of fax machine we cannot guarantee that the unit will operate correctly While it is often relatively simple to connect a fax machine to a PABX Private Automatic Branch Exchange we suggest that you contact the company that installed your telephone s...

Страница 69: ...eceive the fax If the machine answers a voice call and fast double rings for you to take over use the Remote Deactivation Code 5 1 9 1 for New Zealand to take the call at an extension telephone See F T Ring Time Fax Tel mode only on page 43 If you answer a call and no one is on the line 6 Assume you are receiving a manual fax Press l 5 1 l 9 1 for New Zealand and wait for the chirp or until the To...

Страница 70: ...kup Changing the remote codes 6 If you want to use Remote Activation you have to turn on the remote codes The preset Remote Activation Code is l 5 1 l 9 1 for New Zealand The preset Remote Deactivation Code is 5 1 9 1 for New Zealand If you want to you can replace them with your own codes a Press Settings b Press All Settings c Press a or b to display Fax d Press Fax e Press a or b to display Setu...

Страница 71: ...alling from the Address Book 7 a Load your document b Press Fax c Press Address Book d Do one of the following Press a or b to display the number you want to dial Press and then enter the first letter of the name and press OK Press the name you want to dial If the name has two numbers go to step e If the name has one number go to step f e Press the number you want to dial f To send a fax press App...

Страница 72: ...busy press Hook before performing step c above Redial will change to Pause when you enter a fax number Additional Dialling Operations 7 Outgoing Call history 7 The last 30 numbers you sent a fax to will be stored in the outgoing call history You can choose one of these numbers to fax to add to the Address Book or delete from the history a Press Fax b Press Call History c Press Outgoing Call d Pres...

Страница 73: ...laces information about the first call NOTE If you are not a Caller ID subscriber you can still view call dates from the Caller ID history and delete entries from the list a Press Fax b Press Call History c Press Caller ID history d Press the number or the name you want e Do one of the following To send a fax press Apply Press Fax Start If you want to store the number press Edit and then press Add...

Страница 74: ...ess Name g Enter the name using the keyboard on the Touchscreen up to 16 characters Press OK For help entering letters see Entering Text on page 179 h Press Address 1 i Enter the first fax or telephone number using the keyboard on the Touchscreen up to 20 digits Press OK NOTE Be sure to include the area code when entering a fax or telephone number Depending on the country the Caller ID names and h...

Страница 75: ... Enter the new name up to 16 characters using the keyboard on the Touchscreen For help entering letters see Entering Text on page 179 Press OK If you want to change the first fax or telephone number press Address 1 Enter the new fax or telephone number up to 20 digits using the keyboard on the Touchscreen Press OK If you want to change the second fax or telephone number press Address 2 Enter the n...

Страница 76: ... on page 33 b Press Copy The Touchscreen shows 1 No of Copies You can enter the number of copies in the following ways Press or on the Touchscreen as shown above Use the dial pad on the Touchpanel Press the number of copies on the Touchscreen Enter the number of copies using the keyboard on the Touchscreen Press OK c If you want more than one copy enter the number up to 99 d Press Mono Start or Co...

Страница 77: ...n1 ID Stack Sort Density 2 sided Copy Ink Save Mode MFC J870DW Thin Paper Copy MFC J870DW Book Copy MFC J870DW Watermark Copy MFC J870DW Remove Background Colour Set New Default Factory Reset NOTE If you want to sort copies use the ADF Paper Type 8 If you are copying on a special type of paper set the machine for the type of paper you are using to get the best print quality a Load your document b ...

Страница 78: ...1 paper a Load your document b Press Copy c Enter the number of copies you want d Press Options e Press a or b to display Paper Size f Press Paper Size g Press a or b to display A4 A5 10x15cm Letter or Legal 1 and then press the option you want to set h If you do not want to change further settings press OK i Press Mono Start or Colour Start 1 Only available for some countries ...

Страница 79: ...r computer to access a memory card or USB Flash drive that is inserted in the front of the machine See Software and Network User s Guide Using a memory card or USB Flash drive 9 Your Brother machine has media drives slots for use with the following popular digital camera media Memory Stick Duo Memory Stick PRO Duo SD Memory Card SDHC Memory Card SDXC Memory Card MultiMedia Card MultiMedia Card plu...

Страница 80: ...ra that uses the USB mass storage as standard Any other USB devices are not supported 2 Memory card slot Slot Compatible memory cards Upper slot Memory Stick Duo Memory Stick PRO Duo Memory Stick Micro Adapter required Lower slot SD Memory Card SDHC Memory Card SDXC Memory Card MultiMedia Card MultiMedia Card plus miniSD Adapter required miniSDHC Adapter required microSD Adapter required microSDHC...

Страница 81: ...an one media card in the machine at the same time Doing this may cause damage to the machine DO NOT unplug the power cord or remove the memory card or USB Flash drive from the media drive slot or USB direct interface while the machine is reading or writing to the memory card or USB Flash drive You will lose your data or damage the card The machine can only read one device at a time ...

Страница 82: ...an image go to step g If you want to print all photos press Print All Press Yes to confirm Go to step j g Press d or c to display the photo you want to print and then press it h Enter the number of copies you want either by entering the number of copies or by pressing or Press OK i Repeat steps g and h until you have chosen all the photos you want to print j Press OK k Read and confirm the display...

Страница 83: ...ur documents may be stored in PDF PDF or JPEG JPG file formats The factory setting is Colour 200 dpi and the default format is PDF The machine creates file names based on the current date See Quick Setup Guide For example the fifth image scanned on July 1 2013 would be named 01071305 PDF You can change the colour and resolution a Load your document b Open the media slot cover c Put the memory card...

Страница 84: ...nd Colour removes the base colour of documents to make the scanned data more recognisable h The file name is set automatically However you can create a name of your choice using the keyboard on the Touchscreen Press File Name and then enter the file name You can only change the first 6 digits of the file name Press OK i Press OK NOTE If you want to save the settings as a shortcut press Save as Sho...

Страница 85: ...pplication choose the Print command c Choose the name of your machine in the Print dialog box and click Properties or Preferences depending on the application you are using d Choose the settings you want to change in the Properties dialog box Commonly used settings include Media Type Print Quality Paper Size Orientation Colour Greyscale Ink Save Mode Scaling 2 sided Booklet e Click OK f Click Prin...

Страница 86: ...machine is on a network configure it with a TCP IP address Install the scanner drivers from the CD ROM See Quick Setup Guide Install MFL Pro Suite Configure the machine with a TCP IP address if network scanning does not work See Software and Network User s Guide How to scan to a computer 11 ...

Страница 87: ...ific applications a Load your document See How to load documents on page 32 b Windows XP Windows Vista and Windows 7 Open ControlCenter4 by clicking Start All Programs Brother MFC XXXX where XXXX is your model name ControlCenter4 The ControlCenter4 application will open Windows 8 Click Brother Utilities and then click the drop down list and select your model name if not already selected Click SCAN...

Страница 88: ... Choose PDF pdf from the File Type drop down list 2 You can enter the file name you want to use for the document 3 You can save the file to the default folder or choose your preferred folder by clicking the Browse button 4 You can choose a scanning resolution from the Resolution drop down list 5 You can choose the document size from the Document Size drop down list f Click OK 1 2 4 5 3 ...

Страница 89: ...How to scan to a computer 79 11 g Click File h Press Scan The machine starts the scanning process The folder where the scanned data is saved will open automatically ...

Страница 90: ...C XXXX where XXXX is your model name ControlCenter4 The ControlCenter4 application will open Windows 8 Click Brother Utilities and then click the drop down list and select your model name if not already selected Click SCAN in the left navigation bar and then click ControlCenter4 The ControlCenter4 application will open b Make sure the machine you want to use is selected from the Model drop down li...

Страница 91: ...t 2 You can enter the file name you want to use for the document 3 You can save the file to the default folder or choose your preferred folder by clicking the Browse button 4 You can choose a scanning resolution from the Resolution drop down list 5 You can choose the document size from the Document Size drop down list f Click OK 1 2 4 5 3 ...

Страница 92: ...s go to step j If you want to change the default settings go to step f f Press Options g Press Set with Touch Panel Press On h Choose the settings for Scan Type Resolution File Type Scan Size and Remove Background Colour as required i Press OK j Press Start The machine starts the scanning process NOTE The following scan modes are available to OCR to File to Image to Media to E mail WS Scan 1 Web S...

Страница 93: ...d Devices Scanning with NFC Near Field Communication 12 If your Android device supports the NFC function you can scan photos and documents to your device by touching it to the NFC logo on the lower left of the front of the machine You must download and install Brother iPrint Scan to your Android device to use this function For more information see Mobile Print Scan Guide for Brother iPrint Scan Fo...

Страница 94: ...a and printing from a computer see Print from a computer Windows on page 84 and also see Software and Network User s Guide Print from a computer Windows 13 Your Brother machine can print on printable media including CD R RW DVD R RW and Blu ray Disc from a computer using the NewSoft CD Labeler application This section briefly introduces the steps for Windows For Macintosh see Software and Network ...

Страница 95: ...operties The printer driver window appears e Choose your settings for the following options on the Basic tab Media Type Choose Printable Disc Print Quality Choose Normal or Slow Drying Paper Size Choose 12 cm Disc 120 mm Copies Choose the number of copies you want Change other settings as desired Click OK f Continue your operation according to the on screen instructions For more information see So...

Страница 96: ...there is over 10 cm of free space behind the machine 1 10 cm e Firmly place a printable disc on the Disc Tray NOTE Make sure the disc is placed onto the Disc Tray with the print side face up Make sure there is no dirt on the Disc Tray f Insert the Disc Tray into the Disc Guide and line up the triangular marks 2 1 1 ...

Страница 97: ... tray in it i Close the document cover IMPORTANT If the printing area shifts and the Disc Tray or the transparent area near the centre of the disc gets printed on immediately wipe the ink off those areas Always close the Disc Guide and store the Disc Tray in the document cover after printing If you do not the Disc Tray may become warped or bent and cause a malfunction when used ...

Страница 98: ...rtridge there will be a small amount of ink left in the ink cartridge It is necessary to keep some ink in the ink cartridge to prevent air from drying out and damaging the print head assembly CAUTION If ink gets in your eyes wash it out with water at once and call a doctor if you are concerned IMPORTANT Brother multifunction machines are designed to work with ink of a particular specification and ...

Страница 99: ...idge bag for the colour indicated on the Touchscreen and then take out the ink cartridge d Turn the green release lever on the orange protective packing 1 counterclockwise until it releases the vacuum seal Then remove the orange protective packing as shown IMPORTANT DO NOT touch the cartridge in the area indicated 2 this can prevent the machine from detecting the cartridge 1 2 1 2 ...

Страница 100: ...ectly Remove the ink cartridge and reinstall it slowly and firmly until the cartridge lever lifts IMPORTANT DO NOT take out ink cartridges if you do not need to replace them If you do so it may reduce the ink quantity and the machine will not know the quantity of ink left in the cartridge DO NOT touch the cartridge insertion slots If you do so the ink may stain your skin DO NOT shake the ink cartr...

Страница 101: ...oistened with a non flammable glass cleaner NOTE In addition to cleaning the glass strip with a non flammable glass cleaner run your finger tip over the glass strip to see if you can feel anything on it If you feel dirt or debris clean the glass strip again concentrating on that area You may need to repeat the cleaning process three or four times To test make a copy after each cleaning attempt 2 1...

Страница 102: ...rint head When cleaning is finished the machine will go back to the Ready mode NOTE If you clean the print head at least five times and the print has not improved try installing a new Brother Original Innobella ink cartridge for each problem colour Try cleaning the print head again up to five more times If the print has not improved contact Brother customer service or your local Brother dealer You...

Страница 103: ...head at least five times and the print has not improved try installing a new Original Brother Brand replacement ink cartridge for each problem colour Try cleaning the print head again up to five more times If the print has not improved contact Brother customer service or your local Brother dealer IMPORTANT DO NOT touch the print head Touching the print head may cause permanent damage and may void ...

Страница 104: ...n add the date and time to each fax you send by setting your Station ID a Press Settings b Press All Settings c Press a or b to display Initial Setup d Press Initial Setup e Press a or b to display Date Time f Press Date Time g Press Date h Enter the last two digits of the year on the Touchscreen and then press OK i Enter the two digits for the month on the Touchscreen and then press OK j Enter th...

Страница 105: ...e 12h Clock in step l enter the time in 12 hour format using the keyboard on the Touchscreen and then press AM or PM Press OK If you chose 24h Clock in step l enter the time in 24 hour format using the keyboard on the Touchscreen Press OK For example enter 19 45 for 7 45 PM o Press ...

Страница 106: ...n go to the suggested page Paper handling and Printing problems Printing Difficulties on page 129 Print Quality Difficulties on page 131 Paper Handling Difficulties on page 132 Printing Received Faxes on page 134 Telephone and Fax problems Telephone Line or Connections on page 134 Handling Incoming Calls on page 137 Receiving Faxes on page 135 Sending Faxes on page 136 Copying problems Copying Dif...

Страница 107: ...g problems Scanning Difficulties on page 137 PhotoCapture Center Difficulties on page 138 Software and Network problems Software Difficulties on page 138 Network Difficulties on page 138 Difficulties when entering data on page 139 ...

Страница 108: ...e following way Printing If you choose Greyscale in the Advanced tab of the printer driver you can use the machine as a monochrome printer 2 sided printing is not available when this message appears Copying If the paper type is set to Plain Paper you can make copies in monochrome 2 sided copying is not available when this message appears Faxing If the paper type is set to Plain Paper or Inkjet Pap...

Страница 109: ...n the memory If a sending machine has a colour fax the machine s handshake will ask that the fax be sent as monochrome Replace the ink cartridges See Replacing the ink cartridges on page 88 Check for a Printable Disc MFC J870DW The disc cannot be printed on Remove the disc and place a printable disc on the Disc Tray Insert the Disc Tray into the Disc Guide and line up the triangular marks Press Re...

Страница 110: ...s RestartPrinting Disc Tray hit at back of machine MFC J870DW There is not enough space behind the machine for the Disc Tray to feed The Disc Tray was ejected from the front of the machine Remove the Disc Tray from the Disc Guide See Disc Tray is jammed at the front of the machine on page 127 The Disc Tray is stuck inside the back of the machine Make sure there is enough space behind the machine L...

Страница 111: ... following Remove any dirt from the scanner glass Before scanning choose the type of the document disc or paper While scanning close the scanner cover Place only one sheet on the scanner glass Make sure the document is placed correctly on the scanner glass High Temperature The room temperature is too high After lowering the room temperature allow the machine to cool down to room temperature Try ag...

Страница 112: ...se of non Brother supplies may not be covered under the stated product warranty The ink absorber box or flushing box will need to be replaced Contact Brother Customer Service or your local Brother Authorised Service Centre to have your machine serviced Other reasons for cleaning are 1 After a paper jam has been cleared the machine automatically cleans itself before the next received fax is printed...

Страница 113: ...ntains less than 999 files Delete unused files and try again The memory card or USB Flash drive you are using does not have enough free space to scan the documents Press Delete unused files from your memory card or USB Flash drive to make some free space and then try again No Caller ID There is no incoming call history You did not receive calls or you have not subscribed to the Caller ID service f...

Страница 114: ...p rollers Clean the paper pick up rollers See Advanced User s Guide Cleaning the paper pick up rollers The Jam Clear Cover is not closed correctly Make sure the Jam Clear Cover is closed evenly at both ends MFC J650DW Printer jam or paper jam MFC J650DW on page 114 MFC J870DW Printer jam or paper jam MFC J870DW on page 120 The paper is jammed in the machine Remove the jammed paper by following the...

Страница 115: ...e machine s memory is full If a fax sending or copy operation is in process Press Quit or Close and wait until the other operations that are in progress finish and then try again Press Send Now to send the pages scanned so far Press Partial Print to copy the pages scanned so far Clear the data in the memory To gain extra memory you can turn off Memory Receive See Advanced User s Guide Turning off ...

Страница 116: ...et to the correct paper size DO NOT extend the paper tray when you load A5 or smaller size paper The extendable tray is only available for some countries If there is a repeat paper jam a small piece of paper may be stuck in the machine Make sure paper is not still jammed in the machine by following the steps in each section below MFC J650DW Additional paper jam clear operations on page 117 MFC J87...

Страница 117: ...h guide is set to the correct paper size DO NOT extend the paper tray when you load A5 or smaller size paper The extendable tray is only available for some countries If there is a repeat paper jam a small piece of paper may be stuck in the machine Make sure paper is not still jammed in the machine by following the steps in each section below MFC J650DW Additional paper jam clear operations on page...

Страница 118: ...llowing the steps in each section below MFC J650DW Additional paper jam clear operations on page 117 MFC J870DW Additional paper jam clear operations on page 124 Paper dust has accumulated on the surface of the paper pick up rollers Clean the paper pick up rollers See Advanced User s Guide Cleaning the paper pick up rollers Touchscreen Init Failed The Touchscreen was pressed before the power on in...

Страница 119: ...urned off for approximately 24 hours without losing faxes stored in the memory See Transferring your faxes or Fax Journal report on page 111 Unusable Device Disconnect device from front connector turn machine off then on A broken device has been connected to the USB direct interface Unplug the device from the USB direct interface then press to turn the machine off and then on again Unusable Device...

Страница 120: ... on page 27 2 Make sure you loaded the paper in a Portrait position by setting the paper guides at the indicators for your paper size See Loading paper and other print media on page 19 3 After you have checked the paper size and the paper position press OK on the Touchscreen If you are printing from your computer make sure the paper size you choose in the printer driver matches the size of paper i...

Страница 121: ...ick Setup Guide Enter personal information Station ID a Press to temporarily interrupt the error b Press Settings c Press All Settings d Press a or b to display Service e Press Service f Press Data Transfer g Press Fax Transfer h Do one of the following If the Touchscreen shows No Data there are no faxes left in the machine s memory Press Close and then press Enter the fax number to which faxes wi...

Страница 122: ...x transfer mode See Quick Setup Guide Enter personal information Station ID a Press to temporarily interrupt the error b Press Settings c Press All Settings d Press a or b to display Service e Press Service f Press Data Transfer g Press Report Transfer h Enter the fax number to which the Fax Journal report will be forwarded i Press Fax Start Document jam B Documents can jam in the ADF unit if they...

Страница 123: ...nt cover c Pull the jammed document out to the left 1 document cover d Close the document cover e Press Removing small documents jammed in the ADF B a Lift the document cover b Insert a piece of stiff paper such as cardstock into the ADF to push any small paper scraps through 1 document cover c Close the document cover d Press 1 1 ...

Страница 124: ...the machine from the power source you can transfer your faxes that are stored in the memory to your PC or another fax machine so you will not lose any important messages See Transferring your faxes or Fax Journal report on page 111 b Pull the paper tray 1 completely out of the machine c Pull the two green levers inside the machine towards you to remove the jammed paper If the Touchscreen shows Pap...

Страница 125: ... Flap for any pieces of paper With the tray removed do one of the following If the Touchscreen shows Paper Jam Front go to step j If the Touchscreen shows Paper Jam Front Rear go to step g g Open the Jam Clear Cover 1 at the back of the machine h Pull the jammed paper out of the machine i Close the Jam Clear Cover Make sure the cover is closed correctly 1 ...

Страница 126: ...mage to the machine If the paper is jammed under the print head unplug the machine from the power source and then move the print head to take out the paper If the print head is in the right corner as shown in the illustration you cannot move it Re connect the power cord Hold down until the print head moves to the centre Then unplug the machine from the power source and take out the paper If ink ge...

Страница 127: ...l it locks in the open position and then unfold the paper support flap Make sure you pull out the paper support until it locks into place IMPORTANT DO NOT use the paper support flap for Legal size paper Only available for some countries o Re connect the power cord NOTE If there is a repeat paper jam a small piece of paper may be stuck in the machine See Additional paper jam clear operations on pag...

Страница 128: ...he jammed paper d Place both hands under the plastic tabs on both sides of the machine to lift the scanner cover into the open position e Prepare one sheet of thick A4 or letter sized paper such as glossy paper and insert it deep into the machine as shown in the illustration ...

Страница 129: ...e damage to the machine g Pull the thick paper out of the machine h Lift the scanner cover 1 to release the lock Gently push the scanner cover support down 2 and close the scanner cover 3 using both hands CAUTION Be careful not to pinch your fingers when the scanner cover closes i Put the paper tray firmly back in the machine j Re connect the power cord 1 2 3 1 ...

Страница 130: ...machine from the electrical socket b Pull the paper tray 1 completely out of the machine c Push and pull down the Disc Guide 1 Pull the Disc Guide towards you to open it 2 If the Touchscreen shows Paper Jam Rear go to step g d Pull out the jammed paper 1 e Lift the Jam Clear Flap and remove the jammed paper 1 2 1 1 ...

Страница 131: ...r With the tray removed do one of the following If the Touchscreen shows Paper Jam Front go to step j If the Touchscreen shows Paper Jam Front Rear go to step g g Open the Jam Clear Cover 1 at the back of the machine h Pull the jammed paper out of the machine i Close the Jam Clear Cover Make sure the cover is closed completely 1 ...

Страница 132: ...mage to the machine If the paper is jammed under the print head unplug the machine from the power source and then move the print head to take out the paper If the print head is in the right corner as shown in the illustration you cannot move it Re connect the power cord Hold down until the print head moves to the centre Then unplug the machine from the power source and take out the paper If ink ge...

Страница 133: ...over closes o While holding the paper tray in place pull out the paper support until it locks in the open position and then unfold the paper support flap Make sure you pull out the paper support until it locks into place IMPORTANT DO NOT use the paper support flap for Legal size paper Only available for some countries p Re connect the power cord NOTE If there is a repeat paper jam a small piece of...

Страница 134: ...r and remove the Disc Tray c Close the document cover d Pull the paper tray 1 completely out of the machine e Push and pull down the Disc Guide 1 Pull the Disc Guide towards you to open it 2 f Place both hands under the plastic tabs on both sides of the machine to lift the scanner cover into the open position 1 2 1 ...

Страница 135: ...shown in the illustration h If the Disc Tray is pushing any jammed paper out remove the paper IMPORTANT DO NOT touch the encoder strip 1 Doing this may cause damage to the machine i Push the Disc Tray forward from the inside of the machine as shown in the illustration and remove the Disc Tray 1 ...

Страница 136: ...se the scanner cover 3 using both hands CAUTION Be careful not to pinch your fingers when the scanner cover closes k Close the Disc Guide l Put the paper tray firmly back in the machine m Open the document cover and store the Disc tray in it n Close the document cover o Re connect the power cord 3 3 1 2 ...

Страница 137: ...ectrical socket b Remove the Disc Tray from the Disc Guide c Close the Disc Guide d Re connect the power cord Disc Tray is jammed at the back of the machine B If the Touchscreen shows Disc Jam Rear follow these steps a Unplug the machine from the electrical socket b Make sure there is enough space behind the machine for removing the Disc Tray c Place both hands under the plastic tabs on both sides...

Страница 138: ...e back of the machine f Lift the scanner cover 1 to release the lock Gently push the scanner cover support down 2 and close the scanner cover 3 using both hands CAUTION Be careful not to pinch your fingers when the scanner cover closes g Close the Disc Guide h Re connect the power cord 3 3 1 2 ...

Страница 139: ...ct this option to enable the printer Windows Vista and Windows Server 2008 Click Control Panel Hardware and Sound Printers Right click Brother MFC XXXX Printer where XXXX is your model name If the printer is offline it will show Use Printer Online Select this option to enable the printer Windows 7 and Windows Server 2008 R2 Click Devices and Printers Right click Brother MFC XXXX Printer where XXXX...

Страница 140: ...age Adjust the top and bottom margins in your document to allow for this See Unprintable area on page 26 Cannot perform Page Layout printing Check that the paper size setting in the application and in the printer driver are the same Print speed is too slow Try changing the printer driver setting The highest resolution needs longer data processing sending and printing time Try the other quality set...

Страница 141: ...her Original Innobella ink Try using the recommended types of paper See Acceptable paper and other print media on page 28 To prolong print head life provide the best ink cartridge economy and maintain print quality we do not recommend frequently unplugging the machine and or leaving the machine unplugged for extended periods of time We recommend using to power down the machine Using allows minimal...

Страница 142: ...indows Check Reverse Order in the Basic tab of the printer driver The printouts are wrinkled Windows In the printer driver Advanced tab click Colour Settings and uncheck Bi Directional Printing Macintosh In the printer driver choose Print Settings click Advanced choose Other Print Options and uncheck Bi Directional Printing Make sure you are using Brother Original Innobella ink Paper Handling Diff...

Страница 143: ...t to the correct paper size Do not extend the paper tray when you load A5 or smaller size paper The extendable tray is only available for some countries Paper jam reoccurs If there is a repeat paper jam a small piece of paper may be stuck in the machine Make sure paper is not still jammed in the machine by following the steps in each section below MFC J650DW Additional paper jam clear operations o...

Страница 144: ...ncoming fax Received colour fax prints only in monochrome Replace the colour ink cartridges that have reached the end of their life and then ask the other person to send the colour fax again See Replacing the ink cartridges on page 88 Telephone Line or Connections Difficulty Suggestions Dialling does not work No dial tone Check the line cord connections Not available in New Zealand Change the Tone...

Страница 145: ...hares a line with other telephones and you want it to automatically answer all incoming faxes select Fax Tel mode In Fax Tel mode your Brother machine will automatically receive faxes and produce a fast double ring to alert you to answer voice calls If you do not want your Brother machine to automatically answer incoming faxes select Manual mode In Manual mode you must answer every incoming call a...

Страница 146: ...ord is plugged into the telephone wall socket and the LINE socket inside the machine Print the Transmission Verification Report and check for an error See Advanced User s Guide Reports Ask the other party to check that the receiving machine has paper Poor fax send quality Try changing your resolution to Fine or S Fine Make a copy to check your machine s scanner operation If the copy quality is poo...

Страница 147: ... that send and receive information on a single shared line with custom features If avoiding a slight interruption is crucial to your business we recommend using a separate telephone line with no custom features Copying Difficulties Difficulty Suggestions Vertical black lines or streaks appear in copies Black vertical lines on copies are typically caused by dirt or correction fluid on the glass str...

Страница 148: ...er Make sure that you have correctly inserted the memory card or USB Flash drive Part of my photo is missing when printed Make sure that Borderless printing and Cropping are turned off See Advanced User s Guide Borderless printing and Cropping Software Difficulties Difficulty Suggestions Cannot install software or print Windows Run the Repair MFL Pro Suite program on the CD ROM This program will r...

Страница 149: ...formation below In Name Enter any description for example Brother PC FAX Rx In Port number Enter 54926 In Protocol UDP is selected Please refer to the instruction manual that came with your third party Security Firewall Software or contact the software manufacturer The Brother software cannot be installed Windows Allow network access to the following programs if your security software displays an ...

Страница 150: ...nterference on the telephone line you can change the compatibility setting which reduces the modem speed to minimise errors a Press Settings b Press All Settings c Press a or b to display Initial Setup d Press Initial Setup e Press a or b to display Compatibility f Press Compatibility g Press Normal or Basic for VoIP Basic for VoIP cuts the modem speed to 9 600 bps and turns off colour fax receivi...

Страница 151: ...lowing reset functions are available 1 Machine Reset You can reset all the machine s settings that you have changed such as the date and time and Ring Delay 2 Network You can reset the print server back to its default factory settings such as the password and IP address information 3 Address Book Fax Address Book Fax resets the following settings Address Book Address Book and Setup Groups Programm...

Страница 152: ... the machine B a Press Settings b Press All Settings c Press a or b to display Initial Setup d Press Initial Setup e Press a or b to display Reset f Press Reset g Press a or b to display the type of reset you want and then press it h Press Yes to confirm i Press Yes for 2 seconds to reboot the machine ...

Страница 153: ...ress the settings and options you want to set as they are displayed on the screen We have created step by step Settings Tables so you can see at a glance all the available choices for each setting and feature You can use these tables to quickly choose your preferred settings in the machine Settings and features tables C ...

Страница 154: ...onfigure your wireless network settings using the one button push method WPS w PIN Code You can easily configure your wireless network settings using WPS with a PIN See WLAN Status You can see the current wireless network status MAC Address You can see your machine s MAC address Fax Preview MFC J870DW On Off You can view faxes you receive on the Touchscreen 45 Paper Type Plain Paper Inkjet Paper B...

Страница 155: ...rint head 92 Ink Volume Lets you check the available ink volume See Paper Type Plain Paper Inkjet Paper Brother BP71 Other Glossy Transparency Sets the type of paper in the paper tray 27 Paper Size A4 A5 10x15cm Letter Legal Sets the size of paper in the paper tray Legal is only available for some countries 27 See Advanced User s Guide The default settings are shown in Bold with an asterisk Level1...

Страница 156: ...30Secs You can set how long the Touchscreen backlight stays on after the last finger press See Keyboard Settings QWERTY ABC You can choose the type of keyboard for the Touchscreen 12 Sleep Mode 1Min 2Mins 3Mins 5Mins 10Mins 30Mins 60Mins You can choose how long the machine will remain idle before it goes into Sleep mode See Shortcut Settings Shortcut Name Edit Shortcut Name You can change the shor...

Страница 157: ...ble ring time in Fax Tel mode 43 Fax Preview MFC J870DW On Off You can view faxes you receive on the Touchscreen 45 Fax Detect On Off Receives fax messages automatically when you answer a call and hear fax tones 44 Remote Codes Remote Codes Options On Off Act Code l51 l91 for New Zealand Deact Code 51 91 for New Zealand Allows you to answer all calls at an extension or external telephone and use c...

Страница 158: ...On Image Off Off Image Choose the initial setup for the Transmission Verification Report 39 Journal Period Journal Period Sets the interval for the automatic printing of the Fax Journal If you have chosen any other option than Off and Every 50 Faxes you can set the time for the chosen option If you have chosen Every 7 Days you can set the day of the week See Time Day Print Document Prints incoming...

Страница 159: ...s you to have a voice number and fax number on the one phone line 49 54 FaxAbility For New Zealand only On Off If you have FaxAbility from Telecom you can use this function to store the ringing pattern of your fax number And if you set in to On you should use the registered number only 51 Call Waiting For New Zealand only On Off If you have Call Waiting as well as FaxAbility set the Call Waiting t...

Страница 160: ...he WINS configuration mode WINS Server Primary 000 000 000 000 Secondary 000 000 000 000 Specifies the IP address of the primary or secondary WINS server DNS Server Primary 000 000 000 000 Secondary 000 000 000 000 Specifies the IP address of the primary or secondary DNS server APIPA On Off Automatically allocates the IP address from the link local address range See Software and Network User s Gui...

Страница 161: ...ss 000 255 000 255 000 255 000 255 Enter the IP address Subnet Mask 000 255 000 255 000 255 000 255 Enter the Subnet mask Gateway 000 255 000 255 000 255 000 255 Enter the Gateway address Node Name BRWXXXXXXXXXXXX Enter the Node name WINS Configuration Auto Static Chooses the WINS configuration mode Level1 Level2 Level3 Level4 Options Descriptions Page See Software and Network User s Guide Please ...

Страница 162: ...gs using the Brother CD ROM Setup Wizard You can manually configure your print server for a wireless network WPS AOSS You can easily configure your wireless network settings using the one button push method WPS w PIN Code You can easily configure your wireless network settings using WPS with a PIN Level1 Level2 Level3 Level4 Options Descriptions Page See Software and Network User s Guide Please go...

Страница 163: ...ork settings using the one button push method See PIN Code You can easily configure your Wi Fi Direct network settings using WPS with a PIN Manual You can manually configure your Wi Fi Direct network settings Group Owner On Off Sets your machine as the Group Owner Level1 Level2 Level3 Level4 Options Descriptions Page See Software and Network User s Guide Please go to the Brother Solutions Center t...

Страница 164: ...i Direct network status Signal Strong Medium Weak None You can see the current Wi Fi Direct network signal strength When your machine acts as Group Owner the Touchscreen always shows Strong I F Enable On Off Enable or Disable the Wi Fi Direct connection Level1 Level2 Level3 Level4 Options Descriptions Page See Software and Network User s Guide Please go to the Brother Solutions Center to download ...

Страница 165: ... MFC J870DW Wired LAN WLAN You can choose the network connection type See WLAN Enable MFC J650DW Off On Lets you use the wireless network connection Network Reset Yes No Restores all network settings back to the factory default Level1 Level2 Level3 Level4 Options Descriptions Page See Software and Network User s Guide Please go to the Brother Solutions Center to download the Wi Fi Direct Guide at ...

Страница 166: ...creen and in the headings of the faxes you send 94 Time Clock Type 12h Clock 24h Clock Daylight Save Forward Hour Backward Hour Manually changes for Daylight Savings Time See Station ID Fax Name Enter your name and fax number to appear on each page you fax See Tone Pulse Not available in New Zealand Tone Pulse Choose the dialling mode Dial Tone Detection No Detection Turns DialTone Detection on or...

Страница 167: ...the Station ID Address Book List Transmission Verification Report and Fax Journal back to the factory default settings All Settings Yes No Resets all the machine s settings back to the factory default Local Language depending on your country Choose the language you want to use Allows you to change the Touchscreen language for your country See Disc Print Alignment MFC J870DW You can align the print...

Страница 168: ...en you set up addresses 62 Hook Press before dialling when you want to listen to make sure a fax machine has answered and then press Fax Start See Address Book Search The search will be within the Address Book 61 Edit Add New Address Stores Address Book numbers so you can dial by pressing Address Book on the Touchscreen and Apply then Fax Start 64 Setup Groups You can set up Group numbers for Broa...

Страница 169: ...can send the same fax message to more than one fax number Add from Address book Search in Address book Preview MFC J870DW On Off You can preview a fax message before you send it 38 Colour Setting Mono Colour Sets whether faxes are sent in monochrome or colour 37 Delayed Fax Delayed Fax On Off Sets the time of day in 12 hour or 24 hour format that the delayed faxes will be sent See Set Time Batch T...

Страница 170: ... it add it to the Address Book or delete it Edit Options Add to Address Book Delete Address Book Search The search will be within the Address Book 61 Edit Add New Address You can store Address Book numbers so you can dial by pressing Address Book on the Touchscreen and Apply then Fax Start 64 Setup Groups You can set up Group numbers for Broadcasting See Change You can change Address Book numbers ...

Страница 171: ... received faxes 47 Print All Old Faxes Prints the old received faxes Delete All New Faxes Deletes the new received faxes 47 Delete All Old Faxes Deletes the old received faxes Address Book See Address Book in Fax When Fax Preview is Off on page 158 Call History See Call History in Fax When Fax Preview is Off on page 158 The default settings are shown in Bold with an asterisk Level1 Level2 Level3 O...

Страница 172: ...egal is only available for some countries 68 Enlarge Reduce 100 See Enlarge 198 10x15cm i A4 186 10x15cm i Letter 141 A5 i A4 You can choose the enlargement ratio for the next copy Reduce 97 Letter i A4 93 A4 i Letter 83 Legal i A4 69 A4 i A5 47 A4 i 10x15cm You can choose the reduction ratio for the next copy Fit to Page Your machine will adjust the size of the next copy to the paper size you set...

Страница 173: ...e 2 sided print settings Portrait Long Edge Flip Landscape Long Edge Flip Portrait Short Edge Flip Landscape Short Edge Flip Advanced Normal 2 sided 1 2 sided 2 Advanced Settings MFC J870DW Off Ink Save Mode Thin Paper Copy Book Copy Watermark Copy Remove Background Colour You can choose various copy settings Advanced Settings MFC J650DW Off Remove Background Colour You can choose Remove Backgroun...

Страница 174: ...ect Options For more information see the Options on page 167 Configure the detailed settings Save as Shortcut Saves the current settings as a shortcut to Image PC Select Options For more information see the Options on page 167 Configure the detailed settings Save as Shortcut Saves the current settings as a shortcut to Media when a memory card or USB Flash drive is inserted Options For more informa...

Страница 175: ...shortcut WS Scan Appears when you install a Web Services Scanner which is displayed in your computer s Windows Explorer Scan PC Select You can scan data by using the Web Services protocol Scan for E mail Scan for Fax Scan for Print Level1 Level2 Level3 Options Descriptions Page See Software and Network User s Guide See Advanced User s Guide The default settings are shown in Bold with an asterisk ...

Страница 176: ...th Touch Panel Scan Type Colour Black and White You can choose the scan type for your document Resolution 100 dpi 200 dpi 300 dpi 600 dpi You can choose the scan resolution for your document File Type Text HTML RTF You can choose the file format for your document Scan Size A4 A5 10x15cm Business Card 90x60mm Letter Legal You can choose the scan size for your document See Software and Network User ...

Страница 177: ...our document Resolution 100 dpi 200 dpi 300 dpi 600 dpi You can choose the scan resolution for your document File Type If you choose the Colour option in the Scan Type setting PDF JPEG If you choose the Mono option in the Scan Type setting PDF TIFF You can choose the file format for your document Scan Size A4 A5 10x15cm Business Card 90x60mm Letter Legal You can choose the scan size for your docum...

Страница 178: ...ng PDF TIFF You can choose the file format for your document Scan Size A4 A5 10x15cm Business Card 90x60mm Letter Legal You can choose the scan size for your document Scan Long Paper On Off You can scan a long document using the ADF File Name You can rename the file Auto Crop MFC J870DW On Off Scan multiple documents placed on the scanner glass to a memory card or USB Flash drive one at a time 73 ...

Страница 179: ...ion see the Print Settings on page 171 You can adjust your photos with the options 72 Print All You can print all photos in your memory card or USB Flash drive Enhance Photos MFC J870DW Enhance Auto Correct Print Settings For more information see the Print Settings on page 171 You can adjust your photos with these settings See Enhance Skin Enhance Scenery Remove Red Eye Night Scene Fill Light Whit...

Страница 180: ...Slide Show Show Each Photo for 3Secs 10Secs 30Secs 1Min 5Mins Sets the time each photo in the Slide Show is shown before the machine switches to the next photo Start The machine starts a Slide Show of your photos You can choose a photo during the Slide Show and change the print settings For more information see the Print Settings on page 171 Level1 Level2 Level3 Options Descriptions Page See Advan...

Страница 181: ...ose the paper size When A4 or Letter is chosen Print Size 8x10cm 9x13cm 10x15cm 13x18cm 15x20cm Max Size Choose the print size if you are using A4 or Letter size paper Auto Correct MFC J870DW Does not appear when DPOF Print is chosen View Photos and Slide Show only On Off The machine decides the appropriate effect for your photo Brightness Does not appear when Enhance is chosen Adjusts the brightn...

Страница 182: ...is feature off if you want to print whole images or prevent unwanted cropping Borderless On Off Expands the printable area to fit the edges of the paper Date Print Not available for DPOF printing On Off Prints the date on your photo Set New Default Yes No Saves your print settings as the default settings Factory Reset Yes No Restores all the settings back to the factory default Option1 Option2 Opt...

Страница 183: ...The default settings are shown in Bold with an asterisk Level1 Level2 Level3 Options Descriptions Page Print Quality Normal Photo Choose the print quality See Paper Type Plain Paper Inkjet Paper Brother BP71 Other Glossy Choose the paper type Paper Size 10x15cm 13x18cm A4 Letter Choose the paper size Photo Enhance MFC J870DW Off Auto Correct Remove Red Eye Auto Correct Remove Red Eye You can adjus...

Страница 184: ...k Picasa Web Albums Flickr Please go to the Brother Solutions Center to download the Web Connect Guide at http solutions brother com The default settings are shown in Bold with an asterisk Level1 Level2 Level3 Options Descriptions Page Add Shortcut Copy Quality For more information see Options in Copy on page 162 You can change the settings in the Copy Options 12 Paper Type Paper Size Enlarge Redu...

Страница 185: ... it Colour Setting Mono Colour Sets whether faxes are sent in monochrome or colour Real Time TX On Off You can send a fax without using the memory Overseas Mode On Off If you are having difficulty sending faxes overseas set this to On Glass Scan Size Letter A4 Adjust the scan area of the scanner glass to the size of the document Call History Outgoing Call You can choose a number from the Outgoing ...

Страница 186: ...can a monochrome or a colour document into your E mail application Web SkyDrive Lets you connect the Brother machine to an Internet service Web services may have been added and or service names may have been changed by the provider since this document was published 15 Box Google Drive Evernote Dropbox Facebook Picasa Web Albums Flickr This list appears when each Shortcut name is pressed for 2 seco...

Страница 187: ...clean the print head 92 Ink Volume Lets you check the available ink volume See See Advanced User s Guide The default settings are shown in Bold with an asterisk Level1 Level2 Level3 Options Descriptions Page Disc Copy from Disc You can print on printable media including CD R RW DVD R RW and Blu ray Disc See Copy from Photo Print from Card See Software and Network User s Guide The default settings ...

Страница 188: ...s using a PC WPS AOSS You can easily configure your wireless network settings using the one button push method WPS w PIN Code You can easily configure your wireless network settings using WPS with a PIN See See Quick Setup Guide See Software and Network User s Guide The default settings are shown in Bold with an asterisk Level1 Level2 Level3 Options Descriptions Page Photo See Photo on page 169 Sc...

Страница 189: ...hanging the keyboard setting on page 12 Inserting spaces C To enter a space press Space Or you can press c to move the cursor NOTE The characters that are available may differ depending on your country Making corrections C If you entered an incorrect character and want to change it press d to move the cursor to highlight the incorrect character and then press Enter the correct character You can al...

Страница 190: ...ition 2 0 5 Even when the machine is turned off it will automatically turn itself on periodically for print head maintenance and then turn itself off Specifications D Printer Type Inkjet Print Head Mono Colour Piezo with 210 nozzles 1 Piezo with 210 nozzles 3 Memory Capacity 128 MB LCD Liquid Crystal Display 2 7 in 67 5 mm TFT Colour Touchscreen LCD 1 and Touchpanel Power Source AC 220 to 240V 50 ...

Страница 191: ...ating Best Print Quality 10 to 35 C 20 to 33 C Humidity Operating Best Print Quality 20 to 80 without condensation 20 to 80 without condensation ADF automatic document feeder Up to 20 pages Paper 80 gsm A4 or Letter size Document Size ADF Width 148 mm to 215 9 mm ADF Length 148 mm to 355 6 mm Scanner Glass Width Max 215 9 mm Scanner Glass Length Max 297 mm 180 mm 410 mm 374 mm 519 mm ...

Страница 192: ...e 3 A4 Legal 4 Executive Letter JIS B5 4 A5 A6 Envelopes Com 10 DL C5 Monarch Photo 10 15 cm Photo 2L 13 18 cm and Index Card 127 203 mm Width 98 mm 215 9 mm Length 148 mm 355 6 mm For more details see Paper weight thickness and capacity on page 31 Maximum paper tray capacity Approx 100 sheets of 80 gsm plain paper Photo Paper Tray Paper type Plain Paper Inkjet Paper coated paper and Glossy Paper ...

Страница 193: ...08 mm A4 Scanner Glass 204 mm A4 Printing Width 204 mm A4 Greyscale Monochrome 8 bit 256 levels Colour 24 bit 8 bit per colour 256 levels Resolution Standard 203 98 dpi Mono 203 196 dpi Colour Fine 203 196 dpi Mono Colour Superfine 203 392 dpi Mono Photo 203 196 dpi Mono Address Book 100 names 2 numbers Groups Up to 6 Broadcasting 250 200 Address Book 50 Manual Dial Automatic Redial 3 times at 5 m...

Страница 194: ... paper Colour Monochrome Yes Yes Copy Width 204 mm 1 Multiple Copies Stacks Sorts up to 99 pages Enlarge Reduce 25 to 400 in increments of 1 Resolution Prints up to 1200 2400 dpi 2 sided Yes Paper type Plain paper Paper size A4 Letter A5 ...

Страница 195: ...iMedia Card mobile with Adapter 64 MB 1 GB SD Memory Card 16 MB 2 GB miniSD with Adapter 16 MB 2 GB microSD with Adapter 16 MB 2 GB SDHC Memory Card 4 GB 32 GB miniSDHC with Adapter 4 GB 32 GB microSDHC with Adapter 4 GB 32 GB SDXC Memory Card 48 GB 128 GB USB Flash drive 2 Resolution Up to 1200 6000 dpi File Extension Media Format DPOF ver 1 0 ver 1 1 Exif DCF up to ver 2 1 Image Format Photo Pri...

Страница 196: ...186 PictBridge D Compatibility Supports the Camera Imaging Products Association PictBridge standard CIPA DC 001 Visit http www cipa jp pictbridge for more information Interface USB direct interface ...

Страница 197: ... Windows Vista Windows 7 Windows 8 Mac OS X v10 6 8 10 7 x 10 8 x WIA Compliant Yes Windows XP 1 Windows Vista Windows 7 Windows 8 ICA Compliant Yes Mac OS X v10 6 8 10 7 x 10 8 x Colour Depth 30 bit colour Processing Input 24 bit colour Processing Output 256 levels per colour Greyscale 10 bit colour Processing Input 8 bit colour Processing Output 256 levels per colour Resolution Up to 19200 19200...

Страница 198: ...or detailed specifications visit http www brother com 5 Only available for some countries Resolution Up to 1200 6000 dpi Printing Width 3 204 mm 210 mm borderless 1 Borderless 2 A4 Letter A6 Photo 10 15 cm Photo L 89 127 mm Index Card 127 203 mm Photo 2L 13 18 cm 2 sided Paper type Plain paper Paper size A4 Letter A5 Executive JIS B5 5 Print Speed 4 ...

Страница 199: ...terface 2 Third party USB ports are not supported 3 See Network on page 190 See Software and Network User s Guide USB 1 2 A USB 2 0 interface cable that is no longer than 2 m LAN cable 3 MFC J870DW Ethernet UTP cable category 5 or greater Wireless LAN IEEE 802 11b g n Infrastructure Ad hoc Mode IEEE 802 11g n Wi Fi Direct MFC J870DW NFC MFC J870DW Yes ...

Страница 200: ...ther BRAdmin Light 2 Network Management software 1 See Computer requirements on page 191 2 Windows If you require more advanced printer management use the latest Brother BRAdmin Professional utility version that is available as a download from http solutions brother com Macintosh The latest Brother BRAdmin Light is available as a download from http solutions brother com Wireless Network Security S...

Страница 201: ... 2008 R2 Windows Server 2012 64bit x64 processor Macintosh Operating System Mac OS X v10 6 8 OS X v10 7 x OS X v10 8 x Printing PC Fax Send 3 Scanning Removable Disk USB or Memory card 5 Network Media Access LAN 5 Intel Processor 80 MB 550 MB Conditions 1 For WIA 1200 1200 resolution Brother Scanner Utility enables to enhance up to 19200 19200 dpi 2 Third party USB ports are not supported 3 PC Fax...

Страница 202: ...eld than standard cartridges 80 With all following ink cartridges you can print the specified number of pages For Australia and other Oceania countries For other countries Standard Yield Black LC131BK LC161BK Standard Yield Yellow LC131Y LC161Y Standard Yield Cyan LC131C LC161C Standard Yield Magenta LC131M LC161M For Australia and other Oceania countries For other countries High Yield Black LC133...

Страница 203: ...aper size 68 paper type 67 Shortcuts 12 using scanner glass 33 Cordless telephone 59 Custom telephone features on a single line 137 D Dialling a pause 64 Address Book 61 Caller ID history 63 manual 61 Outgoing Call 62 Disc tray 85 Distinctive Ring turning off 50 54 turning on 50 54 Document loading 32 33 E Envelopes 22 30 31 Error messages on Touchscreen 98 B W 1 sided Print Only 98 Cannot Detect ...

Страница 204: ...e Activation Code 59 60 Remote Deactivation Code 59 60 Ring Delay 43 G Greyscale 183 187 H Help Features tables 158 Settings tables 144 Touchscreen messages 143 I Ink cartridges ink dot counter 88 replacing 88 Innobella 192 J Jams document 112 paper 114 L LCD Liquid Crystal Display 6 143 Brightness 18 M Macintosh See Software and Network User s Guide Maintenance routine replacing ink cartridges 88...

Страница 205: ...e Presto PageManager application Print difficulties 129 paper jams 114 printable area 26 resolution 188 specifications 188 Printing on the disc 84 See Software and Network User s Guide R Receive Mode External TAD 40 Fax Only 40 Fax Tel 40 Manual 40 Redial Pause 62 Remote Setup See Software and Network User s Guide Resolution copy 184 fax 183 print 188 scan 187 Ring Delay setting 43 S Scan Shortcut...

Страница 206: ... you are having difficulty copying 137 document jam 112 entering data 139 incoming calls 137 Network 138 paper handling 132 PhotoCapture Center 138 print quality 131 printing 129 printing received faxes 134 receiving faxes 135 scanning 137 software 138 telephone line or connections 134 maintenance messages on Touchscreen 98 paper jam 114 U Unscannable area 34 V Volume setting beeper 17 ring 17 spe...

Страница 207: ...port Consultants are available 7 days a week by phone during the hours of 8 30am to 5pm Monday to Friday and 9am to 5pm Saturday and Sunday Outside of these hours you can find assistance from our Auto Attendant Self Help and our Website www brother co nz under Online Help Product Support Centre Australia Brother International Aust Pty Ltd Phone 02 8875 6000 Fax 02 9870 7223 Solutions Site http sol...

Страница 208: ... Visit us on the World Wide Web http www brother com These machines are approved for use in the country of purchase only Local Brother companies or their dealers will only support machines purchased in their own countries ...

Отзывы: