


My Design Center
19
b
Install “My Design Snap”.
■
Transferring an Image from a Smart
Device to the Machine
a
Connect the machine to your wireless
network.
*
Refer to "Specifying Wireless Network Connection
Settings" in the machine's Operation Manual
(Sewing).
b
Confirm that your smart device and your
machine are connected to the same
network.
c
Tap the icon on the smart device for “My
Design Snap” to start the app.
d
Follow the instructions that appear in the
app to connect the app to your machine.
*
Select the name that appears beside “Machine
name” in the settings screen on your machine.
e
Tap .
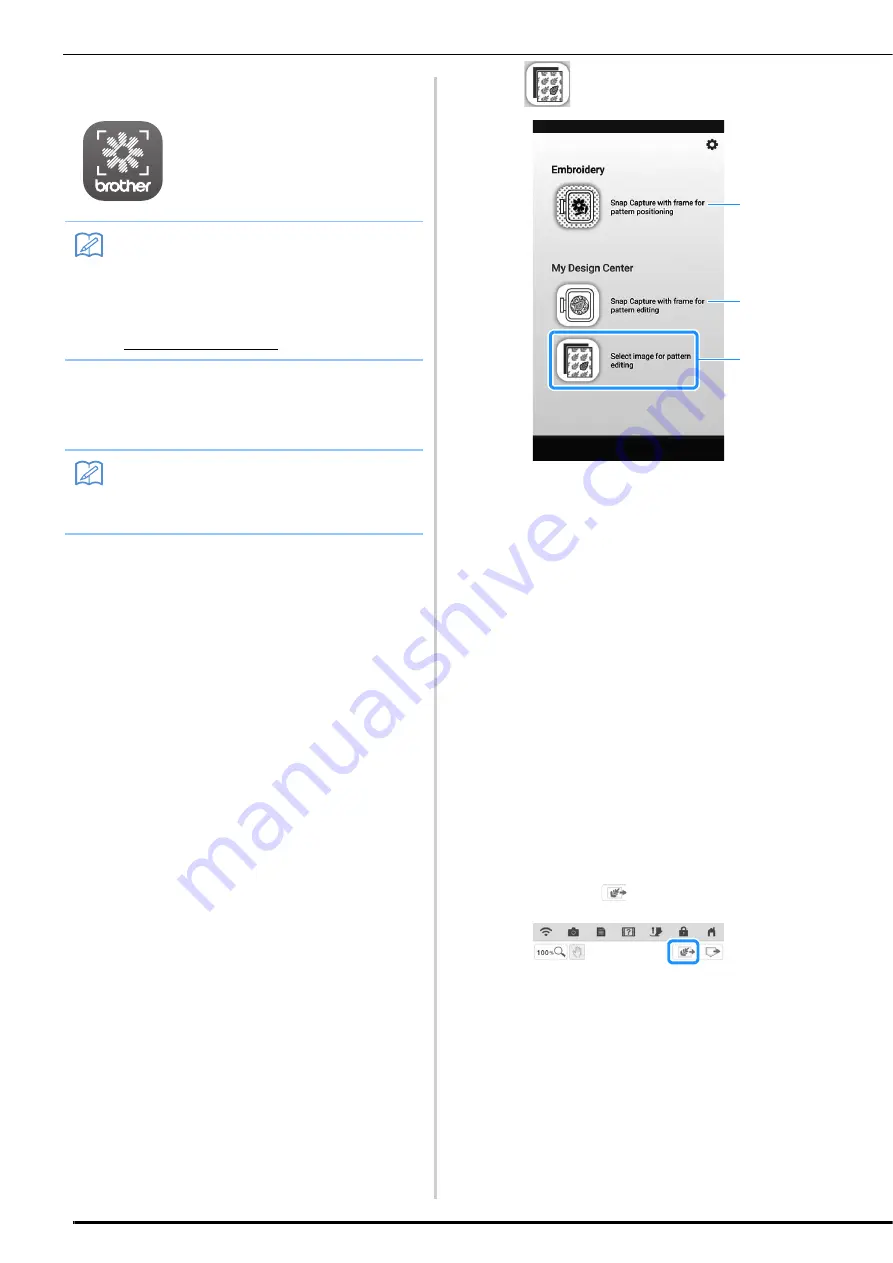
a
This icon is not available for your machine. It is for
machines that are not equipped with a camera.
Your machine will use the built-in camera to align
embroidery patterns. For details, refer to “Display
the Fabric While Aligning the Embroidering
Position” in the machine's Operation Manual
(Embroidery).
b
This icon is not available for your machine. It is for
machines that are not equipped with a camera.
Your machine will use the built-in camera to create
embroidery patterns in My Design Center. For
details, refer to “MY DESIGN CENTER WITH
SCAN” in the machine's Operation Manual
(Embroidery).
c
This icon allows you to transfer an image from the
smart device to the machine to create a design in
My Design Center.
f
Select the image, then select "Send to the
Machine" to transfer it from the smart
device to the machine.
You will receive confirmation in the app that the
image was successfully sent to My Design Center.
g
Start My Design Center on the machine,
and then press
.
My Design Snap
Memo
• To download and install the app, you can
also search for “My Design Snap” in Google
Play or the App Store.
• Visit the following web page for support
information on the app.
http://s.brother/cpdab/
Memo
• The app will be updated from time to time.
The following descriptions may differ from
the actual screens and operations.
a
b
c


