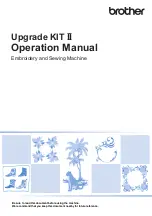


Embroidery
13
h
Position each part and embroider it
according to the on-screen instructions.
You will be prompted to align the starting point, rotate
the design, and to rehoop the quilt when necessary.
a
When embroidering the edge part
Use the move pattern keys to align the start point projected by
the projector with the end point of the previous pattern, and
then press
.
Rotate the pattern to align the corner of the projected segment
with the reference line on the quilt, and then press
.
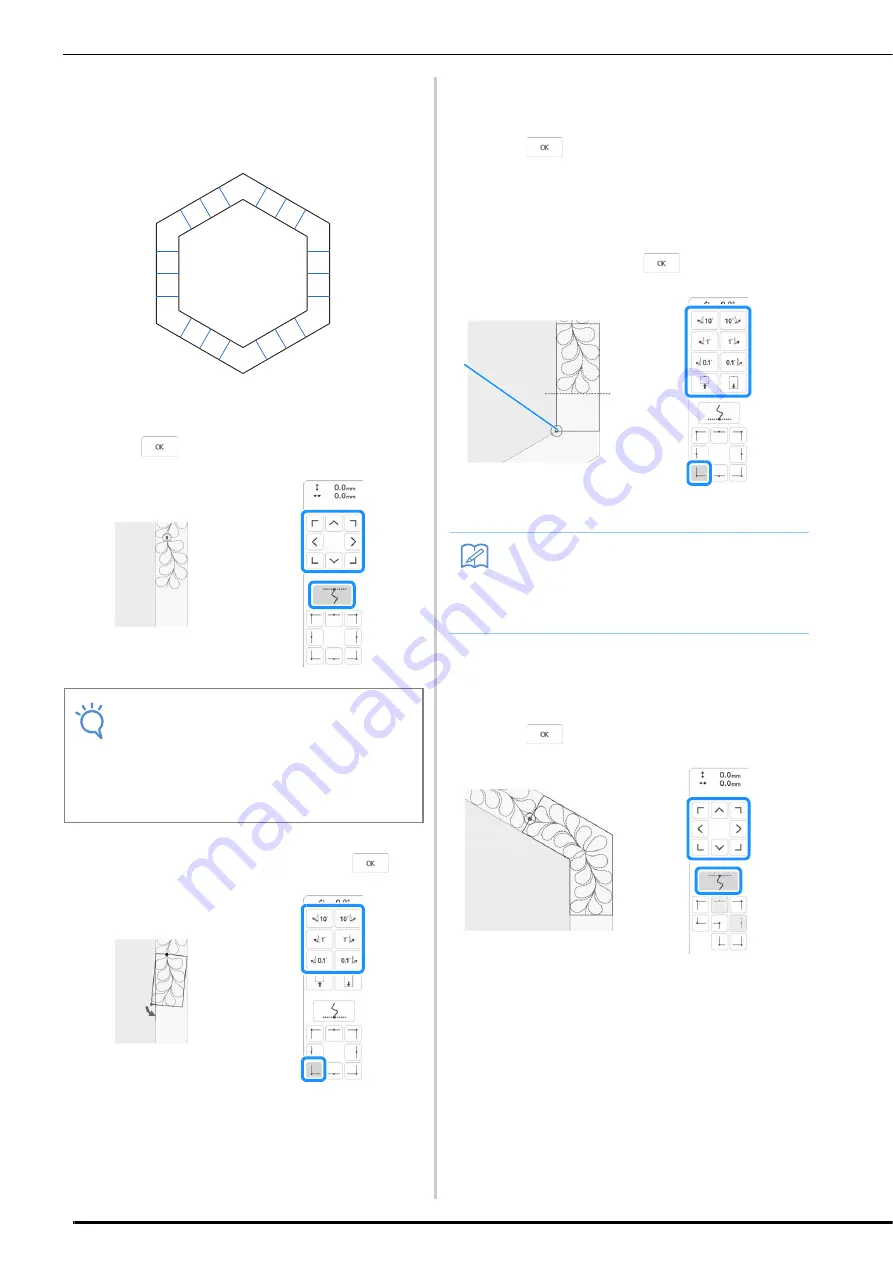
b
When embroidering the edge part immediately before a
corner
Use the move pattern keys to align the start point projected by
the projector with the end point of the previous pattern, and
then press
.
Then, align the lower-left point (inner corner of the next pattern
to be embroidered) with the lower-left corner of the reference
lines. If the pattern is not angled correctly, rotate it. If the length
of the pattern does not match, enlarge or reduce the pattern so
that the lower-left point of the segment is at the lower-left
corner of the reference lines on the quilt.
After making adjustments, press
.
a
Inner corner of next pattern to be embroidered
c
When embroidering the corner part
Rotate the quilt counterclockwise, rehoop it, and then attach the
embroidery frame to the machine.
Use the move pattern keys to align the start point projected by
the projector with the end point of the previous pattern, and
then press
.
Note
• For precise positioning of the start point,
rotate the handwheel toward you to check
the needle drop point. After checking the
needle position, be sure to use the needle
up/down key to return the needle to its
highest position.
b
c
a
b
c
c
a
a
d
a
c
b
a
b
b
a
c
Memo
• To maintain the overall shape of the
hexagon, it is important to carefully check
and adjust the length of the pattern that is
stitched immediately before the corner.
a


