background image

11

f

Embroider the next pattern. To continue 
embroidering a repeating pattern, repeat the 
procedure starting with “Removing the 
Border Embroidery Frame”
.

 CAUTION

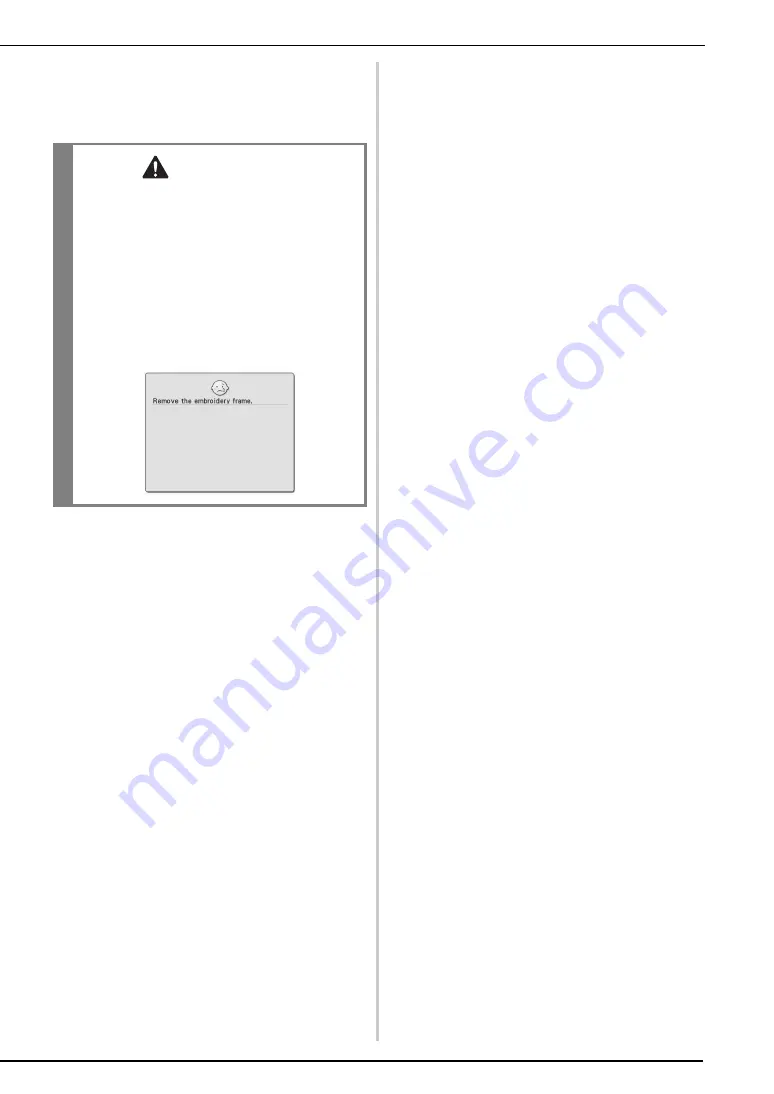
• If the sewing machine is turned off, then turned on 

again with the border embroidery frame attached 
or if you try to select a stitch from the Utility Stitch 
screen or the Character/Decorative Stitch screen 
while the border embroidery frame is attached, the 
following message appears. If the border 
embroidery frame is not fully removed from the 
embroidery unit at this time, the border embroidery 
frame may be hit by the presser foot when the 
carriage of the embroidery unit is moved. When the 
following message appears, fully remove the border 
embroidery frame.

Содержание Quattro 6000D

Страница 1: ...Upgrade KITI I I Operation Manual ...

Страница 2: ...osition Setting 13 Practice Connecting Three Patterns 14 CHANGING THE POSITION OF A STICKER 22 CONNECTING ROTATED PATTERNS 27 CHANGING THE REFERENCE EDGE AND REFERENCE POINT FOR CONNECTING THE NEXT PATTERN AFTER A PATTERN HAS BEEN EMBROIDERED 29 SLIDING THE POSITION OF THE PATTERN TO BE CONNECTED 32 Connecting Patterns to be Joined Along an Edge 33 TROUBLESHOOTING 36 Resume Feature 37 NEW FEATURES...

Страница 3: ...the embroidery frame holder New machine features and benefits are described in this guide NEW FEATURES A border embroidery frame 30 cm 10 cm approx 11 3 4 inches 4 inches is included allowing the fabric to easily be rehooped when embroidering repeated patterns Instead of using a thread mark the built in camera can be used to connect embroidery patterns Embroidery Edit Ten embroidery designs create...

Страница 4: ...an be embroidered Sample Projects Using the Border Embroidery Frame We recommend using the border embroidery frame when repeated patterns are embroidered at the edges of items such as curtains chair covers bed covers tablecloths and blankets CAUTION Do not leave the border embroidery frame within the reach of children otherwise injuries may result Note When the border embroidery frame is not being...

Страница 5: ...Of the 16 settings available there are 2 for border embroidery frames 30 cm 10 cm approx 11 3 4 inches 4 inches a Border embroidery frame embroidering area 30 cm 10 cm approx 11 3 4 inches 4 inches b Center mark c Press and select a pattern and then press d Use the border function to repeat the pattern a b Memo For details for the border function refer to Designing Repeated Patterns in chapter 6 o...

Страница 6: ...dd thread marks to character patterns Add thread marks to patterns that do not have a point of alignment such as rotated patterns or patterns that are spaced apart Patterns that can be aligned visually can be embroidered cleanly without the thread mark Memo Select the location where the thread mark is to be added according to the direction that the embroidery is repeated If the design direction is...

Страница 7: ...the lower frame press the left and right lock release buttons to unlock the upper frame a Lock release buttons d Lay the fabric between the upper and lower frames Note When embroidering the edges of the fabric affix stabilizer material larger than the fabric and then firmly secure the fabric and excess part of the stabilizer material within the border embroidery frame in the same way as when the n...

Страница 8: ...guide on the border embroidery frame with the right edge of the embroidery frame holder a Embroidery frame holder b Guide on border embroidery frame Memo The fabric can also be positioned in the border embroidery frame by aligning the edge of the fabric with the inner markings on the upper frame Note If there is excess fabric after the center of the embroidering area is aligned with the center of ...

Страница 9: ...attern a To check the embroidering area press b Thread the machine and then start embroidering When embroidering is finished the thread mark is sewn with the last thread color CAUTION If the frame securing lever is not lowered the pattern may not embroider correctly or the presser foot may strike the border embroidery frame and cause injuries a a Note When the border embroidery frame is used the e...

Страница 10: ...y frame to the embroidery unit and then press Note Before removing the border embroidery frame from the embroidery unit make sure that the embroidery unit carriage has moved to its initial position CAUTION If the thread has become tangled and the embroidery unit carriage does not move to its initial position even after the thread is cut turn off the machine manually gently move the carriage and th...

Страница 11: ...eedle position with the point of the thread mark a Needle position e After aligning the needle position for the beginning of embroidering remove the thread mark Note After turning the handwheel to check the needle position press the Needle Position button to raise the needle Note Remove the thread mark before starting to embroider Otherwise the thread mark stitching may be combined with the patter...

Страница 12: ... or if you try to select a stitch from the Utility Stitch screen or the Character Decorative Stitch screen while the border embroidery frame is attached the following message appears If the border embroidery frame is not fully removed from the embroidery unit at this time the border embroidery frame may be hit by the presser foot when the carriage of the embroidery unit is moved When the following...

Страница 13: ...ect patterns The small embroidery frame 2 cm 6 cm 1 inch 2 1 2 inches cannot be used with the camera function Connecting Patterns Two patterns can be connected by selecting the reference point and reference edge of each pattern so that they can be aligned using the camera When connecting patterns the reference edge of each pattern will be along a single straight line Example Reference edge Referen...

Страница 14: ...n 2 Remove presser foot and replace needle with a new embroidery needle standard size 75 11 or 90 14 3 Affix white sticker on needle dropping point area a White sticker 4 Press to initiate the calibration process For safety please make sure area around needle is clear prior to pressing Setting the needle drop point begins Note Be careful not to touch the LCD screen prior to Step c below This funct...

Страница 15: ...turn off the machine Practice Connecting Three Patterns In order to practice aligning pattern edges by using the camera we will connect three patterns as shown below A First pattern B Second pattern C Third pattern a Press in the Embroidery Edit screen select the pattern shown below and then press b Thread the machine with the upper thread and the bobbin thread Note When using the camera to connec...

Страница 16: ...nce edge and reference point of the selected pattern for connecting the next pattern Since in this example we will connect the center point of the bottom edge for the first pattern with the center point of the top edge for the next pattern select the center point of the bottom edge and then press To cancel the selection press a Reference edge and reference point of first pattern appears in the scr...

Страница 17: ...EPS2 EPS2 XF0763 001 from your Brother dealer If any other sticker is used the camera may not recognize it The 182 mm 257 mm 7 inches 10 inches embroidery positioning sticker sheet with strong adhesion is most appropriate for connecting patterns SAEPS2 EPS2 XF0763 001 If any other positioning sticker is used it may peel off If the sticker peels off the patterns cannot be connected Note Use new pos...

Страница 18: ...d the following message appears With the stickers remaining attached remove the frame and then press m While making sure that the positioning stickers do not peel off rehoop the fabric so that the next pattern and the centers of the large circles of the two stickers are within the embroidering area Check with the embroidery sheet After checking reattach the embroidery frame to the machine a Patter...

Страница 19: ...rs do not fit within the embroidering area use a larger embroidery frame If a larger embroidery frame cannot be used continue to step o and then refer to CHANGING THE POSITION OF A STICKER on page 22 to reposition the sticker If the sticker peels off during this procedure the patterns cannot be connected In that case restart the procedure from the beginning Note In this screen the reference edge a...

Страница 20: ... been correctly selected in step p press The message above also appears when the positioning sticker is too closely attached to the perimeters of the embroidering area In that case rehoop the fabric so that the stickers fit more within the embroidering area If the following message appears press and then rehoop the fabric so that the pattern and the centers of the large circles of the positioning ...

Страница 21: ...ng stickers do not peel off rehoop the fabric so that the next pattern and the centers of the large circles of the two stickers are within the embroidering area Check with the embroidery sheet After checking attach the embroidery frame to the machine a Pattern to be embroidered next b Centers of large circles for stickers c Embroidery sheet Note Before embroidering select the reference edge and re...

Страница 22: ...n with the second one and then press Since in this example we will connect the right point of the top edge for the third pattern with the bottom point of the right edge for the second pattern select the right point of the top edge and then press a Reference edge and reference point b Third pattern C c Second pattern B x Perform steps p and q y Lower the presser foot and then embroider the third pa...

Страница 23: ... inches to connect patterns as shown below A First pattern B Second pattern a Press frame patterns in the Embroidery Edit screen select the pattern shown below and then press b Thread the machine with the upper thread and the bobbin thread c Hoop fabric in the embroidery frame with a size of 10 cm 10 cm 4 inches 4 inches and then attach the frame to the embroidery machine d Press to display the se...

Страница 24: ...ttom point of the right edge a Reference edge and reference point g Lower the presser foot and then embroider the first pattern h When the following message appears press i Follow the machine s on screen instructions until the two stickers are detected For details refer to steps i through k in Practice Connecting Three Patterns on page 14 a ...

Страница 25: ...hine a Pattern to be embroidered next b Centers of large circles for stickers c Embroidery sheet l Select the second pattern and then continue to the sewing screen For this example select the same pattern as the first one m When the pattern connection setting screen screen for connecting the selected pattern to the previous one appears press To return to the embroidery edit screen press n Without ...

Страница 26: ...ters for the large circles of the two marks are within the embroidering area and then attach the embroidery frame to the machine a Pattern to be embroidered next b Centers of large circles for stickers c Embroidery sheet Note If an error message appears refer to page 19 to solve the problem Note If the stickers are re affixed within or near the area where the next pattern is to be embroidered the ...

Страница 27: ...rence point for connecting this pattern to the next one and then press For this example select the top point of the left edge and then press t Select the area containing one of the two stickers and then press u After the stickers have been detected press and then remove the stickers Note If an error message appears refer to page 19 to solve the problem ...

Страница 28: ...by rotating patterns The following procedure describes how to connect patterns that are rotated A First pattern B Second pattern a Select the pattern and then press The pattern editing screen appears b Press in the pattern editing screen c Rotate the pattern and then press ...

Страница 29: ...een screen for connecting the selected pattern to the previous one appears select the reference edge and reference point corresponding to those for the first pattern and then press a Reference edge and reference point j Continue with step p of Practice Connecting Three Patterns to finish connecting the patterns Note Be sure to rotate the pattern from the pattern editing screen The reference edge a...

Страница 30: ...e changed after a pattern has been embroidered A First pattern B Second pattern a Perform the procedure in Practice Connecting Three Patterns up to step n and then press in the pattern connection setting screen screen for connecting the pattern to the previous one b Select the new reference edge and reference point for connecting the pattern and then press To return to the previous screen press ...

Страница 31: ...ithin the red lines by using both hands to press down on each corner of the sticker and then press Affix the sticker with the large circle at the top as shown on the machine s screen f Using both hands affix the second embroidery positioning sticker within the red lines by pressing down on each corner of the positioning sticker onto the material and then touch g If the stickers have been successfu...

Страница 32: ...for connecting the selected pattern to the previous one appears select the reference edge and reference point and then press a Second pattern B b First pattern A i Continue with step p of Practice Connecting Three Patterns to finish connecting patterns b a ...

Страница 33: ...you want the pattern to be equally spaced when embroidered The vertical and horizontal shifts can be set up to 99 9 mm a Second pattern b First pattern a Second pattern b First pattern c Vertical distance 15 0 mm d Horizontal distance 40 0 mm Note The arrangement of patterns displayed in the screen may differ slightly from the actual embroidery Use a ruler to measure the vertical and horizontal sh...

Страница 34: ...along an edge Before connecting the patterns the basting function will be used to measure the distance that the pattern will be slid A First pattern B Second pattern Measuring the Distance That the Pattern Will Be Slid a Set Embroidery Basting Distance in the settings screen to 0 0 b Select the pattern whose slide distance is to be measured c Continue to the sewing screen and then press to select ...

Страница 35: ...eference edge and reference point for connecting this pattern to the next one a Reference edge and reference point of first pattern d Refer to steps g through m of Practice Connecting Three Patterns to embroider the first pattern and rehoop the fabric e Select the next pattern and then continue to the sewing screen f When the pattern connection setting screen screen for connecting the selected pat...

Страница 36: ...ractice Connecting Three Patterns to finish connecting the patterns Note After checking that the trial embroidery results are satisfactory sew the actual embroidery If you decide to change the distance that the pattern is slid after checking the trial embroidery change the settings selected in step g ...

Страница 37: ...roidering the third pattern Operation No 8 19 Issue When rehooping the fabric a sticker peels off the fabric Solution The patterns cannot be connected Restart the procedure from the beginning Operation No 8 11 19 22 Issue The next pattern to be embroidered and the centers of the large circles on the stickers do not fit within the embroidering area Solution1 Change the embroidery frame to a larger ...

Страница 38: ...Finish embroidering the first pattern A If the machine is turned off during any operation in this box the machine will return to A when it is turned on again È Start detecting positioning stickers 2 locations È Finish detecting positioning stickers B If the machine is turned off during any operation in this box the machine will return to B when it is turned on again È Rehoop the fabric È Select th...

Страница 39: ...nts in operation and screen displays have been incorporated making the machine easier to use For details refer to the following descriptions Displaying Patterns in The Embroidery Edit Screen Magnified By 200 In the Embroidery Edit screen the pattern can be magnified by 200 within the embroidery display area a Press changes to and the pattern is magnified by 200 b Check the displayed pattern Use to...

Страница 40: ...ge of the needle position displayed by the built in camera Press The image file will be saved to the USB media Note When thumbnail size setting has been changed the pattern selection screen will not immediately reflect the chosen size To view the patterns with the new thumbnail size return to the category selection screen and then select the pattern category again Note If two USB medias are insert...

Страница 41: ... grid can be displayed when the built in camera is used to display the needle position in the LCD a Press The grid appears To turn the grid off press Memo For details about displaying the Settings screen refer to Using the Machine Setting Mode Key in the machine s Operation Manual Note If 100 image files have already been saved on the USB media the following message appears In this case delete a f...

Страница 42: ...displayed in a language other than English Example Deutsch German screen When combining character patterns the stitching connecting patterns jump stitches are no longer displayed in the preview so that the patterns can be viewed more clearly Note Scanning cannot start from the center after an area has been selected To scan from the center press to close the window then display the window again but...

Страница 43: ...g returning to a page for example in the pattern selection screen the pages are scrolled through continuously from the last page directly to the first page or from the first page directly to the last page Memo Two rows of stitching are displayed even if was pressed Note The pages displayed after is pressed cannot be scrolled through continuously ...

Страница 44: ...dded The keys for these new functions are activated when the Upgrade Kit I is purchased and Certification has been completed on machine Background Image Display and Fabric Thickness Sensor are activated after Upgrade Kit I is installed and certified Note For details on Upgrade Kits visit our website www brother com or contact your authorized Brother dealer ...

Страница 45: ...44 New Patterns for Version 2 Character Decorative Stitch Embroidery Embroidery Edit ...

Страница 46: ...5 126 16 348 17 330 18 812 28 4 cm 9 5 cm 77 min 19 206 20 126 21 330 22 206 23 330 24 126 z No 03 XKIT3B03 pes 1 513 2 001 3 085 4 206 5 086 6 107 7 206 8 513 9 085 10 206 11 107 12 513 26 7 cm 9 3 cm 18 min 13 206 z No 06 XKIT3B06 pes 28 7 cm 9 4 cm 1 542 2 019 3 007 4 399 5 810 6 019 7 542 8 810 9 007 35 min COLOR CHANGE TABLE FOR THE EMBROIDERY PATTERNS ON THE CD ROM Memo These files can be op...

Страница 47: ... 7 534 8 509 9 614 10 612 11 202 12 085 13 807 14 612 15 085 16 086 17 807 18 534 19 509 20 515 21 534 22 202 23 807 24 614 29 2 cm 8 9 cm 55 min 25 807 26 085 27 612 28 614 29 202 30 807 z No 08 XKIT3B08 pes 1 348 2 209 3 323 4 206 5 209 6 348 7 209 8 323 9 206 10 209 11 348 12 323 21 6 cm 6 9 cm 18 min 13 209 No 07 XKIT3B07 pes 1 406 2 509 3 206 4 337 5 406 6 509 7 206 8 337 9 406 10 509 11 206 ...

Страница 48: ...English 111 001 ...

Отзывы: