background image

75

MAINTENANCE

MANTENIMIENTO

ENTRETIEN

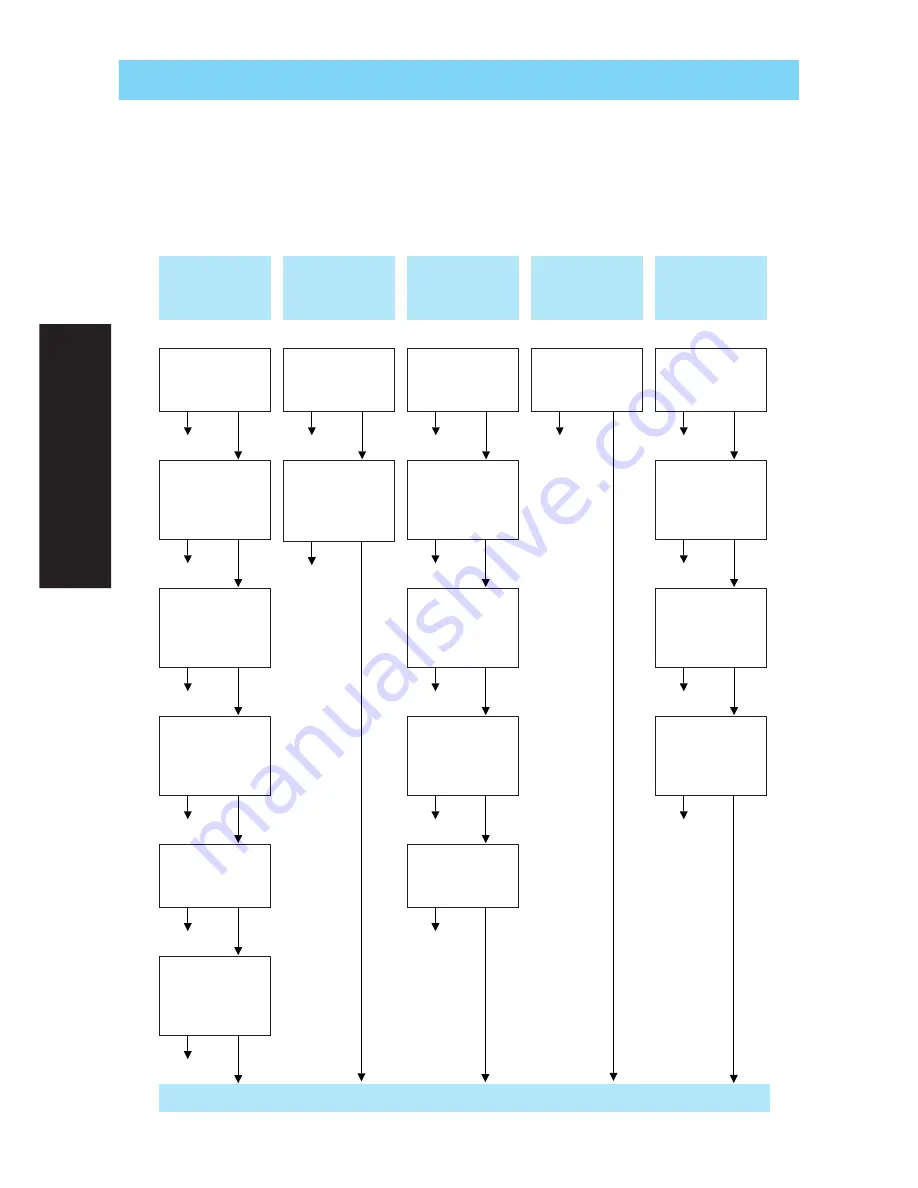
Liste de vérification en cas de défaillances

En cas de problème, consulter d’abord le chapitre voulu dans le présent manuel pour s’assurer de la bonne utilisation de la machine. Si le problème persiste,
la liste de vérification suivante peut vous aider à y remédier.
Si malgré cela, le problème persiste, veuillez vous mettre en contact avec le service technique agréé le plus proche.

Non

Page 34

Non

Page 70

Non

Page 10

Non

Page 24

La canette est mal

installée dans le

crochet de la navette.

Une aiguille inférieure

est utilisée.

Des peluches sont

accrochées à la plaque

à aiguille.

La combinaison

aiguille/fil/tissu n’est

pas correcte.

DES POINTS

SAUTENT

LA COUTURE

FAIT DES

BOUCLES

LE TISSU

FRONCE

CONTACTER LE CENTRE TECHNIQUE LE PLUS PROCHE

RUPTURE DU

FIL INFERIEUR

RUPTURE DU

FIL SUPERIEUR

Non

Page 26

Le fil supérieur n’est

pas bien enfilé.

Non

Page 24

Non

Page 10

Non

Page 32

Non

Page 32

Le fil inférieur est

emmêlé.

L’aiguille est mal

installée.

Mauvaise tension des

fils.

Le fil est trop tendu.

Non

Page 26

Le fil supérieur est

emmêlé.

Non

Page 26

L’enfilage est

mauvais.

Non

Page 32

Le fil supérieur est

trop tendu.

Non

Page 34

Non

Page 10

Le calibre de l’aiguille

est incorrect.

La combinaison

aiguille/fil/tissu est

incorrecte.

Non

Page 26

La bobine de fil est

mal installée.

Non

Page 10

L’aiguille est tordue
ou trop peu pointue.

Non

Page 34

La combinaison

aiguille/fil/tissu n’est

pas

correcte.

Non

Page 26

L’enfilage n’est pas

correct.

Содержание PS-3700

Страница 1: ......

Страница 2: ......

Страница 3: ...ios de ventilación de la máquina de coser y el pedal sin acumulacíon de povo Suciedad y restos de tejido 5 No introducir no insertar objetos en los orificios de ventilación 6 No usar al aire libre 7 No usar mientras se estén utilizando productos aerosoles spray o en lugares donde se esté administrando oxígeno 8 Para desconectar girar el interruptor hasta la posición del símbolo O que representa of...

Страница 4: ...ine si l un des orifices de ventilation est obstrué Veiller à ce que ces orifices et la commande au pied ne soient jamais encombrés de peluches poussières et morceaux de tissus 5 Ne jamais laisser tomber ou insérer des objets dans ces ouvertures 6 Ne pas utiliser la machine à l extérieur 7 Ne pas faire fonctionner la machine en cas d utilisation de produits aérosols vaporisateurs ou d administrati...

Страница 5: ...by inadvertent connection to the main supply IMPORTANT in the other countries If the available socket outlet is not suitable for the plug supplied with this equipment it should be cut off and an appropriate three pin plug fitted With alternative plugs an approved fuse must be fitted in the plug NOTE The plug severed from the main leads must be destroyed as a plug with bared flexible cords is hazar...

Страница 6: ...ámpara halógena u otros objetos candentes 2 Utilice sólo detergentes o jabones neutros para limpiar la carcasa Gasolina diluyentes y polvos de limpieza pueden dañar la carcasa y la máquina no los utilice nunca 3 No deje caer o golpee la máquina 4 Consulte siempre el manual de funcionamiento cuando tenga que reponer o instalar cualquier pieza como el pie prensatela o la aguja Así asegurará una adec...

Страница 7: ...oller 8 Checking the Needle 9 Replacing the Needle 9 Changing the Presser Foot 11 Flat Bed Attachment 11 VARIOUS CONTROLS 12 Pattern Selection Dial 12 Recommended Widths and Lengths for Stitches 13 Stitch Length Dial 16 Stitch Width Dial 17 Reverse Sewing Lever 17 Feed Dog Position Switch 18 Converting to Free arm Style 18 Wide table 19 THREADING THE MACHINE 21 Winding the Bobbin 21 Lower Threadin...

Страница 8: ...2 COMBINACIONES DE TEJIDO HILO AGUJA 33 PUNTADAS RECTAS Y ZIGZAG LEA ESTO POR FAVOR ANTES DE COSER 34 Puntadas rectas 36 Puntadas zigzag 37 PUNTADAS INCORPORADAS Puntadas invisibles 38 Puntada ondas 39 Puntada elástica 40 Puntada de acción doble 41 Puntada festón 42 Puntadas decorativas 43 Patchwork 44 Puntada por encima de la orilla 45 Puntada pluma 46 Triple puntada zigzag elástica 46 OJALES Y C...

Страница 9: ...des fils 32 COMBINAISONS TISSU FIL AIGUILLE 34 POINTS DROITS ET POINTS ZIGZAG A LIRE AVANT DE COMMENCER À COUDRE 34 Point droit 36 Point zigzag 37 POINTS INCLUS Point ourlet invisible 38 Point picot 39 Point élastique 40 Point renforcé 41 Feston 42 Points décoratifs 43 Patchwork Assemblage 44 Overlock élastique 45 Point plume 46 Triple point zigzag 46 COUTURE DE BOUTONNIERES ET DE BOUTONS Pour cou...

Страница 10: ...age 3 11 REVERSE SEWING LEVER Page 17 Push for stitching in the reverse direction A FEED DOG POSITION SWITCH Page 18 B PATTERN INDICATION WINDOW Page 12 Shows the stitch number selected C HOLE FOR VERTICAL SPOOL PIN Page 31 Used to hold a second spool of thread for twin needle sewing D HANDWHEEL E PATTERN SELECTION DIAL Page 12 Turn in either direction to select the desired stitch F MAIN POWER SEW...

Страница 11: ... BOUTONNIERES Page 52 I LEVIER DU PIED DE BICHE Page 26 J PEDALE DU RHEOSTAT Page 8 Sert à contrôler la vitesse de couture la mise en marche et l arrêt ELEMENTOS PRINCIPALES 1 DISPOSITIVO DE BOBINADO DE LA CANILLA Página 22 Hace bobina para la canilla que va a ser utilizada como hilo inferior 2 SELECTOR DE LARGO DE PUNTADA Página 12 16 Controla el largo de las puntadas 3 EJE DEL CARRETE Y PORTA CA...

Страница 12: ... Quilting Foot H Quilting guide Zigzag Presser Foot is on machine NOTE For U S A only Foot Controller Model KD 1902 Part Code XC7359 021 110 120V Area This foot controller can be used for Model PS 3700 Many of the above accessories are stored in the flat bed attach ment These accessories have been designed to help complete most sewing tasks 1 X59370 051 2 SA156 SFB XA5539 151 3 129583 021 4 X57521...

Страница 13: ...ne à coudre PS 3700 La plupart des accessoires susmentionnés sont rangés dans le plateau Ils ont été conçus pour vous permettre de réaliser la plupart des tâches de couture ACCESORIOS 1 Pata de cremalleras 1 pza 2 Canilla 3 pzas 3 Paquete de agujas 4 Aguja doble 1 pza 5 Prensatelas para ojales 1 pza 6 Prénsatela para puntada de realce 1 pza 7 Tope para carretes grande 1 pza 8 Tope para carretes pe...

Страница 14: ...sult in fire electric shock or damage to the machine Turn off the main power and remove the plug in the following circumstances When you are away from the machine After using the machine When the power fails during use When the machine does not operate correctly due to a bad connection or a disconnection During electrical storms CAUTION Do not use extension cords or multi plug adapters with many o...

Страница 15: ... cution Si le cordon ou la fiche est endommagée apportez la machine à votre détaillant autorisé pour la faire réparer avant de continuer à l utiliser Débranchez le cordon d alimentation si la machine n est pas utilisée pendant une longue période de temps Autrement il y aurait risque d incendie FUNCIONAMIENTO DE LA MÁQUINA DE COSER Conexión de los enchufes 1 Conecte la clavija del cordón de aliment...

Страница 16: ... the I mark 2 Turn OFF toward the O mark 1 2 Interruptor principal luz de cosido Este interruptor permite apagar y encender la máquina y la luz 1 Encender hacia la marca I 2 Apagar hacia la marca O Interrupteur principal de la lampe Cet interrupteur permet d allumer et d éteindre la machine ainsi que la lampe de couture 1 Allumer pousser vers la marque I 2 Eteindre pousser vers la marque O ...

Страница 17: ...ll run at a low speed When the pressure on the foot controller is increased the machine s speed will increase When pressure on the foot controller is released the machine will stop Care should be taken that nothing is placed on the foot controller when the machine is not in use 1 Foot controller CAUTION Do not allow fabric pieces and dust to collect in the foot controller Doing so could cause a fi...

Страница 18: ...k and cause injury Never sew with a bent needle A bent needle will easily break and cause injury 1 Remove the power supply plug from the outlet 2 Raise the needle bar to its highest position 3 Lower the presser foot 4 Remove the needle by loosening the needle clamp screw 1 Presser foot lever CAUTION Do not loosen or tighten the needle clamp screw with a strong force otherwise it may be damaged 5 W...

Страница 19: ...pletamente inser tada o el tornillo de la presilla de la aguja está suelto la aguja podría romperse o la máquina podría estropearse Vérification de l aiguille L aiguille doit toujours être droite et pointue pour piquer correctement Pour contrôler correctement une aiguille Pour contrôler l aiguille placez le côté plat de l aiguille sur une surface plane Vérifiez l aiguille à partir du haut et des c...

Страница 20: ...ede ser necesario cambiar el prensatelas TIPO DE ENGANCHE DE GOLPE 1 Levante la aguja a su posición más alta girando la ruedecilla hacia usted en el sentido contrario al de las manecilla de un reloj y levante la palanca del prensatelas 2 Suelte el prensatelas levantando la palanca que hay en la parte trasera del soporte 3 Coloque otro prensatelas en la placa de agujas de tal forma que la barra del...

Страница 21: ...de point A la page suivante vous trouverez une liste des plages de longueur et de largeur recomman dées pour chaque point 1 Sélecteur de modèle de point 2 Fenêtre d indication du modèle de point Les points disponibles dépendent du réglage du sélecteur de longueur de point Si ce sélecteur est réglé entre 0 et 4 5 vous pouvez sélectionner n importe quel point de la rangée supérieure Si le sélecteur ...

Страница 22: ...RAMPART STITCH 1 8 1 4 1 64 1 8 ELASTIC SHELL TUCK STITCH 3 6 5 F 3 45 1 8 1 4 1 64 1 8 BEAD STITCH 43 ARROWHEAD STITCH 3 6 5 F 1 PARALLELOGRAM STITCH 1 8 1 4 1 64 1 16 TRIANGLE STITCH LIGHTNING STITCH 6 5 F 1 43 SQUARE STITCH DECORATIVE STITCH 1 4 1 64 1 16 TRIPLE STRETCH STITCH 3 5 SS Fixed 35 Center position 2 5 3 32 TRIPLE ZIGZAG STRETCH 3 6 5 SS Fixed 46 STITCH 1 8 1 4 2 5 3 32 ELASTIC OVERLO...

Страница 23: ...1 4 1 64 1 8 PUNTADA ONDAS 3 6 5 F 3 45 ELÁSTICAS 1 8 1 4 1 64 1 8 PUNTADA FESTÓN DOBLE 43 PUNTADA FLECHA 3 6 5 F 1 PUNTADA PARALELOGRAMO 1 8 1 4 1 64 1 16 PUNTADA TRIÁNGULO PUNTADA ESCALERA 6 5 F 1 43 PUNTADA FESTÓN DOBLE PUNTADA DECORATIVA 1 4 1 64 1 16 TRIPLE PUNTADA PESPUNTO 3 5 SS Fija 36 Posición centro 2 5 3 32 TRIPLE PUNTADA ZIGZAG 3 6 5 SS Fija 46 ELÁSTICA 1 8 1 4 2 5 3 32 PUNTADA OVERLOC...

Страница 24: ... 6 5 F 3 41 POINT PONT POINT EN REMPARTS 1 8 1 4 1 64 1 8 PLISSE ÉLASTIQUE 3 6 5 F 3 45 1 8 1 4 1 64 1 8 FESTON DOUBLÉ 43 POINT FLECHE 3 6 5 F 1 POINT EN PARALLELOGRAMME 1 8 1 4 1 64 1 16 POINT TRIANGULAIRE POINT ECLAIR 6 5 F 1 43 POINT CARRE POINT DÉCORATIF 1 4 1 64 1 16 POINT TRIPLE 3 5 SS Fixe 36 Position centrale 2 5 3 32 TRIPLE POINT ZIGZAG 3 6 5 SS Fixe 46 1 8 1 4 2 5 3 32 OVERLOCK ÉLASTIQUE...

Страница 25: ...del botón conviene primero probar la puntada y los ajustes de largo en un pedazo de tejido para ver como se alimenta el material 1 Selector de largo de puntada 2 Largo 3 Fina SS 4 Más largo PRECAUCIÓN No ponga el selector de puntada en el rango mostrado por A A A A A Si pone la máquina en marcha con el selector puesto en el rango mostrado por A A A A A el tejido no avanzará correctamente y el teji...

Страница 26: ...a triple puntada elástica es posible cambiar la posición de la aguja de izquierda a derecha 2 Para la aguja izquierda ajuste el selector de ancho de puntadas en 7 3 Para la aguja derecha ajuste el selector de ancho de puntadas en 0 Pulsador de retroceso La costura hacia atrás se usa para remates y para reforzar las costuras Para coser hacia atrás apriete a fondo la palanca de retroceso y manténgal...

Страница 27: ...den ser bajados con la palanca inme diatamente después de su subida suba la palanca gire la ruedecilla hacia usted y los alimentadores se encontrarán subidos 1 Palanca de los alimentadores 2 Posición baja 3 Posición alta Conversión en modalidad de brazo libre La costura con brazo libre es práctica para coser zonas tubulares y difíciles de acceso en los tejidos Para transformar su máquina a la moda...

Страница 28: ...ed using the wide table remove it Whileslightlyliftingupthefrontofthewidetableontherightside pull off the table to the left Snap all four legs into storage position 5 Install the flat bed attachment back in its original position NOTE Do not install or remove the wide table with force otherwise the mounting hook may be damaged CAUTION Do not move the sewing machine while the wide table is attached ...

Страница 29: ... ningun otro proposito como el detabladeplanchar Ellopodríaocasionardañosyheridas Table large 1 Dépliez les pieds à l arrière de la table large Dépliez les quatre pieds jusqu à ce qu ils s enclenchent en place 2 Retirez le plateau en le faisant coulisser vers la gauche 3 Installez la table large 1 Faites glisser la table large pour la mettre en place en la maintenant à l horizontale 2 Tournez la v...

Страница 30: ...in 1 Spring on the shaft 2 Groove of the bobbin 3 Bobbin winder seat 4 Bobbin winder shaft 3 While holding the end of the thread gently depress the foot controller to wind the thread around the bobbin a few times Then stop the machine Trim the excess thread above the bobbin 4 Press down on the foot controller to start 5 After the machine stops automatically when the bobbin is full take your foot o...

Страница 31: ...e ATTENTION Si vous n installez pas correctement la canette il se peut que la tensiondufilserelâche quel aiguillecasseetquevousvousblessiez 1 Bobiné correctement 2 Mal bobiné ENHEBRADO DE LA MÁQUINA Bobinado de la canilla PRECAUCIÓN Si el carrete de hilo o la tapa del carrete no están colocados correctamente el hilo podría enredarse en el portacarrete Utilice la tapa del carrete grande mediana o p...

Страница 32: ...ise and raise the presser foot lever 2 Slide the bobbin cover latch to the right and open the cover Fig A 1 Slide bobbin cover latch 2 Cover 3 Insert bobbin and pass thread through the bobbin thread path then pull the thread forward to cut Fig B CAUTION Be sure the bobbin is set so the thread unrolls in the correct direction If the thread unrolls in the wrong direction it may cause the thread tens...

Страница 33: ...ar alguna lesión 1 Bobinado correcto 2 Bobinado incorrecto PRECAUCIÓN Asegúrese de desconectar la alimentación Si pisa accidental mente el pedal y la máquina se pone en marcha podrá hacerse daño 1 Levante la aguja a su posición más alta girando la ruedecilla hacia usted en el sentido contrario al de las manecillas del reloj y levante la palanca del prensatelas 2 Deslice el cierre de la tapa de la ...

Страница 34: ...Use the spool cap large medium or small that is closest in size to the thread spool If a spool cap smaller than the thread spool is used the thread may become caught in the slit on the end of the spool and cause the needle to break CAUTION Besuretothreadthemachineproperly Improperthreading cancausethethreadtotangleandbreaktheneedle leading to injury 4 Pass thread through upper thread path Fig C 5 ...

Страница 35: ...érieur sur ce même levier Veiller à relever le levier du pied de biche et le levier de remontée du fil avant d enfiler le fil supérieur Un mauvais chargement du fil peut en effet provoquer des problèmes de couture Enhebrado superior 1 Levante el prensatelas con la palanca correspondiente Fig A 2 Levante la aguja a su posición más alta girando la ruedecilla hacia usted en el sentido contrario al de...

Страница 36: ...le 2 Needle threader lever 3 Guide 4 Hook holder 5 While lightly holding the thread rotate the needle threader lever toward the front of the machine toward you Fig C The hook will pull the thread through the needle eye 5 Hook 6 Thread 6 Raise the needle threader lever and pull out about 5 cm 2 of thread through the needle toward the back of the sewing machine Fig D CAUTION The needle threader can ...

Страница 37: ...iguilles passez le fil à la main dans le chas de l aiguille par l avant Assurez vous au préalablequel interrupteurd alimentationprincipalestsurOFF arrêt Uso del enhebrador Desenchufar la máquina interruptor principale a O 1 Baje la palanca de la pata del prensatelas 2 Para levantar la aguja a su posición más alta gire la ruedecilla hacia usted en el sentido contrario al de las manecillas de un rel...

Страница 38: ...a flecha y déjelo allí sin cortarlo La tapa de la canilla no debe estar colocada 2 Mientras sujeta ligeramente el extremo del hilo superior gire lentamente la ruedecilla hacia la parte frontal a la izquierda una vez con la mano para bajar y después subir la aguja 3 Tire del hilo superior para levantar el hilo inferior 4 Saque unos 10 cm 4 de ambos hilos y colóquelos en dirección a la parte trasera...

Страница 39: ...digo de pieza X57521 021 De lo contrario la aguja podría romperse y causar una avería Al coser con una aguja doble debe asegurarse que el selector de ancho de puntada no está ajustado en un valor superior a 5 ya que en esas circunstancias la aguja podría golpear la placa de agujas y romperse No cosa con agujas dobladas De otra manera la aguja podría romperse y causar lesiones Si usa la aguja doble...

Страница 40: ... del carrete colocado en el porta carretes extra Véase página 26 para los detalles sobre el enhebra do 2 Enhebrado de la aguja izquierda Enhebre la aguja izquierda de la misma manera que la aguja derecha pero no pase el hilo por la guía que se sitúa arriba de la aguja antes de pasarlo por el ojo de la aguja izquierda tal como se indica en la fig B 1 El hilo de la aguja derecha pasa por la guía 2 E...

Страница 41: ...ences Le fil supérieur est trop tendu Fig A Des boucles se forment à l endroit du tissu Solution Diminuer la tension en tournant le disque vers un nombre inférieur Le fil supérieur est trop lâche Fig B Des boucles se forment à l envers du tissu Solution Augmenter la tension en tournant le disque vers un nombre supé rieur Tension correcte Fig C Il est essentiel de procéder à un réglage correct de l...

Страница 42: ...11 90 14 65 9 75 11 90 14 100 16 Ball point needle golden colored 75 11 90 14 90 14 100 16 Size Thread Size of needle Type COMBINACIONES DE TEJIDO HILO AGUJA NOTA 1 Para hilo de nailon transparente use siempre agujas 90 14 100 16 2 Para el hilo de la bobina y el hilo superior se suele utilizar siempre el mismo hilo PRECAUCIÓN Asegúrese de utilizar las combinaciones de aguja hilo y tejido listadas ...

Страница 43: ...ng it the other way may cause the thread to tangle and result in damage to the needle or fabric or injury LEA ESTO POR FAVOR ANTES DE COSER PRECAUCIÓN Para evitar lesiones preste especial atención a la aguja cuando la máquina esté en funcionamiento Mantenga las manos alejadas de las piezas móviles mientras la máquina esté en funcionamiento No empuje o estire la tela durante la costura Podría causa...

Страница 44: ...ects duringsewing Thethreadcouldtangleorthe needle could break causing injury CHANGING SEWING DIRECTION 1 Stop the machine at the point where you wish to change direction with the needle still in the fabric 2 Raise the presser foot and turn the fabric to line up its new direction using the needle as a turning point 3 Lower the presser foot and start sewing in the new direction FINISHING SEWING Rev...

Страница 45: ... la parte de atrás del prensatelas 4 Coloque el tejido debajo del prensatelas y posicione la aguja a 1 cm 3 8 de la orilla del tejido 5 Baje el prensatelas 6 Para retroceder baje a fondo el pulsador de retroceso luego presione el pedal para empezar a coser hacia atrás 7 Suelte el pulsador de retroceso y empiece a coser hacia delante presionando el pedal El cosido hacia atrás se utiliza para remata...

Страница 46: ...ctúa como puntada de refuerzo PUNTADA DE REALCE Cuando se define el largo de la puntada en la parte F se coserán puntadas tupidas puntada zigzag muy cerradas que pueden servir para hacer puntadas decorativas Seleccione la puntada zigzag y luego coloque el selector de largo de puntada en la zona F y ajuste el ancho deseado Al coser bordados de realce disminuya ligeramente la tensión del hilo superi...

Страница 47: ...re de la même couleur que le tissu à coudre 2 Plier le tissu à la taille souhaitée pour l ourlet comme le montre lafig A puis replier le bord en faisant chevaucher de 6 mm voir fig B 3 Mettre le sélecteur de modèle de point sur point ourlet invisible ou point élastique invisible et régler la longueur et la largeur du point 4 Coudre sur le repli comme le montre la fig C 5 Lorsqueletissuestdéplié on...

Страница 48: ...e sélecteur de modèle de longueur et de largeur de point sur le point coquille 2 Coudre le tissu sur le biais après l avoir placé sous le pied de biche de sorte que la machine puisse coudre des points droits sur la ligne de couture et des points zigzag légèrement au dessus du bord replié 3 La tension du fil supérieur doit être légèrement plus forte que la normale 4 Coudre lentement Puntada ondas M...

Страница 49: ...point élastique comme le montre la fig A COUTURE D ELASTIQUES 1 Placer l élastique sur le tissu 2 A mesure que l on coud tendre l élastique de part et d autre du pied de biche voir fig B ASSEMBLAGE DE TISSUS Le point élastique peut servir à assembler deux morceaux de tissu Il s avère particulièrement efficace pour la couture de tricots Avec du fil nylon la couture sera invisible 1 Placer bord à bo...

Страница 50: ... à assembler deux morceaux de tissu par exemple pour faire du patchwork 1 Assembler deux morceaux de tissu avec un point droit voir page 36 et maintenir le rabat ouvert 2 Mettre les sélecteurs de modèle de longueur et de largeur de point sur le point renforcé le point pont etc 3 Placer le tissu à l endroit et lors de la couture centrer la ligne de couture Puntada de acción doble Modelo de puntada ...

Страница 51: ...e longueur et de largeur de point sur le point feston 2 Effectuer le point de feston le long de la lisière du tissu 3 Si on le souhaite découper autour des coquilles à l aide d une paire de ciseaux pour festonner le tissu Faire attention cependant de ne pas couper le fil Avec le pied pour point de bourdon il est plus facile de voir le tissu et de faire de beaux points Puntada festón Modelo de punt...

Страница 52: ...tif Point décoratif 3 6 5 Point décoratif 6 5 Ces points peuvent servir pour la réalisation de points de fantaisie décoratifs ou pour la création de fronces Mettre le sélecteur de modèle de longueur et de largeur de point sur le point perle ou le point triangulaire Avec le pied pour point de bourdon il est plus facile de voir le tissu et de faire de beaux points Puntadas decorativas Modelo de punt...

Страница 53: ...r faire un ourlet et les faufiler à du papier fin en laissant un petit espace entre les deux 2 Mettre le sélecteur de modèle de longueur et de largeur de point sur le point fagot ou le point d assemblage 3 Piquer le long des bords en tirant légèrement des deux fils au début Utiliser des fils plus épais que pour une couture normale 4 Après avoir terminé défaufiler et retirer le papier Achever en fa...

Страница 54: ...que 2 Placer le tissu sous le pied de biche de telle manière que la couture point d épine se trouve à environ 3 mm à gauche du centre du pied de biche Ce point donne d excellents résultats avec une marge de couture de 6 5 mm ce qui permet au côté droit côté zigzag du point de piquer le bord coupé du tissu comme le montre la fig A 3 Si l écart est supérieur à la taille du point couper l excédent de...

Страница 55: ...tir du bord 3 Couper le tissu au ras des points Ce point empêche le tissu de s effilocher Triple point zigzag Modèle de point Longueur de point Largeur de point Triple point zigzag SS 3 6 5 Utiliser ce point pour coudre des tissus élastiques épais là où un point zigzag pourrait être utilisé Le point rick rack peut aussi servir de point fantaisie de haute couture Mettre le sélecteur de modèle de lo...

Страница 56: ...l open the button holder and insert a button See fig A The size of the buttonhole is determined by the button inserted into the button holder 4 Align the red line on the presser foot with the mark on the fabric then lower the Presser Foot Lever Be sure to pass the thread under the presser foot and pull it toward you See fig B 1 Button holder 2 Mark on fabric 3 Line on presser foot NOTE Do not lowe...

Страница 57: ...l supérieur et appuyer sur la pédale pour commencer à coudre ATTENTION Si vous tirez trop fort sur le fil vous risquez de plier ou de casser l aiguille et de vous blesser 7 La machine coud automatiquement les points 1 2 3 et 4 puis elle s arrête Para coser ojales Modelo de Largo de Ancho de Prensatelas puntada puntada puntada F 1 5 4 7 Prensatelas para ojales La función de costura de ojales en una...

Страница 58: ...ess then set the buttonhole presser foot scale to this measurement The distance in the scale between two lines of the same length is 0 5 cm 3 16 Example For a button with a diameter of 1 5 cm 9 16 and a thickness of 1 cm 3 8 the scale should be set at 2 5 cm 1 1 Thickness 1 cm 3 8 2 Diameter 1 5 cm 9 16 3 Button holder plate 4 Scale 5 Diameter thickness 2 5 cm 1 6 0 5 cm 3 16 Boutons aux formes ir...

Страница 59: ...e la boutonnière 2 Retirer le tissu de la machine Il est vivement conseillé de placer des épingles à chaque extrémité de la boutonnière afin de ne pas couper les barrettes 3 Couper une ouverture au milieu de la boutonnière à l aide du découd vite en veillant bien à ne couper aucune couture ATTENTION Lorsquevousutilisezledécoud vitepourouvrirlaboutonnière ne mettez pas votre main ou vos doigts en f...

Страница 60: ...ide of buttonhole 2 Stitch length dial 3 Shorter 4 Longer 5 Adjusted stitch 3 After obtaining a satisfactory feeding on the right side stitch the left side of the buttonhole and observe the feeding 4 If the left side is too coarse or fine compared to the right side adjustthebuttonholefineadjustmentscrewasdescribedbelow If the left side is too coarse turn the screw with the enclosed large screwdriv...

Страница 61: ...re uniformes 6 Sélecteur de longueur de point 7 Vis d équilibrage des boutonnières 8 Lèvre gauche de la boutonnière 9 Point ajusté Ajuste fino de los ojales Si las puntadas en ambos lados del ojal no parecen ser uniformes se pueden hacer los siguientes ajustes 1 Sitúe el selector de largo de puntada en F 1 5 y cosa la parte derechadelojalenunpedazodetejido vigilandolaalimentación del tejido 2 Si l...

Страница 62: ...arrière de la machine et coudre la boutonnière depuis le début Méthode de correction 2 voir fig B 1 Relever le levier du pied de biche puis retirer le tissu et tout le fil cousu 2 Remettre le tissu sous le pied de biche puis pousser légèrement le levier des boutonnières vers l arrière de la machine et coudre la boutonnière depuis le début REMARQUE Lorsque la boutonnière est terminée ne pas oublier...

Страница 63: ...ied pour zigzac 3 Abaisser les griffes d entraînement en mettant le levier correspondant sur la position abaissée comme indiqué à la page 18 4 Placer un bouton entre le pied et le tissu et veiller à ce que l aiguille pique dans les trous sans heurter le bouton Si jamais elle heurte le bouton veuillez vous reporter au point 1 5 Coudre environ 10 points à faible vitesse 6 Retirer le tissu de la mach...

Страница 64: ...wer the needle into the notch located either on the left or right side of the zipper foot CAUTION Turn the handwheel to make sure the needle does not strike the presser foot If another stitch is selected the needle will strike the presser foot causing the needle to break possi bly leading to injury 5 Sew from the bottom of the zipper toward the top on both sides The needle should be positioned on ...

Страница 65: ...int droit et la longueur de point sur 4 2 Relâcher la tension du fil supérieur afin que le fil inférieur reste tendu à l envers du tissu 3 Coudre une seule rangée de points droits ou plusieurs rangées à intervalles réguliers 4 Tirer sur le ou les fils inférieurs pour froncer le tissu Inserción de cremalleras Modelo de Largo de Ancho de Prensatelas puntada puntada puntada Puntada 2 3 3 5 Pata de re...

Страница 66: ...iquer sur un vêtement ou sur un ouvrage 1 Faufiler le motif découpé à l endroit souhaité 2 Coudre soigneusement le contour du motif en points zigzag avec une fine longueur de point 3 Couper la partie de tissu dépassant de la couture 4 Défaufiler si nécessaire REMARQUE Faire quelques points droits à chaque extrémité pour renforcer la couture ATTENTION Assurez vous que l aiguille ne frappera pas d é...

Страница 67: ...crew is firmly tightened See fig B 1 Use a screwdriver 2 Presser Foot Screw 3 Needle Clamp Screw CAUTION Be careful not to touch the needle when attaching the free motion quilting foot otherwise injury may result Use the screwdriver to tighten the presser foot holder screw securely If the screw is loose the needle may strike the presser foot and cause injury Be sure to turn the handwheel toward th...

Страница 68: ... manos manténgalo estirado y cósalo siguiendo el dibujo véase fig C B Dibujo del acolchado línea Utilisation du pied quilting en mouvement libre Modèle de Longueur Largeur de Griffe point de point point d entraînement Point droit N importe quelle 3 5 au centre Abaissée longueur Lepiedquiltingenmouvementlibreestpratiquepourrepriser réaliserdes monogrammes ou assembler librement des bouts de tissu à...

Страница 69: ...e a few holding stitches 8 Grip the hoop with the thumb and forefingers of both hands while pressing the fabric with the middle and third fingers and support ing the outside of the hoop with your smaller fingers MONOGRAMMING 1 Select the Zigzag Stitch and a width of 3 5 2 Sew moving the hoop slowly along the lettering at a constant speed 3 Secure with a few straight stitches at the end of the last...

Страница 70: ...l de la costura NOTA Se pueden realizar puntadas largas al mover el bastidor rápidamente y puntadas cortas al moverlo lentamente Monogrammes broderies et quilting Modèle de Longueur de Largeur de Pied de Griffe point point point biche d entraînement Point N importe N importe Pied quilting Abaissée zigzag quelle longueur quelle largeur en mouvement libre PREPARATION AVANT DE FAIRE DES MONOGRAMMES D...

Страница 71: ...oloque el tejido que se va a zurcir debajo del prensatela con un estabilizador debajo como refuerzo 4 Baje la palanca del pie prensatela 5 Pase el hilo inferior por el trabajo girando la ruedecilla y cosa unas pocas puntadas para asegurar el comienzo de la costura 6 Comience a coser alternando entre alejar el trabajo y acercarlo a usted 7 Repita esta operación hasta que el zurcido se haya completa...

Страница 72: ...dle and the presser foot 3 Loosen the presser foot holder screw to remove the presser foot holder See fig A 4 Attach the forked section of the connecting lever to the needle clamp install the walking foot to the presser bar See fig B 5 Lower the presser foot lever and then tighten the presser bar holder fixing screw See fig C 1 Forked part of operation lever 2 Presser bar holder 1 Use a screwdrive...

Страница 73: ...a con el pie móvil ajuste la velocidad entre media y baja Utilisation du pied de biche mobile Modèle de point Longueur de point Largeur de point Point droit 1 4 5 3 4 Point zigzag 0 6 5 Ce pied convient parfaitement pour la couture de matériaux comme du tissu vinylé du cuir synthétique du cuir fin etc L entraînement de ces matières est généralement difficile et ce pied mobile évite qu ils ne fronc...

Страница 74: ...er a quilt See fig A 1 Set the Pattern Selection Dial to Straight Stitch Set the Stitch Length between 2 and 2 5 Set the Stitch Width 3 5 center 2 Change the foot to the 1 4 Inch Quilting Foot 1 Seam allowance 1 4 6 5mm 3 Position the presser foot over the fabric and sew as shown in fig B and C Achieving an accurate seam allowance See fig B 2 Beginning of stitching 3 Align this mark with edge of f...

Страница 75: ...su 4 Fin de la couture 5 Aligner cette marque sur le bord du tissu Pour assembler rapidement un quilt Voir fig C 6 Dessus du tissu 7 Couture 3 2 mm Utilización del prensatela para pespunte 1 4 Modelo de puntada Largo de puntada Ancho de puntada Puntada recta 2 2 5 3 5 centro El prensatela para pespunte 1 4 se utiliza para coser costuras con una anchura fija de 6 5 mm 1 4 al juntar las partes de un...

Страница 76: ...puntadas paralelas con un espacio igual entre ellas 1 Introduzca la base del acolchador en el orificio situado en la parte trasera del pie móvil o del soporte del pie prensatela 1 Pie móvil 2 Soporte del pie prensatela 2 Ajustelabasedelacolchadordemaneraquelaguíadeacolchados quede alineada con la costura que ya se ha cosido Utilisation du guide de quilting Utilisez le guide de quilting pour coudre...

Страница 77: ...carga eléctrica Si la máquina está encendida y el pedal está pisado podría hacer se daño Para evitar quemaduras deje enfriar la bombilla antes de cambiarla 1 Desenchufe la máquina 2 Afloje el tornillo de la parte trasera de la máquina tal como se indica en la fig A 3 Retire la cubierta de la máquina tal como se indica en la fig A 4 Cambie la bombilla tal como se muestra en la fig B 1 Bombilla 1 Af...

Страница 78: ... the front of the ma chine Turning the handwheel in the other direction may damage the machine 6 Remove the race See fig C 7 Clean out lint and dust Use soft fabric to clean the race DO NOT OIL the race or shuttle See fig D 6 Race 7 Shuttle DO NOT OIL CAUTION Do not use a damaged race or shuttle Otherwise the thread may tangle and cause a poor finish or the needle may break You can get the proper ...

Страница 79: ...ornillos de la misma en el sentido opuesto a cuando la retiró 8 Muesca en la pista de la lanzadera 9 Repisa 0 Muelle Nettoyage ATTENTION Veillezàdébrancherlecordond alimentationdelamachineavant de la nettoyer Sinon vous risquez de vous électrocuter ou de vous blesser 1 Retirer la fiche de la prise secteur 2 Relever l aiguille et le pied de biche 3 Desserrer la vis du pied de biche et la vis de fix...

Страница 80: ...If the problem continues the following check list may help you to improve the operation If you still have difficulties contact your nearest authorized service center No Page 25 Upper thread is not correctly installed No Page 23 No Page 9 No Page 32 No Page 32 Lower thread is tangled Needle is incorrectly inserted Thread tension is incorrect Thread tension is too tight No Page 25 Upper thread is ta...

Страница 81: ...on of needle size thread size fabric is incorrect No Page 7 Main power switch is turned off No Page 9 Inferior needle is used No Page 21 The bobbin winder shaft is slid to the right No Page 25 Thread is tangled No Page 18 Feed Dog Position Switch in down position No Page 47 The buttonhole lever is pushed toward the back of the machine NEEDLE BREAKS No Page 9 Needle is not correctly inserted No Pag...

Страница 82: ... demasiada fuerte No Página 26 El hilo superior está enredado No Página 26 Los hilos no están bien enhebrados No Página 32 El hilo superior es demasiado tirante No Página 33 No Página 10 El tamaño de la aguja no corresponde La combinación tamaño de aguja grueso de hilo tejido no es correcta No Página 26 El carrete está mal colocado No Página 10 La aguja está doblada o gastada No Página 33 La combi...

Страница 83: ...tejido no es correcta No Página 7 El interruptor principal está apagado No Página 10 Se está usando una aguja inferior No Página 22 El eje de bobinado de la canilla está deslizado hacia la derecha No Página 26 El hilo está enredado No Página 18 La palanca de los alimentadores está en la posición baja No Página 48 La palanca de ojales está colocada hacia atrás LA AGUJA SE ROMPE No Página 10 La aguj...

Страница 84: ...ille fil tissu n est pas correcte DES POINTS SAUTENT LA COUTURE FAIT DES BOUCLES LE TISSU FRONCE CONTACTER LE CENTRE TECHNIQUE LE PLUS PROCHE RUPTURE DU FIL INFERIEUR RUPTURE DU FIL SUPERIEUR Non Page 26 Le fil supérieur n est pas bien enfilé Non Page 24 Non Page 10 Non Page 32 Non Page 32 Le fil inférieur est emmêlé L aiguille est mal installée Mauvaise tension des fils Le fil est trop tendu Non ...

Страница 85: ...se Non Page 34 La combinaison aiguille fil tissu est incorrecte Non Page 7 L interrupteur principal est éteint Non Page 10 Une aiguille inférieure est utilisée Non Page 22 L axe du dévidoir est glissé vers la droite Non Page 26 Le fil est emmêlé Non Page 18 Le levier des griffes d entraînement est en position abaissée Non Page 48 Le levier des boutonniè res est poussé vers l arrière de la machine ...

Страница 86: ...cuado o con materiales inapropiados puede causarle daños a la máquina durante el transporte Para embalar la máquina correctamente sírvase seguir las instrucciones que se ilustran IMPORTANTE El material de embalaje está diseñado para prevenir daños durante el transporte Guárdelo siempre en caso de que tenga que volver a transportar la máquina Emballage de la machine Conserverlecartonetlesmatériauxd...

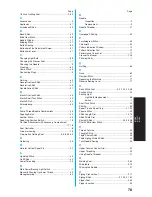
Страница 87: ... Lower Threading 23 M Main Power Sewing Light Switch 7 Manually Drawing Up Lower Thread 29 Monogramming 60 Page N Needle Inspection 9 Replacement 9 Needle Threader 27 O Overedge Stitching 45 P Parallelogram Stitch 43 Patchwork 44 Pattern Indication Window 12 Pattern Selection Dial 12 Performance Check List 71 Presser Foot Lever 1 25 Principal Parts 1 Q Quilting 60 R Race 69 Rampart Stitch 41 Repac...

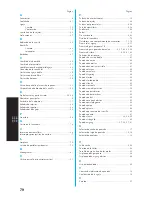
Страница 88: ...4 56 Patchwork 44 Pedal 8 Pie caminante 4 63 Pista de la lanzadera 70 Plataforma con compartimento de accesorios 11 18 Prensa telas zigzag 4 11 Prensatela para pespunte 1 4 4 66 Prénsatela para puntada de realce 4 37 42 43 58 Prensatelas libre 4 59 61 62 Pulsador de retroceso 17 Puntada de acción doble 41 Puntada de unión 44 Puntada decorativa 43 Puntada decorativa invisible 41 Puntada elástica 40...

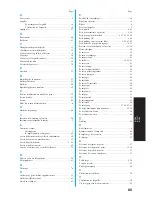
Страница 89: ...coratif 41 Overlock élastique 45 Page P Patchwork Assemblage 44 Pedale du rheostat 8 Pédale 8 Pièces principales 2 Pied mobile 4 63 Pied pour fermeture à glissière 4 56 Pied pour point de bourdon 4 37 42 43 58 Pied quilting 1 4 4 66 Pied quilting en mouvement libre 4 59 61 62 Pied de biche pour points zigzags 4 11 Plateau et compartiment d accessoires 11 18 Plisse elastique 45 Point carre 43 Point...

Страница 90: ......

Отзывы: