NAMES OF MACHINE PARTS AND THEIR FUNCTIONS
10
c
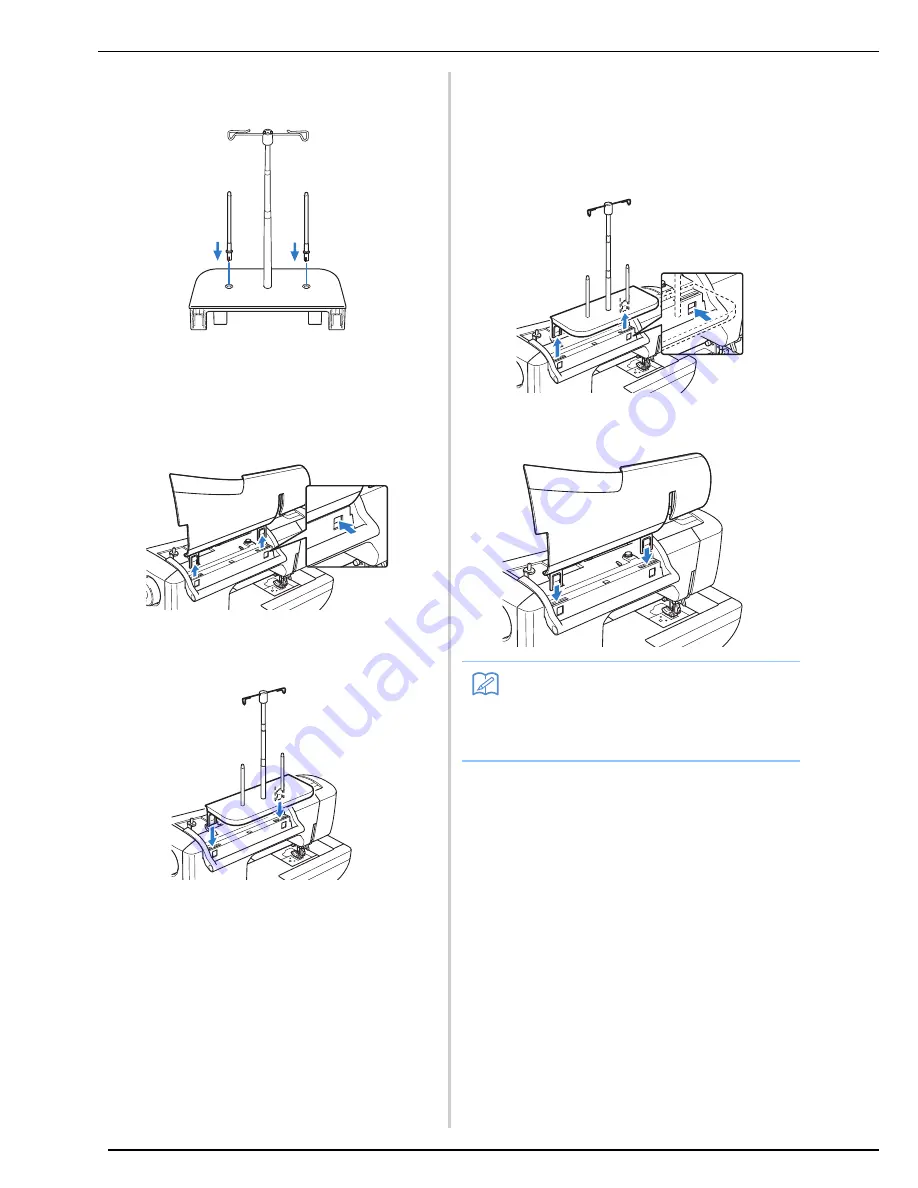
Firmly insert the two spool pins into the two
holes in the spool support.
d
Open the upper cover of the machine. From
the back of the machine, press in the upper
cover latches (one on each side), and then
pull the upper cover up to remove it from
the machine.
e
Insert the spool stand onto the notches of
the machine.
■
How to Remove
a
From the back of the machine, press in the
spool stand latches (one on each side), and
then pull the spool stand up to remove it
from the machine.
b
Attach the upper cover to the machine.
Memo
• See page 41 about the bobbin winding using
the spool stand.
• See page 52 about the upper threading
using the spool stand.
Содержание Innov-is NV6000D
Страница 1: ...Computerized Embroidery and Sewing Machine ...
Страница 14: ...CONTENTS xii ...
Страница 35: ...LCD SCREEN Getting Ready 21 1 ...
Страница 90: ...USEFUL FUNCTIONS 76 ...
Страница 182: ...COMBINING STITCH PATTERNS 168 More Examples Press o o o o Press o o o o o o o o Press o o o Press o o o o o o o o ...
Страница 269: ...USING THE MEMORY FUNCTION Embroidery 255 5 f Press o The sewing screen is displayed ...
Страница 302: ...EDITING PATTERNS 288 ...
Страница 326: ...PRINT AND STITCH COMBINING EMBROIDERY PATTERNS AND PRINTED DESIGNS 312 ...
Страница 335: ...ENTERING STITCH DATA MY CUSTOM STITCH 321 7 o A new point is entered and moves to it c Use to move the point ...
Страница 338: ...USING STORED CUSTOM STITCHES 324 ...
Страница 373: ......
Страница 374: ......
Страница 375: ......


