


4-5
Confidential
1.3 Setting Serial Number and Entering Adjusted Value of Laser Unit
<Operating Procedure>
Common to LED/LCD models
(1) Enter the maintenance mode. (For LED models, refer to
"1.1 Setting Default Paper Size (LED Models) / Setting by Spec (LCD Models)" in this
the procedure (1) of "1.1 Setting Default Paper Size
(LED Models) / Setting by Spec (LCD Models)" in this chapter
(2) Connect the machine to your computer using the USB cable.
(3) Double-click the "BrUsbsn.exe" file that was copied to the
temporary folder in the computer to start it. "BrUsbSn" screen
shown on the right appears.
(4) Enter the model name of your machine in the [Find a Product]
field (ex: HL-L2320D) and click the [Find a Product] button. [Find
a Product] button turns into [Find Next] button, and model name
appears in the box above the [Find Next] button.
(5) Check if the model name of your machine is shown in the box
above the [Find Next] button. If you can not find the model
name of your machine, keep clicking the [Find Next] button until
it appears.
(6) In the [Port] field on the "BrUsbSn" screen, select the port
number assigned to the "Brother Maintenance USB Printer".
If the port number is unknown, follow the steps below to check it.
1) Click "Start", "Settings", and "Printers and Faxes". The
"Printers and Faxes" window appears.
2) Right-click the "Brother Maintenance USB Printer" icon.
3) Click "Properties". The "Brother Maintenance USB Printer Properties" window
appears.
4) Click the "Ports" tab. The Brother Maintenance USB Printer port number is displayed.
(7) Enter the serial number (15 digits) of the machine in the [Serial No] field.
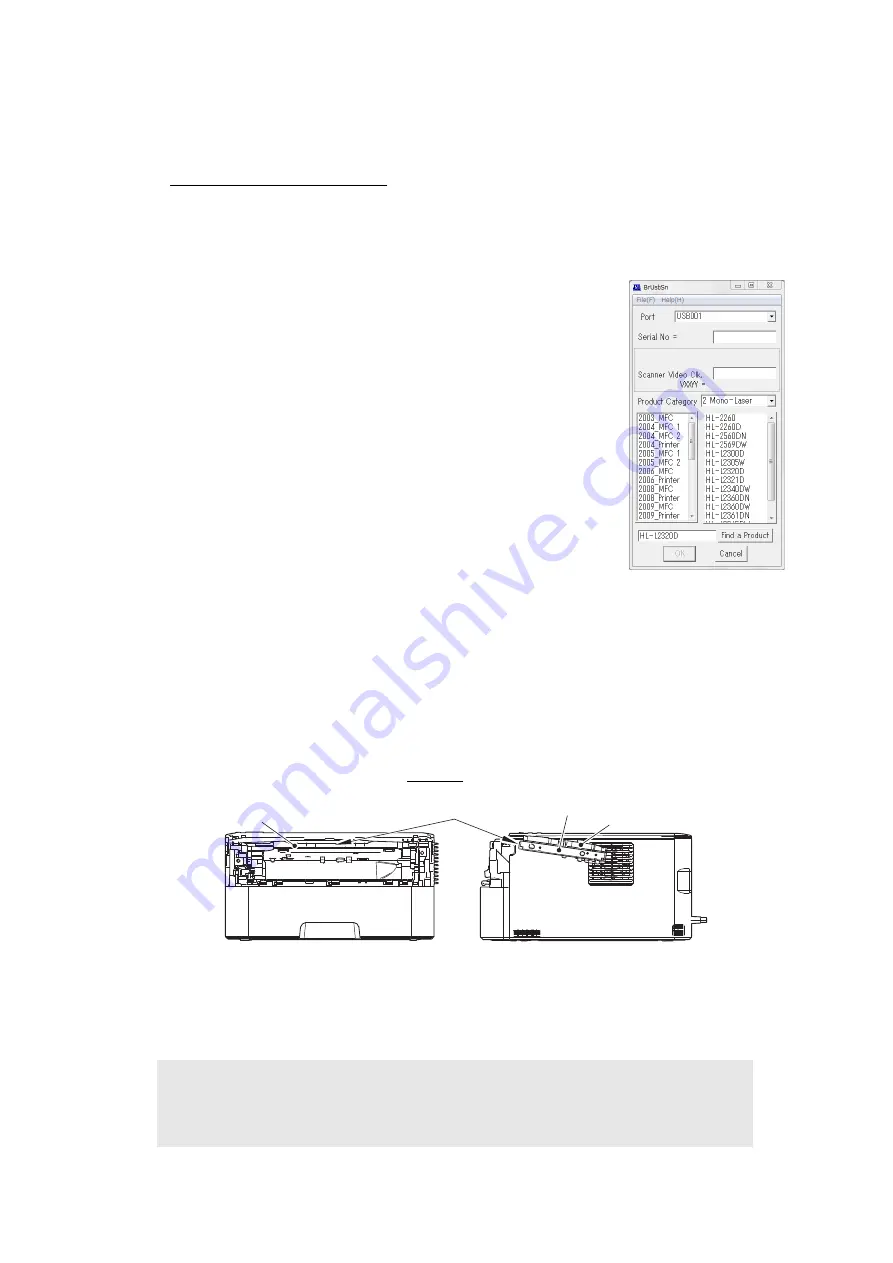
(8) Check the laser serial number label attached to the location shown in the figure below.
(9) Enter the five digits of the laser serial number in the [Scanner Video Clk] field.
e x . ) S N 0 11 4 0 6 0 5 8 4 6 1 7 3 4 7 5 3
Fig. 4-1
(10) Click the [OK] button. The serial number and the adjusted value of the laser unit are
written to the machine.
(11) Turn OFF the power switch of the machine and disconnect the USB cable from the
machine and computer.
Note:
• For LCD models, serial number can be set by referring to
information (function code: 80)” in Chapter 5
for how to check the serial number.
Laser unit
Laser serial number label
Scanner plate
Scanner plate


