


Troubleshooting
81
B
Paper is jammed at the back
of the machine
B
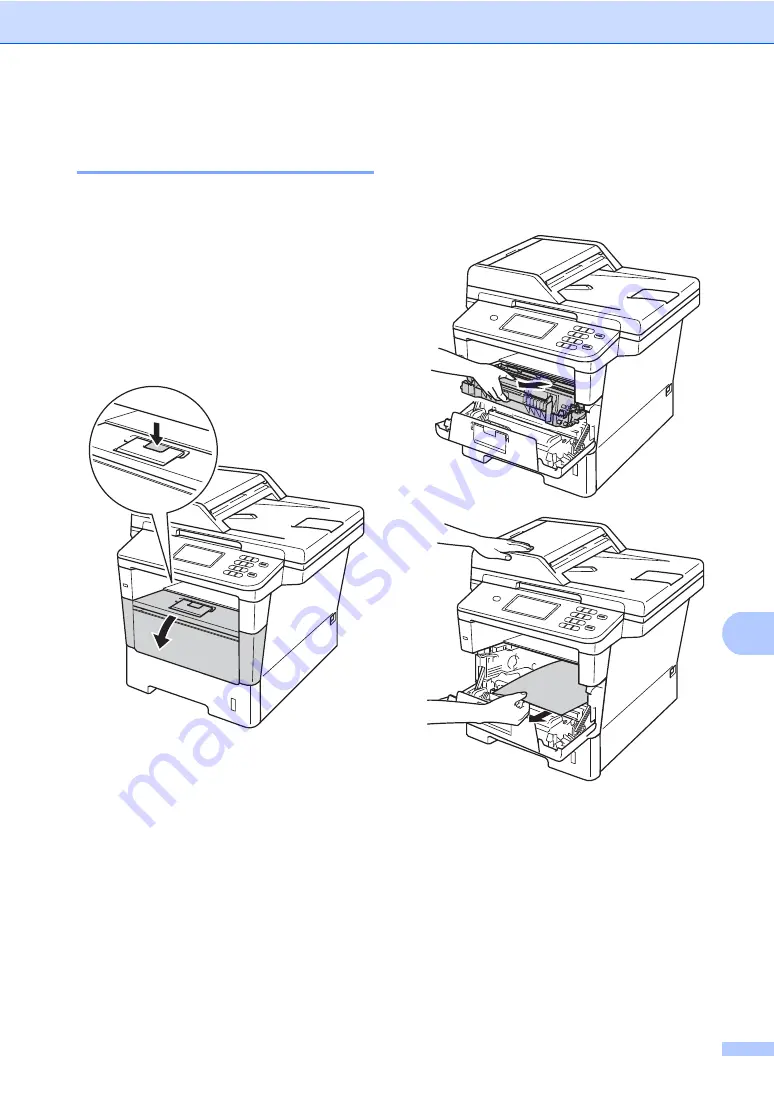
If the LCD shows
Jam Rear
, a paper jam
has occurred behind the back cover. Follow
these steps:
a
Leave the machine turned on for
10 minutes for the internal fan to cool
the extremely hot parts inside the
machine.
b
Press the front cover release button and
then open the front cover.
c
Slowly take out the drum unit and toner
cartridge assembly. The jammed paper
may be pulled out with the drum unit and
toner cartridge assembly, or this may
release the paper so you can pull it out
from inside of the machine.
Содержание DCP-8250DN
Страница 1: ...Basic User s Guide DCP 8250DN Version 0 UK IRE ...
Страница 8: ...vi ...


