9. STANDARD ADJUSTMENTS
DA-927A, DA-928A
21
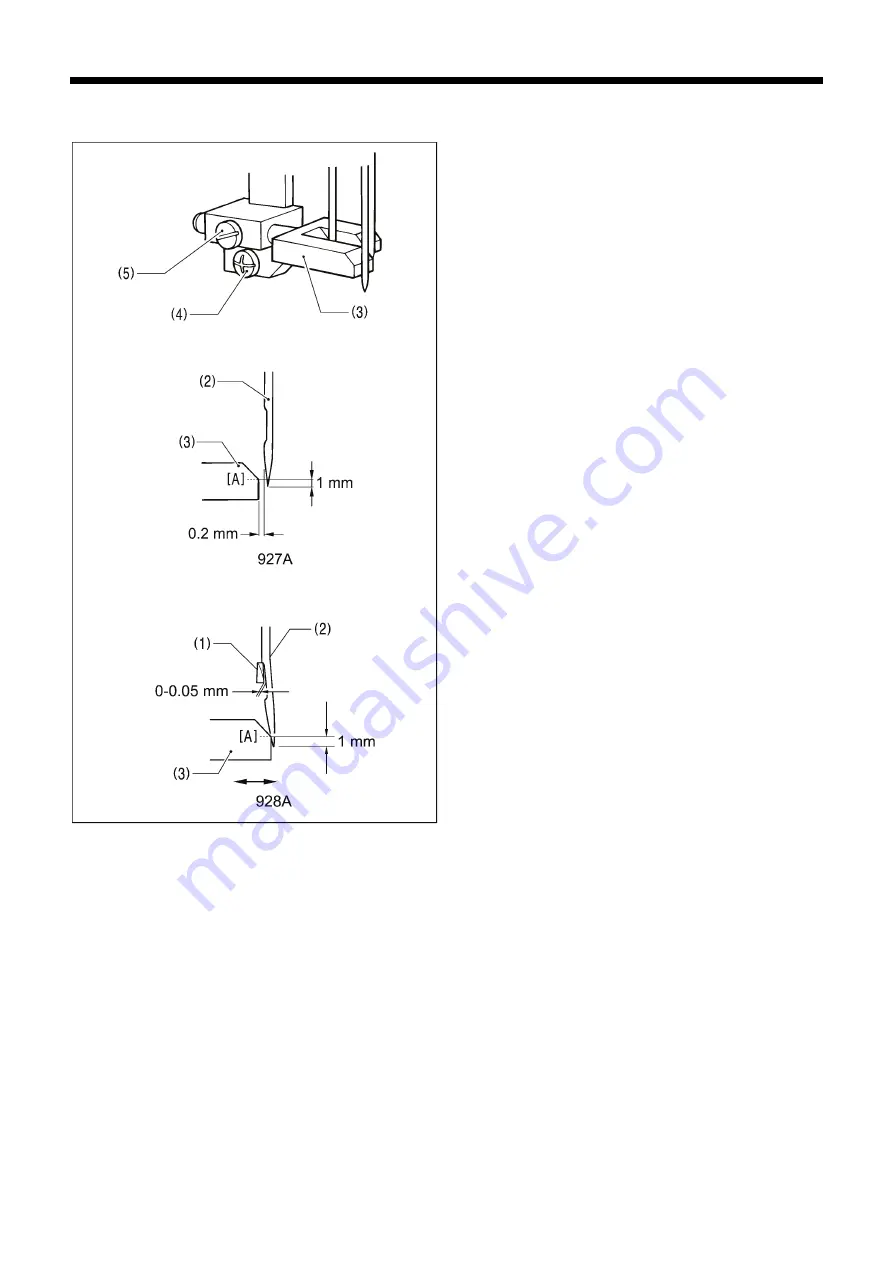
9-5. Needle guard adjustment
1. Set the actual stitch length. (Refer to “7-3. Adjusting the stitch
length”.)
2. Turn the machine pulley toward you by hand until the looper
(1) tip is aligned with the needle (2) center while the looper is
moving forward.
3. Loosen the set screw (4), and then move the needle guard
(3) up or down to adjust so that the distance between the
ridge line [A] of the needle guard (3) tip and the needle (2) tip
is 1 mm.
4. Tighten the set screw (4).
5. Loosen the set screw (5), and then move the needle guard
(3) to the left or right to adjust so that the clearance between
the needle (2) and the needle guard (3) is 0.2 mm (for the
927A) or so that the clearance between the needle (2) and
the tip of the looper (1) is 0 to 0.05 mm when the needle
guard (3) is pushing the needle (2) (for the 928A).
6. Tighten the set screw (5).
NOTE:
Be sure to adjust the needle guard (3) after changing the
stitch length. If you use the sewing machine without
adjusting the needle guard (3), skipped stitches may occur
or the looper tip may become broken.
4332B
1524B
4331B
Содержание DA-927A
Страница 6: ...DA 927A DA 928A v 4284B Oil tank ...


