background image

63

5

Drawing

Scanning

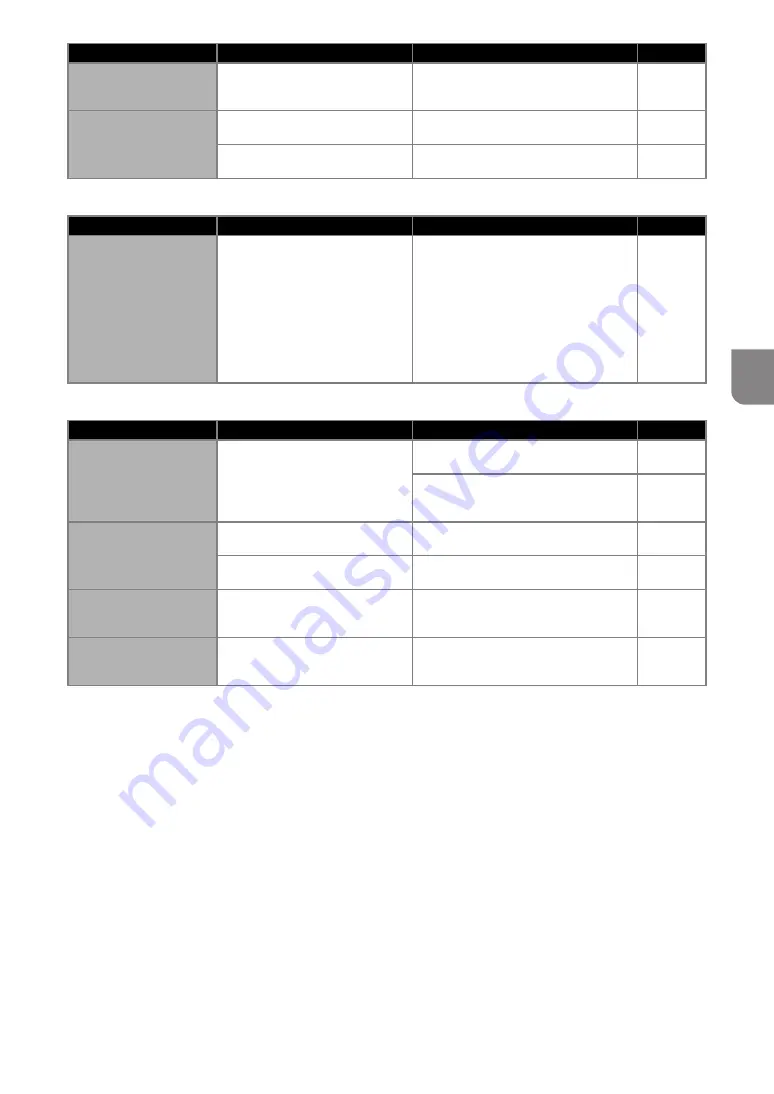
Not all of the material to 
be cut is cut. Some 
areas remain uncut.

An iron-on fabric appliqué contact 
sheet is not firmly attached to a 
fabric.

Iron the entire contact sheet to affix it 
firmly to the wrong side of the fabric.

page 16

There are deep cuts 
completely through the 
mat.

The blade extension from the blade 
holder is too much.

Remove the holder from the carriage, and 
then adjust the blade extension.

page 18

The cutting pressure (“Cut 
Pressure”) is incorrect.

Adjust the setting for “Cut Pressure” in the 
settings screen.

page 18
page 23

Symptom

Possible Causes (or Results)

Solutions

Reference

The drawn line is thicker 
(thinner) than intended.

The drawing speed (“Draw Speed”) 
or drawing pressure (“Draw 
Pressure”) is incorrect.

Adjust the settings for “Draw Speed” and 
“Draw Pressure” in the settings screen.
To draw thicker lines, increase the 
drawing pressure. To draw thinner lines, 
decrease the drawing pressure.
To draw thicker lines, reduce the drawing 
speed. To draw thinner lines, increase the 
drawing speed.
After adjusting the settings, perform a trial 
drawing operation.

page 23

Symptom

Possible Causes (or Results)

Solutions

Reference

Unwanted images are 
scanned.

The scanning area is incorrectly 
specified.

In “Scan to USB” mode, specify the paper 
size with the “Scan Size” setting.

page 54

In “Direct Cut” or “Scan to Cut Data” 
mode, trim the image in the editing screen 
after scanning.

page 48
page 51

Scanning cannot be 
done cleanly (there are 
lines in the scanned 
image).

The scanner glass is dirty.

Clean the scanner glass from the bottom 
of the machine.

page 59

The original to be scanned is dirty or 
scratched.

In “Scan to Cut Data” mode, remove thin 
lines or dirt in the image editing screen.

page 52

The lines printed on the 
mat are scanned.

The original is transparent so the 
lines printed on the mat are being 
scanned.

In “Scan to Cut Data” mode, remove the 
lines in the image editing screen.

page 52

The scanned image is 
red.

When the optional scanning mat is 
used, scanning is performed without 
peeling off the blue tape.

Peel off the blue tape from the optional 
scanning mat before scanning.

Symptom

Possible Causes (or Results)

Solutions

Reference

Содержание 891-Z01

Страница 1: ...Be sure to read this document before using the machine We recommend that you keep this document nearby for future reference Operation Manual Cutting Machine Product Code 891 Z01 ...

Страница 2: ...n The name of Intel Corporation may not be used to endorse or promote products derived from this software without specific prior written permission This software is provided by the copyright holders and contributors as is and any express or implied warranties including but not limited to the implied warranties of merchantability and fitness for a particular purpose are disclaimed In no event shall...

Страница 3: ...plicated or reproduced partially or in full without permission We assume no responsibility for damages arising from earthquakes fire other disasters actions of third parties the user s intentional or negligent operation misuse or operation under other special conditions For additional product information visit our web site at www brother com Symbols Used in This Document The following symbols are ...

Страница 4: ...wise the cover of the AC adapter may melt and a fire or electric shock may result If the machine is not to be used for a long period of time be sure to unplug the AC adapter from the machine and the electrical outlet for safety reasons When performing maintenance such as cleaning unplug the AC adapter from the electrical outlet Otherwise an electric shock may result When disconnecting the power co...

Страница 5: ... sprays are used Otherwise a fire or physical injuries may result Do not use the machine near medical electrical equipment Otherwise the medical electrical equipment may be affected by the electrical waves from this machine and malfunction resulting in an accident Avoid using this machine outdoors Otherwise the machine may become wet possibly resulting in an electric shock If the machine becomes w...

Страница 6: ...njuries may result If anything is pulled in immediately unplug the power cord to stop the machine Do not touch the sharp edge of the blade Otherwise injuries may result Pay close attention to the carriage movements while the machine is operating Keep your hands away from all moving parts such as the rollers carriage and holders Do not place your fingers under the blade holder In addition keep your...

Страница 7: ...void using craft paper or fabric covered with decorative layer that can easily separate such as lamé or foil The separate layer may stick to the machine s scanning device or feed rollers during operation resulting in damage to the machine It may also damage the cutting blade While the machine is operating do not pull out or push in the mat with extreme force Otherwise the blade or holder may be da...

Страница 8: ...bles and the feeding mechanism in the machine In this case some or all of the scan data may be missing The original may be damaged if it becomes jammed If a fluorescent marker has been used on the original the color may not be scanned depending on the marker color and thickness or the hue may not be faithfully reproduced Federal Communications Commission FCC Compliance Notice For USA Only This equ...

Страница 9: ...ng a Single Pattern 31 Selecting Multiple Patterns 31 3 ADVANCED OPERATIONS 33 CUTTING AND EDITING FUNCTIONS 33 Pattern Editing Functions 33 Pattern Editing Functions Advanced Patterns 34 Pattern Layout Screen 35 Layout Editing Functions 35 Welding Merging the Outlines of Multiple Patterns 36 Auto Layout Functions 38 Scanning a Background Image 38 Character Input Functions 40 MEMORY FUNCTIONS 41 S...

Страница 10: ...ate designs Scanning Scan mode Scan an illustration photo or your own drawing to create personalized cut designs The design can then be cut out or saved as data The many editing functions allow you to easily process the scanned design The laid out design can be saved and recalled at any time FEATURES Home screen Select a pattern Tutorial 1 page 25 Tutorial 2 page 27 Scan an image Tutorial 3 page 4...

Страница 11: ...age and holder Open the cover while the machine is operating Unit Descriptions Rear a USB Port Allows a USB flash drive to be connected for saving and recalling data b Slot Allows a mat to be fed back and forth during an operation Do not place any objects near the slot that would prevent the mat from being fed out c DC Power Jack d AC Adapter e AC Power Cord Unit Descriptions Operation Panel a Pow...

Страница 12: ...Panel The angle of the operation panel can be adjusted to one of three levels To store away the operation panel first raise it until it is vertical and then it can be lowered and stored away If you wish to decrease the angle of the operation panel raise it until it is vertical and then adjust the angle again Note Follow the instructions provided above to lower the panel Lowering it forcibly may ca...

Страница 13: ... a selection in the screens Otherwise damage to the machine may result Preparation of Craft Paper Fabric Prepare the material for cutting drawing and scanning Direct Cut based on the following conditions Recommended thickness varies depending on the type of material used Note Avoid using craft paper or fabric covered with decorative layer that can easily separate such as lamé or foil The separate ...

Страница 14: ...ng the Mat on page 58 b Test attaching the material Before attaching the material to the mat use a corner of the adhesive side of the mat to test attaching it Check for the following when testing attaching the material The color does not come off the material when it is peeled off The material is not torn or deformed when it is peeled off If any problems occur when testing attaching use different ...

Страница 15: ...e c Standard mat turquoise and purple d Low tack adhesive mat turquoise When cutting slick paper Attaching the Material Medium Weight Paper Follow the steps in Attaching the Material Lightweight Paper on page 12 Peeling Off the Material Medium Weight Paper Follow the instructions in Peeling Off the Material Lightweight Paper on page 13 3 Lightweight Fabric for Quilt Piecing a Standard cut blade b ...

Страница 16: ...he adhesive side of the mat to test attaching it If any problems occur when testing attaching use different material e From its edges attach the material to the adhesive side of the mat so that there are no wrinkles in the material Be sure to first iron the fabric to remove any wrinkles Note Place the material within the attaching area grid area on the adhesive side If the material extends from th...

Страница 17: ...lacing the sheet use the spatula to carefully remove the old sheet Store the mat in between uses with the protective sheet affixed to the support sheet If a mat with a support sheet attached is not to be used for a certain length of time peel the support sheet off the mat and affix the protective sheet on the adhesive side of the mat before storing it Do not reuse a support sheet that has been att...

Страница 18: ...fabric d Evenly iron the entire contact sheet to affix it to the wrong side of the fabric With the iron on a medium temperature setting 140 to 160 C 284 F to 320 F press each part of the sheet for about 20 seconds the length of time differs depending on the material Be sure to apply pressure on the top of the backing and push out any air between the sheet and fabric a Backing Note Before attaching...

Страница 19: ...t b Contact sheet Note Do not place anything heated on the fabric attached with a contact sheet Adhesive will permeate any other pieces of fabric around Attaching Fabrics With the Double Sided Adhesive Place a cutout on a base fabric and apply pressure on the top of the cutout using an iron The contact sheet may not adhere well to some fabrics Hand or machine stitch to ensure that the cutout stays...

Страница 20: ...ade tip Note Be careful that the blade does not extend too much If there is too much of a blade extension the material may not be cut cleanly and the mat will deteriorate quicker Cutting Settings Use the following table to select the appropriate settings according to the material that will be cut Adjust the setting for Cut Pressure in the settings screen page 23 Use a support sheet or contact shee...

Страница 21: ...lever c Grasp the holder grip and then insert the holder into the carriage a Grip d Push down on the holder lock lever Firmly push down until the holder is locked in place e Reverse the installation procedure to uninstall the holder Note After removing the blade holder from the machine or when storing it store the blade tip within the holder Trial Cutting Make sure that the blade extension is appr...

Страница 22: ...e OK key For details on changing the pattern arrangement see Pattern Layout Screen on page 35 Press to cancel the pattern selection and then select the pattern again Loading the Mat a Attach the material that will be cut to the mat For details on attaching material to the mat see Mat and Cutting Blade Combinations on page 12 b While holding the mat level and lightly inserting it into the feed slot...

Страница 23: ...y Note Depending on the fabric being used it may not be cut cleanly if the cutting pressure is not correctly adjusted For the appropriate cutting pressure see Cutting Settings on page 18 c Press the Start Stop button to start cutting X When cutting is finished the message Finished cutting appears on the display Touch the OK key to return to the draw cut selection screen Unloading the Mat a Press i...

Страница 24: ... careful that the blade does not extend too much If there is too much of a blade extension the material may not be cut cleanly and the mat will deteriorate quicker Trial cutting results Tips for adjustment Part of the cut material remains when it is peeled off Too Little of a Blade Extension Turn the holder cap half a marking to the right b The material is not clearly cut Too Little of a Blade Ext...

Страница 25: ... between the mat size 12 12 305 mm 305 mm and 12 24 305 mm 610 mm Touch the OK key to apply the settings Touch to return to the previous screen without applying the settings Background Adjust the contrast of a background image scanned with the background scanning function For details see Scanning a Background Image on page 38 Page 2 Cut Speed Adjust the cutting speed Cut Pressure Adjust the cuttin...

Страница 26: ...sive fabric support sheet Page 4 Opening Screen Select whether the opening slide show is displayed after the machine is turned on If the slide show is displayed touch the screen to display the home screen Page 5 No Displays the serial number specific for this machine Ver Displays the version information for this software Auto Shutdown If the machine is not used for a specified length of time it wi...

Страница 27: ...First Pattern a Select Pattern in the home screen b Select the category for the pattern to be cut out in the pattern category selection screen For this example select a Touch to return to the previous screen b Pattern categories Memo The pattern categories and built in patterns that appear in the operation screens differ depending on the machine model For details on the built in patterns refer to ...

Страница 28: ...K key From this screen an individual pattern can be edited moved or deleted For details on the functions that can be used in the pattern layout screen see Layout Editing Functions on page 35 By using the auto layout function the arrangement of the patterns can easily be adjusted For details see Auto Layout Functions on page 38 X The draw cut selection screen appears Note Depending on the pattern t...

Страница 29: ...sure that patterns that will be cut out are arranged in the cutting area corresponding to the size of the material to be used b Adjust the cutting speed and pressure Before cutting the pattern adjust the cutting speed and pressure These adjustments can be made from the settings screen Press in the operation panel X Touch or to change the settings Note Depending on the fabric being used it may not ...

Страница 30: ... editing is finished touch the OK key For details on the pattern sizing screen see Pattern Sizing on page 34 f Select the piece to be edited first in the pattern piece list screen and then touch the OK key From the pattern piece list that appears in the screen touch a pattern piece to edit it individually Memo The pattern pieces displayed in the pattern piece list screen are automatically arranged...

Страница 31: ... each piece For details on preparing the material and loading the mat see Loading the Mat on page 20 Cutting the First Pattern a Select Cut in the draw cut selection screen X The Start Stop button in the operation panel lights up Note Before continuing operation make sure that patterns that will be cut out are arranged in the cutting area corresponding to the size of the material to be used b Pres...

Страница 32: ...lecting another pattern b Follow the procedures described in Loading the Mat page 20 and Cutting page 21 to load the material to be used for the second pattern piece and cut it out X When cutting is finished a message appears c After all pattern pieces have been cut out touch the Finish key X The draw cut selection screen appears again Unloading the Mat Peel from the mat the pattern piece that was...

Страница 33: ...Desired Patterns a Touch in the layout editing screen for making multiple pattern selection b Individually touch all the patterns you want to select in the screen and then touch the OK key Memo Touching a selected surrounded with a red box pattern again clears its multiple selection Touching any blank space in the screen clears all the pattern selections Selecting All Patterns a Touch in the layou...

Страница 34: ...n area to select the patterns c Touch and drag the area resizing keys to specify the area and then touch the OK key a Keys for specifying the area b Patterns to be selected Note This method of selecting patterns within a specified area is useful for welding or unifying patterns and deleting unwanted images when scanning page 52 a b ...

Страница 35: ... the aspect ratio Touch or to adjust the setting Touch to edit only the width c Duplicating Create a duplicate of the pattern Touch or to specify the number of pattern duplicates to be created d Unlocking the Aspect Ratio Touch to edit the pattern size without maintaining the aspect ratio The function is available depending on the pattern you select If the key is not available the aspect ratio is ...

Страница 36: ...e pattern you select Follow the instructions in either this section or Pattern Editing Functions on page 33 Pattern Sizing Available in the following screen a Touch to edit the pattern height while maintaining the aspect ratio b Touch to edit the pattern width while maintaining the aspect ratio Memo All the pattern pieces displayed on the pattern sizing screen can be resized while maintaining the ...

Страница 37: ...l for cutting drawing to be displayed in the background of the pattern layout screen You can use specific areas of the material to cut out draw patterns or display the material that has already been cut in order to reuse it For details see Scanning a Background Image on page 38 Layout Editing Functions The layout editing functions are available when is touched in the pattern layout screen X The la...

Страница 38: ...is useful for increasing or reducing the size of multiple patterns at one time For selecting multiple patterns touch in the layout editing screen For details see Selecting Multiple Patterns on page 31 X Unifying X Increasing the size of multiple patterns at one time g Welding Merging the Outlines of Multiple Patterns Weld the outlines of multiple patterns to create a single outline For details see...

Страница 39: ...ouch the OK key Note Welding pattern outlines cannot be undone In order to recreate the original pattern arrangement select the patterns again and then arrange them X The outlines of the selected patterns are welded Note This function welds the outermost outline of the patterns When welding certain types of patterns that have inside areas cut out the cut out areas are not used to create the outlin...

Страница 40: ...Any Angle This is useful when arranging a large number of patterns in a limited space b Rearranging By Rotating Patterns 0 or 180 This is useful when arranging the printed design vertical patterns on paper or fabric as the material for cutting drawing or when using the vertical grain c Rearranging Without Rotating Patterns This is useful when arranging the printed design on paper or fabric as the ...

Страница 41: ...tings screen Press in the operation panel to display the settings screen X Makes the background image darker X Makes the background image lighter X Does not display the background image d Touch X The layout editing screen appears Memo The pattern can also be moved by touching and dragging it in the screen e Use the layout editing functions to move the patterns For details on moving patterns see Pa...

Страница 42: ...keys c Uppercase lowercase selection key d Space key e Letter accented character number selection key f Backspace key deletes one character from the end of those displayed Memo If the entered characters do not fit within the cutting drawing area the character size is automatically reduced d Adjust the settings of character size and character spacing Touch or to adjust the character size or the spa...

Страница 43: ... port on this machine a Save to the machine s memory X Touch this key to start saving When saving is finished the following message and the name of the saved file appear b Save to the USB flash drive X Touch this key to start saving When saving is finished the following message and the name of the saved file appear The name of the saved file with the extension fcm is automatically assigned Note Wh...

Страница 44: ...r is not displayed If this occurs change the name of the file folder We recommend using the 26 letters of the alphabet uppercase and lowercase the numbers 0 through 9 and _ X Touch the pattern to be recalled and display a preview of the pattern layout c Check the preview of the pattern layout in the screen and then touch the OK key a Touch to return to the list of patterns at the destination b Tou...

Страница 45: ...for fabrics that will be cut or drawn on Drawing In this example we will draw a built in pattern on material Preparing the Pen Holder a Press the button at the center of the pen holder to unhook the lid and open it b Remove the cap from the pen and then insert the pen into the pen holder with the point down c Close the lid of the pen holder Note After use remove the pen from the pen holder and the...

Страница 46: ...Use the same material that the pattern will be drawn on to make the adjustments f Press the Start Stop button in the operation panel to start drawing Note After use remove the pen from the pen holder and then attach the cap to the pen before storing it Cutting Around Drawings In this example we will specify a seam allowance for a built in pattern and draw the pattern then cut an outline around it ...

Страница 47: ... the pattern arrangement and then touch the OK key When using fabric the patterns may not be cleanly cut if they are arranged near the edge of the fabric In this case move patterns so they are at least 10 mm from the fabric edge the edge of the cutting drawing area in the screen To re edit the pattern arrangement after checking it touch For details see Pattern Layout Screen on page 35 X The draw c...

Страница 48: ...rocedure Cutting a Touch the Cut key X A preview of the line to be cut appears X The Start Stop button in the operation panel lights up b Remove the pen holder and then install the blade holder Note Replace the holder without turning off the machine If the machine is turned off the mat will be fed out when it is turned on again Therefore the drawn pattern outline and cut pattern may become misalig...

Страница 49: ...scribed below Patterns that are clearly drawn with no gradation fading or blurriness Patterns that are at least a 5 mm square Not using an extremely intricate design b Press to turn on the machine For details see Turning On Off the Machine on page 10 c Install the cutting blade holder into the carriage of the machine For details see Installing and Uninstalling the Holder on page 19 Scanning a Touc...

Страница 50: ...scanning is finished the scanned image appears in the screen f Check the scanned image and then touch the OK key Editing Cutting Lines a In the image trim screen use the touch pen to touch and drag it around the screen to trim the image b To cut around the image for the pattern touch the OK key Touch to cut any of a variety of shapes as a frame around the scanned image For details on selecting a f...

Страница 51: ...rs a Outlining Touch this key to create a cutting line that follows the outline of the scanned image b Frame Shape Scroll Keys Touch or to scroll up or down through the list of frames c Framing Touch the key for the desired frame to add it to the scanned image and create a cutting line that follows its shape If there are multiple images a frame can be specified for each image d Previewing Display ...

Страница 52: ...he mat and then load the mat into the feed slot Lightly insert the mat into the feed slot and press in the operation panel For details on loading the mat see Loading the Mat on page 20 Memo In Scan to Cut Data mode the optional 12 24 305 mm 610 mm mat cannot be used d Press the Start Stop button to start scanning X When scanning is finished the scanned image appears in the screen Editing Cutting D...

Страница 53: ...ing Data a Select the destination where the data will be saved Select either the USB flash drive or the machine s memory as the destination for saving the data Touch the key for the desired destination For this example select the machine s memory In order to save data on a USB flash drive plug the device into the USB port on this machine X Touching a key starts saving the data When the data has be...

Страница 54: ...terns in the specified area b Unwanted spots and lines X Specify the area of the unwanted spots and then touch the OK key X Touch to delete all of the selected spots Editing Pictures By adjusting the output level of data for a scanned image you can reproduce the image in a wide variety of ways Available in the following screen Specifying Delete Size Clean up the image by deleting small spots unwan...

Страница 55: ...ection Level Convert an image with a gradation or shading to a two tone black and white image and then create cutting lines for that image In the following example we will scan three images of different tones light medium dark a Touch in the function selection screen to display the setting screen b Specify the threshold for converting an image to a two tone image using and 1 Cutting line created 2...

Страница 56: ...paper or fabric to be scanned The mat can be used without attaching the paper or fabric to the mat Tutorial 5 Scanning to USB In this tutorial we will save an illustration drawn on paper as JPEG data to a USB flash drive Scan Settings a Plug the USB flash drive into the USB port on this machine b Touch the Scan key in the home screen to select the scanning mode c Select Scan to USB in the scanning...

Страница 57: ...to finish specifying settings i Check the settings and then touch the OK key X A message appears Scanning and Saving a Attach the original that will be scanned to the mat Note Place the original to be scanned so that it is in the landscape orientation a 12 12 305 mm 305 mm b Letter 216 mm 279 mm c A4 210 mm 297 mm d 8 8 203 mm 203 mm e 5 7 127 mm 178 mm f 4 6 102 mm 152 mm g 3 5 5 89 mm 127 mm b L...

Страница 58: ...here are many cutting traces in the mat Cutting blade When the cuts in the material become rough reducing the quality of the finished product When the cutting edge becomes blunt High tack adhesive fabric support sheet When the sheet s adhesive strength decreases When fabric attached becomes twisted while being cut Scanning mat When the mat and cover sheet become dirty reducing the quality of the s...

Страница 59: ...he holder cap to attach it to the holder Fully tighten the cap until the blade extension reaches its maximum and then loosen the cap until the blade is no longer visible a Tighten the cap until the blade extension reaches its maximum b Loosen the cap until the blade becomes invisible from the cap end Note Loosen the holder cap until the blade tip is no longer visible The blade extension scale on t...

Страница 60: ...ecrease Do not fold or bend the mat to store it Store the mat at room temperature and in a location not exposed to high temperatures high humidity or direct sunlight If the mat no longer has any adhesive strength replace it with a new one For details on optional mats see OPTIONAL ACCESSORIES on page 66 Cleaning the Holder If material cuttings lint or dust accumulate in the holder it may not operat...

Страница 61: ...move the holder from the carriage d Use a commercially available brush to clean around the feed slot and the carriage Cleaning the Scanner Glass If there are unwanted vertical lines in the scanned image or if scanning cannot be done cleanly the scanning area of the scanner may have become dirty Clean the scanner glass at the bottom of the machine a Turn off the machine and disconnect the power cor...

Страница 62: ...fferent operation follow the steps below to make the proper adjustments a Holding your finger on the LCD screen turn the main power to off and back to on X The touch panel adjustment screen is displayed b Using the included touch pen lightly touch the center of each in order from 1 to 5 X After completing the touch panel adjustment the message SUCCESS appears on the screen c Turn the main power to...

Страница 63: ...hin the adhesive area of the mat page 12 The mat was inserted so that the side with the material attached is facing down Insert the mat so that the side with the material attached is facing up page 20 The mat is fed in at an angle The mat was inserted into the feed slot at an angle Press the Feed button to feed out the mat and then re insert it straight in page 20 The corners of the mat are deform...

Страница 64: ...machine stops operating if the panel is touched while cutting or drawing Follow the instructions in the message that appears in the screen Touch the OK key to move the carriage to its initial position Load the mat and perform the operation again Not all of the material to be cut is cut Some areas remain uncut A blade appropriate for the material being cut is not used Use a blade appropriate for th...

Страница 65: ... draw thinner lines increase the drawing speed After adjusting the settings perform a trial drawing operation page 23 Symptom Possible Causes or Results Solutions Reference Unwanted images are scanned The scanning area is incorrectly specified In Scan to USB mode specify the paper size with the Scan Size setting page 54 In Direct Cut or Scan to Cut Data mode trim the image in the editing screen af...

Страница 66: ...o long for the mat Reduce the number of characters so that the length of the character string fits in the width of the 12 inch mat maximum possible width 297 mm Initialization of the blade position failed Turn the machine off Turn the machine off then on again Initialization of the head failed Turn the machine off No more patterns can be added to this combination 301 or more patterns cannot be com...

Страница 67: ...nnot be saved The mat cannot be recognized The mat will unload A mat that cannot be recognized has been inserted If a mat designed specifically for this machine is not being used use the specially designed mat Clean the dotted marks at the edge of the mat and their surrounding area If the mat is still not recognized replace the mat with a new one There are some patterns which cannot add seam allow...

Страница 68: ...from the port e Turn the machine off then on again The following are available as optional accessories to be purchased separately Contact the retailer who sold you this machine or the nearest authorized service center UPGRADING THE SOFTWARE OPTIONAL ACCESSORIES 1 2 3 4 5 6 7 8 9 10 11 12 13 14 15 No Part Name Part Code 1 Low tack adhesive mat 12 12 305 mm 305 mm turquoise CAMATP12 2 Low tack adhes...

Страница 69: ...rval 24 Low tack adhesive mat 12 M Main power on off 10 Main power switch 11 25 Mat loading 20 Mat unloading 21 O Opening screen 11 24 Operation panel 9 10 Optional accessories 66 Outline distance 49 Outlining and framing 49 P Parts and functions 9 Pattern category selection screen 25 Pattern editing functions 33 Pattern editing screen 25 33 Pattern layout screen 26 35 Pattern mode 8 Pattern piece...

Страница 70: ......

Страница 71: ......

Страница 72: ...XF5251 001 English 891 Z01 Printed in China Please visit us at http solutions brother com where you can get product support and answers to frequently asked questions FAQs ...

Отзывы: