background image

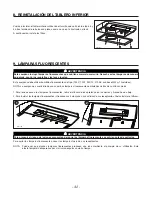
NOTA: Si la parte inferior del armario está empotrada, instale tiras de madera (no incluidas),

como se ve en las ilustraciones, para poder instalar debidamente la campana en el
armario. Las tiras de maderas deben ser del mismo grosor del encastre.

Corte el armario e en la pared las aperturas para el tubo (

A

) y para el cable de alimentación (

B

), con arreglo a la dirección de la

descarga elegida. Vea las siguientes ilustraciones. 

D

ESCARGA


HORIZONTAL

:

D

ESCARGA


VERTICAL

:

C

L

HD0150E

3½”

5¼” 5¼”

B

1¼” diá.

A

7

8

11

1

8

C

L

¾”

3¾”

5¼”

5¼”

1

¼

HD0151E

A

BASE DEL ARMARIO

B

3

8

1½”

10½”

- 29 -

3. PREPARACIÓN DE LA INSTALACIÓN

Compruebe que el aparato viene con los siguientes:

-Campana

-Filtros (2)

-Conjunto del adaptador o dispositivo de cierre de 3¼’’ x 10’’ (ubicado en la campana, bajo el tablero inferior)

-Bombillas fluorescentes (120 V, 13 W, PLC13, 2700 K con base G24q-1) (lámparas fluorescentes embaladas detrás el difusor 

de luz)

-Bolsa con piezas (ubicado en la campana, bajo el tablero inferior), que comprende:

(1) abrazadera de cable, (5) tornillos de doble rosca n.° 8 x 1/2’’, (2) conectadores de hilos y (6) tornillos n.° 6 x 1/2’’ 

Pieza vendida aparte: 

-  Cambio de sección de 3¼’’ x 10” a 6” redondo (opcional, soló para instalaciones con tubos redondos de 6 pulgadas)

PRECAUCIÓN

Se aconseja llevar anteojos y guantes de seguridad al instalar, reparar o limpiar la campana.

HO0002A

2    ”

3

8

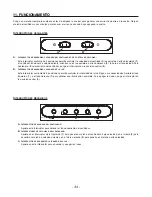
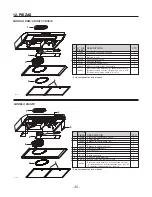
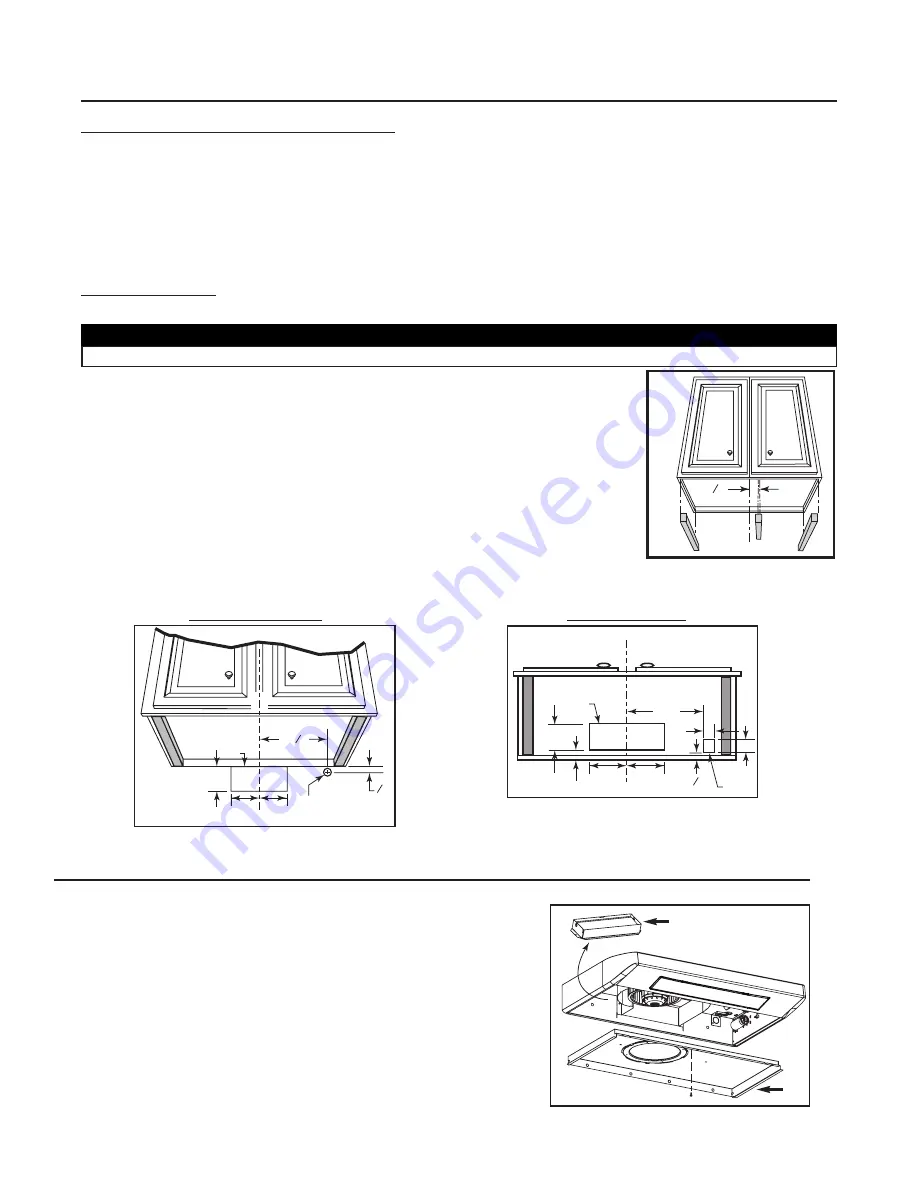
4. PREPARACIÓN DE LA CAMPANA

Retire ambos filtros de la campana. Desmonte el adaptador o dispositivo de cierre,
(

A

) de la campana.

NOTA: El adaptador o dispositivo de cierre estars dentro de la campana. Se debe

retirar el tablero inferior (

B

) para tener acceso al adaptador o dispositivo

de cierre. Consulte la siguiente ilustracione.

HO0091

Содержание ESB10

Страница 1: ...NS USE AND CARE INTENDED FOR DOMESTIC COOKING ONLY INSTALLER LEAVE THIS MANUAL WITH HOMEOWNER HOMEOWNER CLEANING AND OPERATION INFORMATION ON PAGES 9 AND 10 V06727 rev A READ AND SAVE THESE INSTRUCTIONS MODELS ESB10 ESN10 ESV10 QDE AND ESC270 ...

Страница 2: ...ware appropriate for the size of the surface element TO REDUCE THE RISK OF INJURY TO PERSONS IN THE EVENT OF A RANGE TOP GREASE FIRE OBSERVE THE FOLLOWING 1 SMOTHER FLAMES with a close fitting lid cookie sheet or metal tray then turn off the burner BE CAREFUL TO PREVENT BURNS IF THE FLAMES DO NOT GO OUT IMMEDIATELY EVACUATE AND CALL THE FIRE DEPARTMENT 2 NEVER PICK UP A FLAMING PAN You may be burn...

Страница 3: ...of death CAUTION Denotes an instruction which if not followed may severely damage the unit and or its components Phillips screwdriver no 2 or Robertson no 1 and no 2 Pair of long nose pliers to open thehorizontal or vertical discharge knockout hole Hammer and flat blade screwdriver to open the electrical knockout hole Sheet metal sheers Pair of pliers Scissors to cut duct tape Pen Wire stripper TA...

Страница 4: ...ound duct Roof cap Wall cap 3 x 10 to 6 round transition HH0014A 2 MEASURE THE INSTALLATION Dimensions for the most common installations are shown below We recommend to install the hood at a minimum of 20 508 mm from an electric range and at 24 610 mm from a gas range For optimal performance the hood should not be installed more than 30 762 mm from cooktop Cabinets 30 maximum clearance Standard 36...

Страница 5: ... assembly 3 x 10 located inside the hood under the bottom panel Compact fluorescent lamps 120 V 13 W PLC13 2700 K with G24q 1 base packed behind the light diffuser Bag of parts located inside the hood under the bottom panel including 1 wire clamp 5 no 8 x 1 2 double thread screws 2 wire connectors and 6 no 6 x 1 2 screws Part sold separately Transition 3 x 10 to 6 round optional for 6 round ducts ...

Страница 6: ...e HJ0006 C It may be necessary to adjust the adapter damper location to the existing wall discharge opening Leave the foldable flange C of the adapter damper as is Use the upper screw holes on each side of the adapter damper to assemble it to the back of hood See beside HJ0007 C HORIZONTAL DISCHARGE NEW INSTALLATION HORIZONTAL DISCHARGE HOOD REPLACEMENT Punch out the appropriate electrical knock o...

Страница 7: ...under the cabinet and slide it in position Make sure the adapter damper assembly enters the ducting and the damper opens freely Secure the hood by tightening the screws completely Install the last 1 2 double thread screw B in the remaining embossed hole 5 INSTALL THE ADAPTER DAMPER CONT D For a vertical discharge installation only leave the foldable flange C of the adapter damper as is This flange...

Страница 8: ...ipped with both fluorescent lamps packed behind the light diffuser 1 To access fluorescent lamps remove the light diffuser by pushing on its both tabs and pulling it down 2 To install the fluorescent lamps slide their 4 prongs into their corresponding holes in their socket until secured Reinstall the light diffuser WARNING In order to prevent the risk of personal injury the fluorescent lamps must ...

Страница 9: ...t Always clean in the direction of original polish lines Always rinse well with clear water 2 or 3 times after cleaning Wipe completely dry You may also use a specialized household stainless steel cleaner Don t Do not use any steel or stainless steel wool or any other scrapers to remove stubborn dirt Do not use any harsh or abrasive cleansers Do not allow dirt to accumulate Do not let plaster dust...

Страница 10: ...witch to the central position 0 B ON OFF LIGHTING CONTROL SWITCH This 3 position rocker switch controls the lighting Press either on left side 1 or right side 1 to obtain full lighting To shut off the lights set the rocker switch to the central position 0 HC0031 A B MECHANICAL PUSH BUTTON CONTROL A OFF BLOWER SWITCH Press on this switch to stop the blower operation B SPEED BLOWER SWITCHES Press on...

Страница 11: ...2 Item not shown 2 4 1 5 3 6 KEY PART No No DESCRIPTION QTY 1 13296 ADAPTER DAMPER 1 2 16153 SMOKED GLASS 1 13296 GLASS HOLDER BLACK PAIR 1 3 16151 GLASS HOLDER WHITE PAIR 1 16152 GLASS HOLDER GREY PAIR 1 4 03623 FLUORESCENT LAMP 2 5 01752 LIGHT DIFFUSER 1 6 01988 BLOWER WHEEL 1 7 01757 INLET RING 1 8 14131 MICROMESH FILTER THE PAIR 1 V06727 INSTALLATION USER MANUAL 1 04281 HARDWARE BAG 1 WIRE CLA...

Страница 12: ...EL 1 7 V16119 BOTTOM PAN WHITE 1 V16117 BOTTOM PAN BLACK 1 8 V01757 INLET RING 1 9 V14131 MICROMESH FILTER THE PAIR 1 10 V02104 SECONDARY CAPACITOR 7 5µF 1 11 V06756 CAPACITOR 11 5µF 1 12 V03649 BALLAST HARNESS SOCKET LAMPS INCLUDED 1 V06727 INSTALLATION USER MANUAL 1 V04281 HARDWARE BAG 1 WIRE CLAMP 2 WIRE CONNECTORS 1 6 NO 6 X 1 2 SCREWS 5 NO 8 X 1 2 DOUBLE THREAD SCREWS 12 SERVICE PARTS HL0095 ...

Страница 13: ...D ENTRETIEN CONÇUES UNIQUEMENT POUR LA CUISSON DOMESTIQUE INSTALLATEUR LAISSEZ CE GUIDE AU PROPRIÉTAIRE PROPRIÉTAIRE DIRECTIVES D ENTRETIEN ET DE FONCTIONNEMENT EN PAGES 21 et 22 V06727 rév A VEUILLEZ LIRE ET CONSERVER CES DIRECTIVES MODÈLES ESB10 ESN10 ESV10 QDE ET ESC270 ...

Страница 14: ...propriés à la dimension de la surface chauffante AFIN D ÉVITER TOUS RISQUES DE BLESSURE DANS LE CAS D UN FEU DE CUISINIÈRE SUIVEZ CES INSTRUCTIONS 1 ÉTOUFFEZ LES FLAMMES avec un couvercle hermétique une tôle à biscuits ou un plateau métallique et ensuite éteindre le brûleur EVITEZ DE VOUS BRÛLER SI LES FLAMMES NE S ÉTEIGNENT PAS IMMÉDIATEMENT ÉVACUEZ LES LIEUX ET APPELER LES POMPIERS 2 NE PRENEZ J...

Страница 15: ...nstruction qui si elle n est pas suivie peut gravement endommager l appareil et ou ses pièces Un tournevis Phillips n 2 ou Robertson n 1 et n 2 Une pince à long bec pour dégager le trou d évacuation horizontale ou verticale Un marteau et un tournevis à lame plate pour dégager le trou d accès à l alimentation électrique Des ciseaux à tôle Des pinces Des ciseaux pour couper le ruban adhésif en toile...

Страница 16: ...Capuchon de toit Capuchon de mur Transition de 3 po x 10 po à 6 po ronde HH0014F 2 MESURES DE L INSTALLATION Voici les dimensions pour les installations les plus courantes Il est recommandé d installer la hotte à une distance minimale de 20 po 508 mm au dessus d une cuisinière électrique et de 24 po 610 mm au dessus d une cuisinière à gaz Pour des performances optimales la hotte ne doit jamais êtr...

Страница 17: ... x 10 po à l intérieur de la hotte sous le panneau inférieur Ampoules fluorescentes compactes 120 V 13 W PLC13 2700 K avec culot G24q 1 emballées derrière le diffuseur de lumière Sac de pièces à l intérieur de la hotte sous le panneau inférieur incluant 1 serre fils 5 vis à double filets n 8 x 1 2 2 connecteurs de fils et 6 vis n 6 x 1 2 po Pièce vendue séparément Transition 3 po x 10 po à 6 po ro...

Страница 18: ... de l adaptateur volet à l ouverture existante pour l évacuation par le mur Pour ce faire laisser le rebord pliable C de l adaptateur volet tel quel Assembler l adaptateur volet à l arrière de la hotte en insérant les vis d assemblage dans le trou supérieur des 2 rebords Voir ci contre HJ0007 C ÉVACUATION HORIZONTALE NOUVELLE INSTALLATION ÉVACUATION HORIZONTALE REMPLACEMENT D UNE HOTTE 1 2 3 HD015...

Страница 19: ...ural doit être bien préparé pour recevoir l adaptateur Avant d effectuer l installation s assurer que l adaptateur s insère bien dans le conduit Pour une installation avec évacuation verticale seulement laisser le rebord pliable C tel quel Installer l adaptateur volet de façon à ce que ce rebord soit dirigé vers l avant de la hotte Voir ci contre HO0057 C TOUTES LES INSTALLATIONS À l aide de 2 vis...

Страница 20: ...irée précédemment à l étape 4 plus 4 autres provenant du sac de pièces Voir ci contre Puis réinstaller les filtres HO0092 HO0099 1 2 Cette hotte utilise des ampoules fluorescentes compactes de 120 V 13 W PLC13 2700 K avec culot G24q 1 incluses NOTE La hotte est livrée avec ses 2 lampes fluorescentes emballées derrière son diffuseur de lumière 1 Pour accéder aux lampes fluorescentes retirer le diff...

Страница 21: ... des filtres ce qui n affectera en rien leur capacité de filtration Cette décoloration n est pas couverte par la garantie Pour retirer la roue du ventilateur enlever d abord l anneau d admission puis dégager la roue du ventilateur en tirant doucement vers le bas NOTE Ne pas tenter de retirer la pièce noire C fixée au panneau inférieur Lors de la réinsertion de la roue sur son ventilateur s assurer...

Страница 22: ...UR MARCHE ARRÊT D ÉCLAIRAGE Cet interrupteur à bascule à trois positions contrôle d éclairage Appuyer sur son côté gauche ou droit 1 pour allumer les lumières Pour éteindre la lumière régler l interrupteur à bascule en position centrale 0 COMMANDE À BOUTONS POUSSOIRS MÉCANIQUES A INTERRUPTEUR ARRÊT DU VENTILATEUR Appuyer sur cet interrupteur pour faire cesser le fonctionnement du ventilateur B INT...

Страница 23: ...llustré 2 4 1 5 3 6 N PIÈCE Réf N DESCRIPTION QTÉ 1 13296 ADAPTATEUR VOLET 1 2 16153 VERRE FUMÉ 1 13296 SUPPORT DE VERRE NOIR LA PAIRE 1 3 16151 SUPPORT DE VERRE BLANC LA PAIRE 1 16152 SUPPORT DE VERRE GRIS LA PAIRE 1 4 03623 LAMPE FLUORESCENTE 2 5 01752 DIFFUSEUR DE LUMIÈRE 1 6 01988 ROUE DE VENTILATEUR 1 7 01757 ANNEAU D ADMISSION 1 8 14131 FILTRE MICROMESH LA PAIRE 1 V06727 GUIDE D INSTALLATION...

Страница 24: ...88 ROUE DE VENTILATEUR 1 7 V16119 PANNEAU INFÉRIEUR BLANC 1 V16117 PANNEAU INFÉRIEUR NOIR 1 8 V01757 ANNEAU D ADMISSION 1 9 V14131 FILTRE MICROMESH LA PAIRE 1 10 V02104 CONDENSATEUR SECONDAIRE 7 5µF 1 11 V06756 CONDENSATEUR 11 5µF 1 12 V03649 HARNAIS DES BALLASTS RÉCEPTACLE DES LAMPES INCLUS 1 V06727 GUIDE D INSTALLATION ET D UTILISATION 1 V04281 SAC DE PIÈCES 1 SERRE FILS 2 CONNECTEURS DE FILS 1 ...

Страница 25: ... CUIDADO EXCLUSIVAMENTE PARA COCINAS DOMÉSTICAS INSTALADOR ENTREGUE ESTE MANUAL AL PROPIETARIO DE LA CASA PROPIETARIO INFORMACIÓN SOBRE LIMPEIZA Y FUNCIONAMIENTO EN LAS PÁGINAS 33 y 34 V06727 rev A LEA Y CONSERVE ESTAS INSTRUCCIONES MODELOS ESB10 ESN10 ESV10 QDEY ESC270 ...

Страница 26: ... siempre un recipiente adecuado para el tamaño de la placa PARA REDUCIR EL RIESGO DE LESIONES CORPORALES EN EL CASO DE QUE ARDA LA GRASA EN LA PARTE SUPERIOR DE LA COCINA SIGA ESTAS INDICACIONES 1 SOFOQUE LAS LLAMAS con un tapa ajustada una hoja o bandeja metálica para hornear galletas y apague luego el quemador TENGA CUIDADO PARA EVITAR QUEMADURAS SI LAS LLAMAS NO SE APAGAN INMEDIATAMENTE EVACUE ...

Страница 27: ...ezas Destornillador Phillips n 2 o Robertson n 1 y n 2 Un par de alicates de punta para abrir el orificio ciego de descarga horizontal o vertical Un martillo y un destornillador de punta plana para abrir el orificio ciego eléctrico Revestimiento de chapa metálica soló para instalaciones con conductos para ajustarlos Un par de alicates soló para instalaciones con conductos para ajustarlos Tijeras p...

Страница 28: ...apa de techo Tapa de pared Cambio de sección 3 x 10 a 6 HH0014E 2 DIMENSIONES DE LA INSTALACIÓN Más adelante se muetran las dimensiones para las instalaciones habituales Aconsejamos que la campana se instale a una distancia mínima de 20 pulgadas 508 mm de la superficie de una cocina eléctrica y de 24 pulgadas 610 mm de una cocina a gas Para lograr un rendimiento óptimo la campana no debería instal...

Страница 29: ... campana bajo el tablero inferior Bombillas fluorescentes 120 V 13 W PLC13 2700 K con base G24q 1 lámparas fluorescentes embaladas detrás el difusor de luz Bolsa con piezas ubicado en la campana bajo el tablero inferior que comprende 1 abrazadera de cable 5 tornillos de doble rosca n 8 x 1 2 2 conectadores de hilos y 6 tornillos n 6 x 1 2 Pieza vendida aparte Cambio de sección de 3 x 10 a 6 redond...

Страница 30: ...es necesario de ajustar el emplazamiento del adaptador a la apertura existente para la descarga horizontal Para realizar el ajuste dejar el reborde desplegable C tal cual Fijar el adaptador en la parte trasera de la campana con los tornillos en el agujero superior de los 2 rebordes Véase al lado HJ0007 C DESCARGA HORIZONTAL NUEVA INSTALACIÓN DESCARGA HORIZONTAL SUSTITUCIÓN DE UNA CAMPANA Perfore e...

Страница 31: ...léctrico La conexión eléctrica debe hacerla personal competente con arreglo a los códigos y normas en vigor Antes de conectar los hilos corte la alimentación en el tablero de servicio y bloquee los medios de desconexión para impedir que la corriente se conecte accidentalmente 7 CONEXIÓN DEL CABLEADO ADVERTANCIA No olvide conectar la toma a tierra HD0154 A A B NOTA Para lograr mejor ventilación si ...

Страница 32: ...pana debe utilizar bombillas fluorescentes de tipo 120 V 13 W PLC13 2700 K con base G24q 1 incluidas NOTA La campana es suministrada con su ambos lámparas fluorescentes embaladas detrás de su difusor de luz ADVERTENCIA Para prevenir el riesgo de lesiones corporales deje que las lámparas fluorescentes se enfríen antes de quitarlas ADVERTENCIA Este campana incluye lámparas fluorescentes que contiene...

Страница 33: ...o de la condición del agua local pero esto no afectará el rendimiento del filtro Esta decoloración no está cubierta por la garantía Para quitar la rueda del ventilador quite primero el anillo de admisión y a continuación quite la rueda tirando de ella suavemente NOTA No intente quitar la pieza negra C sujeta al tablero inferior Cuando vuelva a instalar la rueda del ventilador compruebe que la pequ...

Страница 34: ...B INTERRUPTOR DE ENCENDIDO Y APAGADO DE LA LUZ Este interruptor oscilante de 3 posiciones permite controlar la intensidad de la luz Según sus necesidades Apriete el lado izquierdo 1 o el lado derecho 1 para obtener una illuminación completa Para apagar las luces poga el interruptor en la posición central 0 INTERRUPTORES MECÁNICOS A INTERRUPTOR DE APAGADO DEL VENTILADOR Apriete este interruptor par...

Страница 35: ...stra 2 4 1 5 3 6 N N DE PIEZA DESCRIPCIÓN CTD 1 13296 ADAPTADOR DISPOSITIVO DE CIERRE 1 2 16153 CRISTAL HUMADO 1 13296 SOPORTE DE CRISTAL NEGRO PAR 1 3 16151 SOPORTE DE CRISTAL BLANCO PAR 1 16152 SOPORTE DE CRISTAL GRIS PAR 1 4 03623 LÁMPARAS FLUORESCENTE 2 5 01752 DIFUSOR DE LUZ 1 6 01988 RUEDA DEL VENTILADOR 1 7 01757 ANILLO DE ENTRADA 1 8 14131 FILTROS DE MICROTAMIZ PAR 1 V06727 MANUAL DE INSTA...

Страница 36: ... VENTILADOR 1 7 V16119 TABLERO INFERIOR BLANCO 1 V16117 TABLERO INFERIOR NEGRO 1 8 V01757 ANILLO DE ENTRADA 1 9 V14131 FILTROS DE MICROTAMIZ PAR 1 10 V02104 CONDENSADOR SECUNDARIO 7 5µF 1 11 V06756 CONDENSADOR 11 5µF 1 12 V03649 HAZ DE HILOS DE LOS BALASTOS RECPTACULOS DE LÁMPARAS INCLUIDOS 1 V06727 MANUAL DE INSTALACIÓN Y DEL USUARIO 1 V04281 BOLSA CON PIEZAS METÁLICAS 1 ABRAZADERA DE CABLE 1 2 C...

Отзывы: