


e-mail:
voice:
360.854.9559
fax:
866.783.1742
20
WVRC-4 Plus Installation and Operation Manual
SET UP
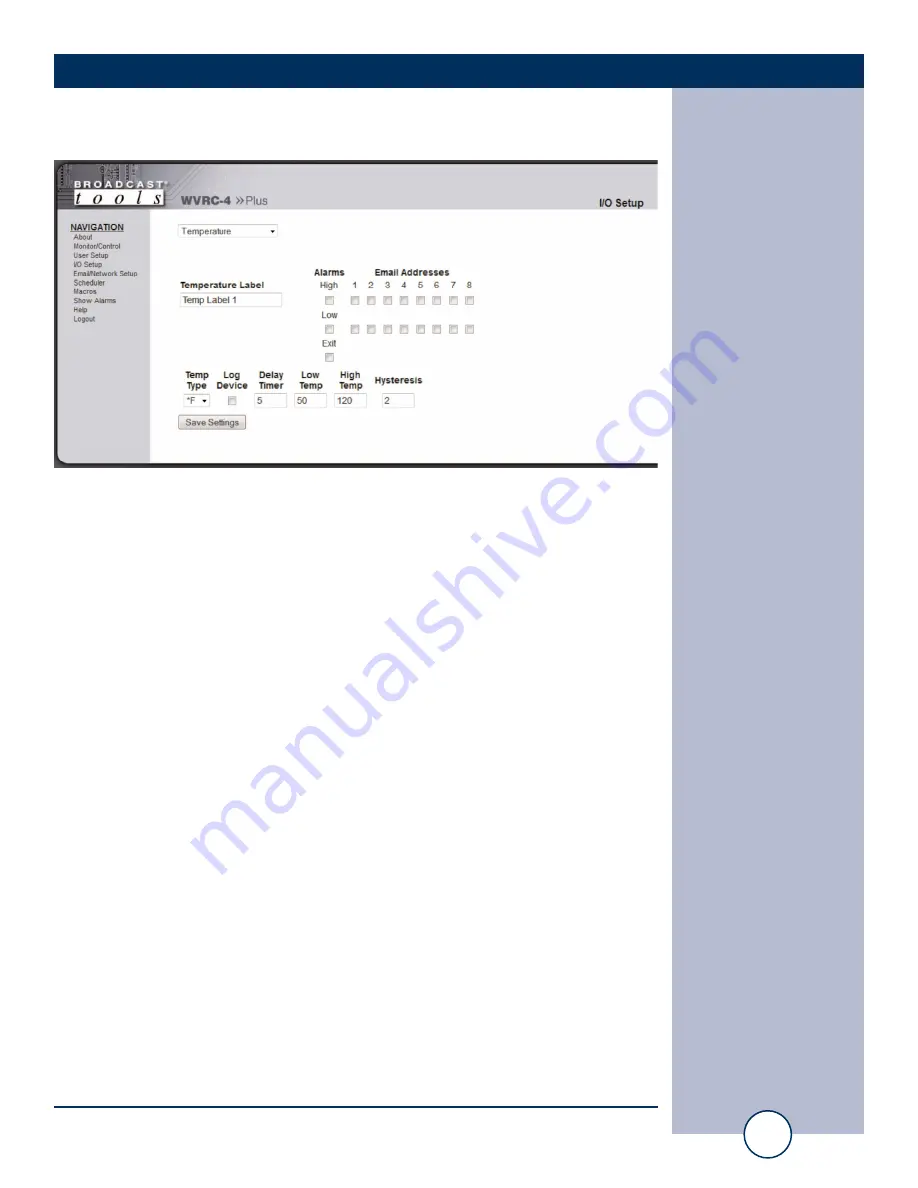
“I/O” Setup Page - Temperature
Temperature Label: Identifies the temperature input source.
Alarms High:
This option enables the “High Trip Point” alarm.
Alarms Low:
This option enables the “Low Trip Point” alarm.
Alarms Exit:
This option enables the generation of an alarm after exiting an alarm state.
Email Addresses:
This allows you to assign up to 8 email addresses to send alarm emails to
whenever the input generates an alarm.
Log Device:
This enables the email snapshot logging of this input.
Delay Timer:
Specifies the delay time from when the input value is above or below the set
alarm trip points and an alarm is generated. 0-999 seconds
Low Temp:
This option specifies the LOW alarm temperature set point.
High Temp:
This option specifies the HIGH alarm temperature set point.
Temp Type:
This option specifies what temperature scale will be used, Fahrenheit or
Centigrade.
Hysteresis:
Hysteresis (deadband), this option specifies the hysteresis used when eval-
uating alarm conditions.
NOTE:
Hysteresis prevents alarms from activating excessively due to normal fluctuation
when the temperature is at a set alarm point. For example, if the hysteresis is set to 1 degree,
and a high temp. alarm is set at 91 degrees, hysteresis ensures that once the high alarm is trig-
gered, it won't go off until the temperature returns to below 91 degrees (90 - 1). This reduces
problems with small fluctuations in temperature readings triggering multiple alarms. The
hysteresis value is also used during low alarm conditions. If, for example, a low temp. alarm
is set to 43 degrees and the hysteresis is set to 1 degree, then once the low alarm is triggered,
it won't go off until the temperature returns a value higher than 44 degrees (43 + 1).
NOTE: After any item has been changed, you MUST press the “Save Settings” but-
ton for your changes to be saved.


