background image

The Brivis Network controls within the heater will automatically adapt the heaters output to suit the
number of outlets that you have open. Check the Outlet Guide (see page 8) for the appropriate number of
outlets you must have open for best performance.

Wall Controller Operation.

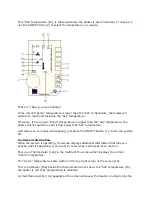
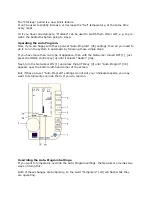
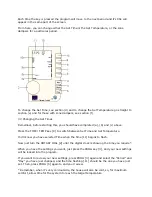
At first glance, the Networker might look complicated, but it really is very simple. It can be as basic or as
sophisticated as you need, or want it to be.

The Brivis Networker is at the heart of an amazingly sophisticated electronic system, but it can be as
simple to use as any manual wall controller.

To learn more about its operation, you will find the Networker booklet in your owners pack.

Outlet Guide.

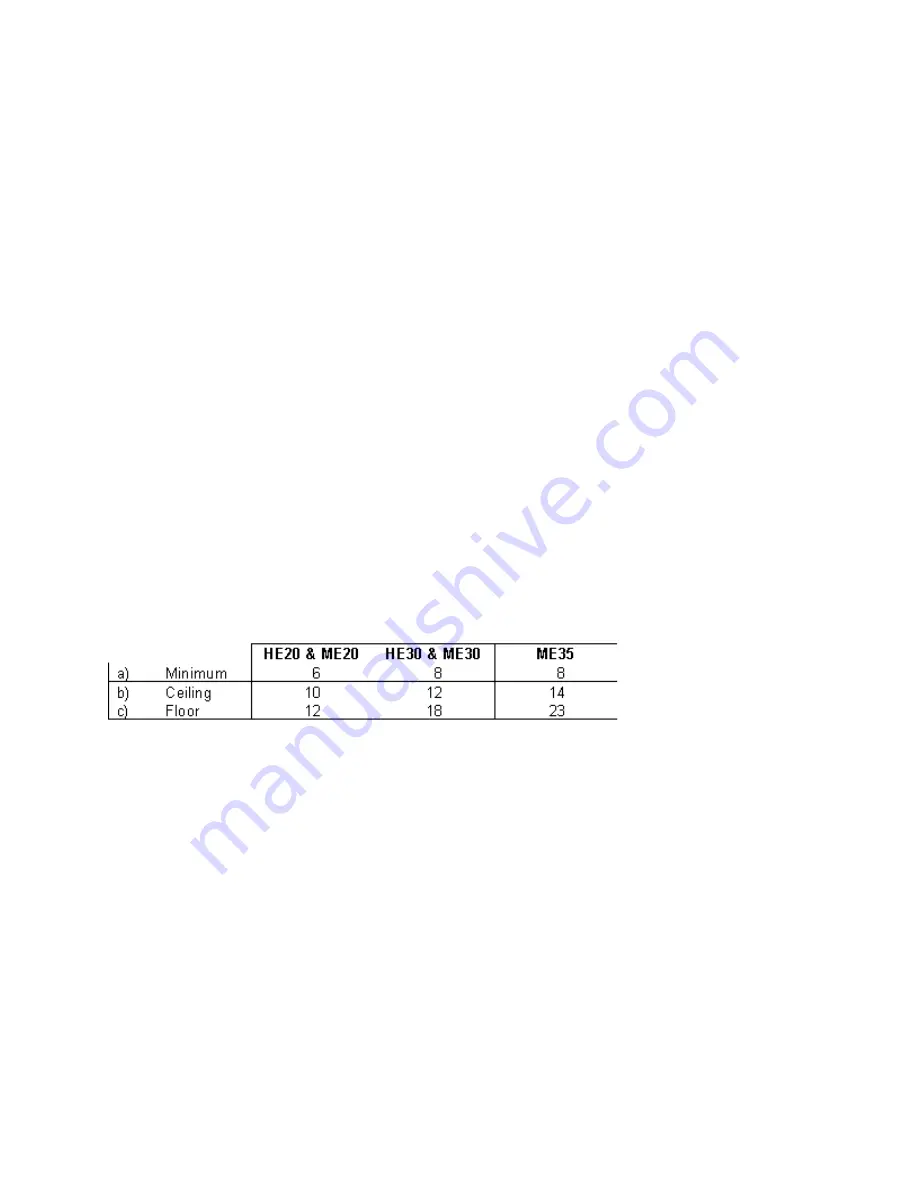
For all systems, a minimum number of outlets a) must remain fully open (this includes both the outlet grille
and the damper in the duct), if the heater is to operate properly without overheating.

Similarly, ceiling systems have a maximum number of outlets b), that can remain fully open, to ensure
that the velocity through each outlet is sufficient.

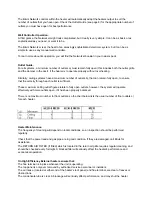
These maximum ceiling outlet figures relate to fully open outlets, however, the system will operate
effectively with more outlets open, if it has been properly balanced.

There is no maximum number for floor outlets, so the chart below lists the usual number of floor outlets c)
for each heater.

Heater Maintenance.

The frequency of cleaning will depend on local conditions, so an inspection should be performed
regularly.

Check that the power lead and gas pipe are in good condition. If they are damaged, call Brivis for
assistance.
The RETURN AIR FILTER (if fitted) which is located in the return air grille requires regular cleaning, and
should be checked every fortnight. A blocked filter will seriously affect the heater's performance and
economical operation.

On High Efficiency External heaters ensure that:

The flue terminal is in place whenever the unit is operating.
The top panel is only ever removed by authorised service personnel or installers.
The air intake, (located at either end of the heater's roof panel) and flue terminal, are clear of leaves or
obstructions.
The condensate tube is clear. A blockage will seriously affect performance, and may shut the heater

Содержание MPS

Страница 1: ... a Brivis product for the first time welcome If you are already an established Brivis customer thank you for your continued support I am sure you will be happy with the choice you have made Yours sincerely Tim O Brien Managing Director Brivis Australia Pty Ltd Understanding Central Heating To make the most of your central heating you first need to be familiar with its basic operating principles Pu...

Страница 2: ...ater s operation the unit has safety mechanisms to turn off the gas supply When the power is restored the heater will resume normal operation automatically If the power is off for more than 2 3 hours the Networker may require the time and day to be reset Heater Operation Ensure the Networker is set at the OFF position Go to the Heater and turn ON the gas cock on the gas supply adjacent to the unit...

Страница 3: ...hrough each outlet is sufficient These maximum ceiling outlet figures relate to fully open outlets however the system will operate effectively with more outlets open if it has been properly balanced There is no maximum number for floor outlets so the chart below lists the usual number of floor outlets c for each heater Heater Maintenance The frequency of cleaning will depend on local conditions so...

Страница 4: ...aerosols in the vicinity of the heater while it is in operation The top cover of the heater must be on when the unit is in operation Do not hose the flue terminal on external heaters Ensure that the flue terminals on external heaters are kept clear of plant growth or any other obstructions The Networker Heating Quick Reference Guide Page 3 Winter Warmth Page 3 Getting Started Page 5 On Screen Info...

Страница 5: ...hat really does the thinking for you The Networker has Timer Thermostat programs that allow you to direct the system to provide the temperature you want when you want it and where you want it Getting Started Once you have read Introducing the Networker operating the heater in Manual couldn t be simpler Start with the Networker turned OFF 1 If you have the Networker ON while switching between units...

Страница 6: ... when you no longer need heating just press the ON OFF button 1 to turn the system off On Screen Information When the system is operating the screen displays additional information that tells you exactly what is happening If you want to know what it all means then read on There is a Thermometer 12a in the middle of the screen which displays the current Room temperature The Room temperature is also...

Страница 7: ... between different zones These will have been set up and explained by the installer of the system and can be operated by either or both of the lower two control keys 6 7 The Auto Program In Automatic the Networker has a pre set Auto Program which is already entered into the Networker s memory This Auto Program covers the entire week It is based on average operation and has the following combinatio...

Страница 8: ...If you have more than one type of appliance then with the Networker turned OFF 1 just press the MODE control key 4 until it selects Heater 4a Next turn the Networker ON 1 and press the AUTO key 3 until Auto Program 3b appears near the bottom left hand corner of the screen But if these pre set Auto Program settings do not suit your immediate needs you may want to temporarily override them If you do...

Страница 9: ...em If so read on Changing the Auto Program Settings If your lifestyle doesn t match the pre set AUTO PROGRAM those settings can be changed very easily If you wish you can change the time or the temperature for any period in four simple steps The first will take you into programming mode a Entering a Program If you are not already in heating mode press the MODE key 4 until the word Heater 4a appear...

Страница 10: ...ME TEMP key 8 to switch between Set Time and Set Temperature You ll know you have selected Time when the time 11 begins to flash Now just turn the ROTARY DIAL 2 until the digital clock is showing the time you require When you have the settings you want just press the PROG key 3 and your new settings will be locked into the program If you want to review your new settings press PROG 3 again and sele...

Страница 11: ...r four zone dampers and only one will appear of you have two or one If you wish to change the zone damper settings for any program period you simply use those keys to select the zone dampers you want to operate during that period Operating the Fan Only Another benefit of a central heating system is that its fan and ductwork system allows you to improve the quality of the air in your home In homes ...

Страница 12: ... Refrig 4b Of course the relationship between Room Temperature 12 and the Set Temperature 15 is reversed The airconditioner will operate to bring the Room temperature down to the Set Temperature not up to it On page 5 On Screen Information there is no Flame symbol 16 so the Fan symbol 17 is used to show the airconditioning is operating On page 6 The Auto Program instead of keeping the temperature ...

Отзывы: