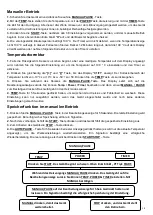
Brewolution BB-A700M-1 Скачать руководство пользователя страница 4


Memory Function in Manual Mode


1. 

Press 

MANUAL/PAUSE

 button 

in edit page

 for 5 seconds, and release it. You have then stored the last setting. 

There's a ringing sound for successful storing.   

2

. Press 

START

 button after the above operation and the Brewster will continue to perform the set program.   

3

. Press 

STOP

 button to stop the Brewster 

4.

 Long press 

AUTO/PAUSE

 button in 

BLANK PAGE

 as below (display show current temperature only as below) for 

5 seconds to restore factory settings, there's a slow ringing for restoring successfully.   


Auto Mode Setting 

1. 

Switch on the device, then press 

AUTO

 button.   

2. 

S1 will be shown on the top left corner, input the 3 settings - 

TEMP

TIMER 

and 

POWER

 (as above).   

3. 

After you have set the 1

st

 program, press 

AUTO

 button again then proceed to the 2

nd

 program setting. 3

rd

 to 9

th


programs are set as 1

st 

and 2

nd

.   

4. 

When  you  have  entered  up  to  9  steps  as  you  require,  press  the 

START

  button  to  confirm  the  above  step 

mashing settings.   

5. 

The steps after boiling will be skipped if 9 steps are too many for your recipe. This program only supports one 

boiling setting in each recipe. However, you can adjust the boiling power during operation anytime.   

6. 

When S1 temperature is reached, there is reminder ringing, timer will not countdown unless you press AUTO 

button to confirm.

 It is ingredients filling reminder.


7. 

The boiling reminder is same as above, when machine finish the step before boiling, there is reminder ringing, 

program will not enter boiling step unless you press AUTO button for confirmation.

 It is sparging reminder.


8.  PAUSE

  button  will  stop  the  heating  and  timer  working  temporarily,  and  you  can  amend  the  data,  afterwards 

press 

AUTO

 to continue. 

9. 

Press 

START

 button when auto mode is running, you can skip the step you if not needed. 

10. 

Setting hop reminder in boiling process, press

 -

 or

 +

 for countdown timer setting. Press 

TIMER 

button for 2

nd

3

rd

...9

th

 setting. The countdown timer should be set with the longest time first e.g. 60 min., 30 min., 15 min., 5 

min., etc.

 Press 

START

 button start to heat.   

11. 

Long pressing 

POWER 

and 

TIMER 

buttons for 5s in 

BLANK PAGE

, operation enter to recipe selection. Press 

"-"

  or 

"+"

  to  choose  required  recipe.  Recipe  storage  is  up  to  9  programs.  Press 

Start

  button  to  confirm  the 

selected recipe, 

BLANK PAGE

 will be shown on display, then press 

AUTO/PAUSE

 button to enter the chosen 

recipe edit page. You can press 

START

 button to run the selected program or press 

AUTO/PAUSE

 button to 

edit/check the program step by step.   

12. 

If you press 

STOP

 button to skip all the steps, the Brewster will stop working, and the display will show 

END

, an 

alarm will ring for 30 sec., press the 

STOP

 button again to enter 

BLANK PAGE. 


Memory Function in Auto Mode 

1. 

After setting all the data you need in auto mode, press 

STOP

 button until 

BLANK PAGE

. Please do not switch 

off the machine! Follow below step for storing. 

2. 

Press 

MANUAL

  button  to  enter  manual  edit  page,  then  long  press 

MANUAL

  button  for  5  seconds  and  then 

release it. You have now stored the last manual and auto mode setting. There is ringing sound for successful 

storing.   

3. 

Switch off/on the machine, then press 

AUTO

 button, the 1st step of last chosen program will be shown on the 

display. 

4. 

Press 

START

 button, machine start working.   

5. 

The program does not support batch storage. Each recording need to repeat above instruction. 


Содержание BB-A700M-1

Страница 1: ... machine The processes described are general guides as we fully understand that brew recipes and conditions vary The machine has been designed for you to adjust the settings to suit your own brewing requirements That is why we believe you will appreciate the programming functions of up to 9 mashing steps and up to 9 hop steps and the fact that you can store up to 10 different recipe settings Besid...

Страница 2: ...ds and can weigh up to 80kg Horizontal positioning is a prerequisite for transfer pumping during the brewing process Avoid an unsteady base The device may not be moved during the brewing process The handles are only meant for transporting the device in an empty state It is imperative to keep children frail persons and animals away from the device while it is in operation Remember boiling water is ...

Страница 3: ...ate the timer 2 Press and button simultaneously until the display shows the C1 F1 sign Temperature correction range is from 10 to 10 or 50 to 50 Press TEMP to go back 3 Press MANUAL PAUSE button during heating the machine will go back to the edit page You can edit Temp Power Timer then press MANUAL PAUSE again to confirm and the machine will go back to heating 4 Long press TEMP for 5 seconds switc...

Страница 4: ... button will stop the heating and timer working temporarily and you can amend the data afterwards press AUTO to continue 9 Press START button when auto mode is running you can skip the step you if not needed 10 Setting hop reminder in boiling process press or for countdown timer setting Press TIMER button for 2nd 3rd 9th setting The countdown timer should be set with the longest time first e g 60 ...

Страница 5: ... Press START not in boiling step machine start to heat RXSX at the top left corner will keep flashing when machine is working Press AUTO in boiling step for hops reminder setting Press AUTO PAUSE enter recipe edit page You can edit Temp Power Timer BLANK PAGE Press Power Timer for 5seconds in BLANK PAGE enter to Recipe selection operation Press or for recipe selection Press Start Stop to confirm t...

Страница 6: ...raining boiling session time is app 60 mins recipes may vary Add the hops etc at correct timings according to your recipe Immerse your wort chiller appx 15mins before the boil has finished this sterilises the equipment After the boil cool down the wort to 26 before pumping the wort to a fermenter Please also see the Brewster Beacon tutorials on www brewolution com or scan the QR code on the Brewst...

Страница 7: ... full line Voltage 220V 240V Power 3000W Frequency 50Hz 60Hz 1 Ingredients stuck in the pump A Flush the pump by connecting a hose to the curved pipe B Dismantle the pump to remove the ingredients 2 Failing to reach 100 A Put the lid on for 1 to 2 mins B Make a temperature correction 3 C1 degree centigrade temperature correction A Press and at the same time to enter C1 temperature correction setti...

Страница 8: ...lectric Circuit Spare parts for the pump The angle pipe in silicone and strips are spare parts for the internal pump The O rings is an extra packing for the sight glass Scan the QR code for video tutorials ...

Страница 9: ...e guides da vi har fuld forståelse for at brygopskrifter og forhold varierer Maskinen er designet således at du let kan justere indstillingerne så de passer til dit brygbehov Vi tror på at du vil sætte pris på programmering af op til 9 mæsketrin og op til 9 humle trin og fordi du kan gemme op til 10 forskellige opskriftindstillinger Skål for hjemmebrygget øl Ud over denne vejledning scan QR koden ...

Страница 10: ...il 80 kg Den vandrette placering er en forudsætning for at pumpen kan pumpe væske rundt under brygprocessen Undgå ustabilt underlag Enheden må ikke flyttes under brygprocessen Håndtagene er kun beregnet til at transportere enheden når denne er tom Det er yderst vigtigt at holde børn og dyr på afstand af enheden mens den er i drift Husk at kogende væske er meget farligt Rengør altid alle delene af ...

Страница 11: ...ølgende justering foretages for at displayet viser 100 og timeren dermed aktiveres 2 Tryk samtidigt på and knapperne i 5 sekunder indtil displayet viser C1 F1 Temperaturen kan nu korrigeres fra 10 til 10 eller 50 to 50 Tryk på MANUAL PAUSE og derefter TEMP for at vende tilbage 3 Tryk på MANUAL PAUSE knappen under opvarmningen og maskinen skifter til indstillingssiden Her kan der så redigeres i Tem...

Страница 12: ...rykkes på AUTO knappen for at bekræfte Denne alarm indikerer at der skal tilsættes malt 8 På samme vis er der en alarm når Brewsteren afslutter sidste step før kogning Bewsteren vil ikke fortsætte til kogning før der trykkes på AUTO knappen for at bekræfte Denne alarm indikerer udmæskning 9 PAUSE knappen stopper opvarmning og timer nedtælling midlertidigt Der kan rettes på de indstillede parametre...

Страница 13: ...en at være I kogetrinnet Brewsteren starter med opvarmning RXSX vises I øverste venstre hjørne Tryk AUTO i kogetrinnet for at indstille alarm for humletilsætning Tryk AUTO PAUSE for redigeringssiden Her kan redigeres Temp Power Timer BLANK PAGE Tryk Power Timer i 5 sekunder i BLANK PAGE for at komme til de gemte opskrifter Tryk eller for at vælge en opskrift Tryk Start Stop for at bekræfte den øns...

Страница 14: ... m m i forhold til tidsangivelserne i opskriften Placer din chiller i urten ca 15 min før urtkogningen er færdig dette vil sterilisere chilleren Efter urtkogningen nedkøles urten til 26 før den pumpes over på en gærtank Se Brewster Beacon instruktionsvideoer på www brewolution com eller skan QR kode på Brewsteren Cirkulationspumpe Pumpen må aldrig køre uden vand det vil beskadige pumpen Kedlen ska...

Страница 15: ...njen Spænding 220V 240V Effekt 3000W Frekvens 50Hz 60Hz 1 Der sidder ingredienser fast i pumpen A Skyl pumpen ved at sætte en slange på det buede rør B Skil pumpen ad og fjern ingredienserne 2 Brewsteren når ikke op på 100 C A Læg låget på i 1 2 minutter B Korriger temperaturen 3 C1 Korrektion af temperaturen i celsius C A Tryk på og samtidig for at tilgå korrektion af C1 temperaturindstillingen I...

Страница 16: ...16 El diagram Reservedele til pumpe Vinkelrør i silikone samt strips er reservedele til den interne pumpe O ringene er ekstra pakning til stigerøret Scan QR kode for videovejledninger ...

Страница 17: ...n Für Schäden die durch Missachtung der Hinweise und unsachgemäßen Gebrauch entstehen übernehmen wir keine Haftung Die beschriebenen Abläufe sind allgemeine Richtlinien da Bedingungen und Rezepte variieren können Das System wurde so konzipiert dass Sie das Gerät an Ihre eigenen Braubedürfnisse anpassen können Deshalb besitzt das Gerät eine Programmierfunktion für bis zu 9 Brauschritte und bis zu 9...

Страница 18: ... wird Vorbereitungen am Brautag Vor dem Gebrauch des Geräts sicherstellen dass dieses auf einen stabilen sicheren und horizontalen Untergrund platziert wird Ein voller Behälter heißer Maische kann bis zu 80 kg wiegen Ein ebener Untergrund ist die Grundvoraussetzung für das Umpumpen während dem Brauen d h vermeiden Sie einen unstabilen Untergrund Das Gerät darf während des Brauvorgangs nicht bewegt...

Страница 19: ...den Heizmodus zurück 4 TEMP Taste für 5 Sekunden gedrückt halten um zwischen Grad Celsius und Fahrenheit zu wechseln Diese Einstellung kann nur ausgeführt werden wenn das Gerät eingeschaltet wurde und noch keine anderen Einstellungen gemacht wurden Speicherfunktion im manuellen Betrieb 1 Drücken Sie die MANUAL PAUSE Taste in der Bearbeitungsanzeige für 5 Sekunden Die letzte Einstellung wird gespei...

Страница 20: ...n 9 Schritte zu viel sind Weitere Einstellungen Wenn die Temperatur S1 erreicht ist ertönt ein Alarm und der Timer startet den Countdown erst wenn Sie die AUTO PAUSE Taste zur Bestätigung drücken Dies erinnert Sie an das Hinzufügen der Zutaten Wenn der Brewster das Maischprogramm beendet hat ertönt einen Alarm und das Programm geht erst in den Siedepunkt zum Würzekochen über bis Sie die AUTO PAUSE...

Страница 21: ...tauswahl im automatischen Betrieb POWER und TIMER 5 Sekunden gedrückt halten um indie Rezeptauswahl zu gelangen Mit und gewünschtes Rezept wählen START STOP drücken um das gewählte Rezept zu bestätigen Der Bildschirm wird leer Schalten Sie das Gerät nicht aus AUTO PAUSE drücken um zur gewählten Rezeptseite zu gelangen und zu bearbeiten Mit POWER TIMER TEMP oder START STOP drücken um das Gerät zu s...

Страница 22: ...m diesen zu sterilisieren Kühlen Sie die Würze nach dem Kochen auf 26 C ab bevor Sie die Würze in einen Gärbottich pumpen Bitte sehen Sie sich auch die Brewster Beacon Tutorials auf www braugschaeftl de tutorials an oder scannen Sie den QR Code auf dem Brewster Umwälzpumpe Die Pumpe nicht ohne Wasser laufen lassen da diese andernfalls defekt wird Die Maische darf nach dem Abkühlen nicht mit der Pu...

Страница 23: ...roblembehandlung 1 Zutaten stecken in der Pumpe fest A Spülen Sie die Pumpe indem Sie einen Schlauch an das gebogene Rohr anschließen B Zerlegen Sie die Pumpe um die Rückstände zu entfernen 2 Es werden keine 100 C erreicht A Den Deckel 1 bis 2 Minuten lang aufsetzen B Nehmen Sie eine Temperaturkorrektur vor 3 C1 Grad Celsius Temperaturkorrektur A Drücken Sie gleichzeitig und um die C1 Temperaturko...

Страница 24: ...e Voltage 220V 240V Power 3000W Frequency 50Hz 60Hz Elektrischer Kreislauf Ersatzteile für die Pumpe Winkelrohr aus Silikon und Streifen sind Ersatzteile für die interne Pumpe Die O Ringen sind extra Verpackungen für den Überlaufrohr Für Videoanleitungen scannen Sie den QR Code ...

Отзывы: