background image

- 13 -

General Information

About this Instruction Manual

Please  read  the  safety  instructions  in  this  manual  carefully.  To 

avoid  damage  to  the  unit  and  the  risk  of  injury,  only  use  this 

product as described in the manual.

Keep the instruction manual handy so that you can easily look 

up information on all the functions.

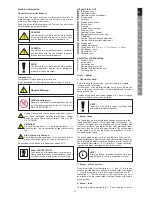
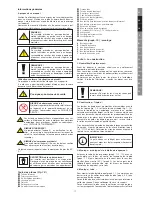
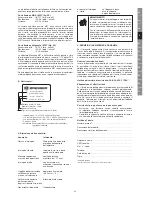
DANGER!

You will find this symbol in front of every section 

of text which deals with the risk of severe injury 

or even death in the event of improper use.

CAREFUL!

You will find this symbol before every section of 

text  that  deals  with  the  risk  of  minor  to  severe 

injuries resulting from improper use.

NOTE!

You will find this symbol in front of every section 

of  text  which  deals  with  the  risk  of  damage  to 

property or the environment.

Intended Use

This product is intended only for private use. 

It was developed for the magnified display of things in nature.

General Warning

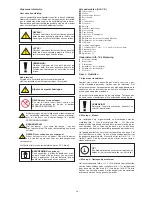
RISK of bodily injury!

Never use this device to look directly at the sun 

or in the direct proximity of the sun. There is a 

RISK OF BLINDNESS!

Children should only use the device under adult supervi-

sion.  Keep  packaging  material  (plastic  bags,  rubber 

bands, etc.) out of the reach of children! There is a RISK 

OF CHOKING!

FIRE RISK!

Do not place the device — in particular the lenses — in 

direct  sunlight.  The  concentration  of  light  could  cause 

fire.

RISK of property damage!

Do not disassemble the device. In the event of a defect, 

please contact the Service Centre in your country.

Do not expose the device to temperatures above 60°C.

Privacy PROTECTION!

The binoculars are intended only for private use. 

Please heed the privacy of other people - do not 

use them to look into apartments, for example.

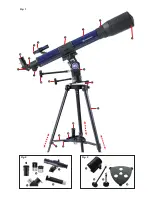
All parts (Fig. 1-3)

B

  Telescope tube

C

  Viewfinder scope

D

  Adjusting-screws (viewfinder)

E

  Tube opening

f

  Objective

g

  Eyepiece connection

H

  Focus wheel

I

  Tube rings

J

  Tripod head (mounting)

1)

  Accessory tray

1!

  Adjusting-screws (tripod)

1@

  Fixing bracket (accessories tray)

1#

  Tripod legs

1$

  Flexible shaft for elevation adjustment 

1%

  Flexible shaft for azimuth adjustment

1^

  Tripod brace

1&

  Latitude adjustment 

1*

  2 eyepieces (Ø 31.7mm / 1 ¼”) f=20mm, f = 4mm

1(

  Star diagonal prism

2)

  Erecting lens 1,5x

2!

  Barlow lens 3x

Parts (Fig. 15): Mounting

A

  Vertical clamp

B

  Incline plate

C

   Declination axis

D

  Flexible adjustment shaft

E

  Flexible shaft (declination axis)

F

  Focussing wheel

Part I – Setup

1. General/Location:

Before you begin construction, you must choose a suitable 

location for your telescope.

It will help you, if you build this appliance in a place, where you 

have  a  clear  view  of  the  skies,  a  stable  footing  and  sufficient 

space around you.

Remove all the parts from the packaging first. Check, using the 

diagram, whether all the parts are there.

NOTE!

Important:  Only  da  the  screws  up  finger  tight 

and avoid over tightening them.

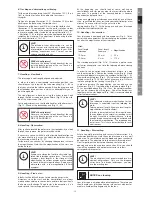
2. Setup - tripod

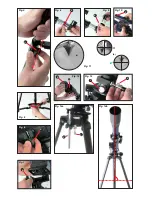
The tripod legs are pre-installed and already connected to the 

tripod head (illustration 5, X) and tripod spider (illustration 1, 16). 

Remove the tripod from it’s packaging and place it upright with 

the feet at the base. Take two of the legs and carefully pull them 

apart until they are in the fully open position. The entire weight 

of the tripod rests on one leg during this procedure. Then set 

the tripod upright again. 

The entire tripod weights rests on one leg here. Then set the 

tripod upright again. Now extend each individual tripod leg to the 

desired length (see illustration 4) and undo the fastening clips for 

this purpose (illustration 1+4, 11) (total of 3). Tighten the fasten-

ing clips and place the tripod on a hard flat surface. 

HINT!

A small spirit level, placed on the accessory tray, 

may help you to setup you telescope in level.

i

3. Setup – accessory tray:

Three  accessories  tray  (illustrations  1,  3,  and  10)  is  inserted 

with the flat side down centrally on the tripod spider (illustration 

1,  16)  and  mounted  in  place  by  turning  clockwise  once  (60°) 

(illustration  5).    The  three  fittings  of  the  accessories  tray  must 

be  aligned  with  the  tripod  spider  retaining  fittings  and  fixed  in 

place by them.

4. Setup – tube:

To mount the telescope tube (Fig. 1, 1) you undo the screw on 

DE

GB

FR

IT

NL

PL

CZ

SK

HU

RO

SE

Содержание Skylux 70

Страница 1: ...E Bedienungsanleitung GB Instruction Manual FR Mode d emploi IT Istruzioni per l uso NL Gebruiksaanwijzing PL Instrukcja Obs ugi CZ N vod k pou it SK N vod na pou vanie HU Haszn lati tas t s RO Manual...

Страница 2: ...kosti slunce Zvl t bu te pozorn pokud za zen pou vaj d ti Hroz nebezpe OSLEPNUT Zabra te p stupu d t k obalov mu materi lu plastikov pytl ky gumov p sky atd SK VAROVANIE S t mto optick m pr strojom sa...

Страница 3: ...ewentualnych reklamacji prosimy o telefoniczny kontakt z kompetentnym centrum serwisowym w Pa stwa kraju CZ Pozor Pokud m te dotazy nebo p padn reklamace spojte se nejprve telefonicky s p slu n m ser...

Страница 4: ...Fig 3 Fig 1 Fig 2 2...

Страница 5: ...Fig 4 Fig 7 X Fig 10 Fig 12 4 8 B Fig 11 D Fig 6 X Fig 5 Fig 13 X Fig 9 Fig 8 X X X Fig 14a X Y Fig 14b X Y A 11...

Страница 6: ...6 Fig 16 Fig 15 C A D E F B 8 4 Fig 17 Fig 18 1 1 O X O X Fig 18b 1 1 2 O X O X O X Fig 19b 2 1 O X O X Fig 19 2 1 O X O X...

Страница 7: ...7 f 20 mm f 4 mm Fig 20 Fig 21 Fig 22 Fig 23...

Страница 8: ...lclips Stativ 1 Fixierhalterung Ablage 1 Stativbeine 1 Biegsame Welle f r die H hen Einstellung Elevation 1 Biegsame Welle f r die Azimutal Einstellung 1 Stativspinne 1 Einstellung Breitengrad 1 2 Oku...

Страница 9: ...lung des Sucherfernrohrs Drehen Sie die hintere Linsenfassung Fig 10 X ein bis zwei Umdrehungen nach links Sie k nnen nun den Konterring ein zeln verstellen Schauen Sie durch den Sucher und fokussiere...

Страница 10: ...des Sucherfernrohres Blicken Sie durch den Sucher und versuchen Sie z B den Polarstern Fig 16 mittig im Fadenkreuz des Suchers einzustel len Fig 17 Bei der exakten Einstellung wird Ihnen die Welle Fig...

Страница 11: ...k nnen Sie sehen wie Sie die Objekte durch Ihr Teleskop mit den mitgelieferten Okularen bei guten Sichtverh ltnissen sehen werden Mond Fig 20 Der Mond ist der einzige nat rliche Satellit der Erde Uml...

Страница 12: ...aufdatum Bitte bewahren Sie den Kaufbeleg als Nachweis auf Unser Produkt wurde nach den neuesten Fabrikationsmethoden hergestellt und einer genauen Qualit tskontrolle unterzogen Service Center Bei Fra...

Страница 13: ...ipod legs 1 Flexible shaft for elevation adjustment 1 Flexible shaft for azimuth adjustment 1 Tripod brace 1 Latitude adjustment 1 2 eyepieces 31 7mm 1 f 20mm f 4mm 1 Star diagonal prism 2 Erecting le...

Страница 14: ...he inside of your telescope from dust and filth the tube opening is protected by a dust protection cap Fig 12 X For observation remove the cap from the opening 8 Setup flexible shafts To ease precise...

Страница 15: ...It is a fixed star and the starting point for all star maps At the beginning you should look at some well known constellations and star groups order that are visible the whole year over The position...

Страница 16: ...d appear like the Ring Nebula M 57 This Object can even be viewed at average weather conditions at low magnifications 2 Technical data Focal length 700 mm Objective diameter 70 mm Article number Optic...

Страница 17: ...d 1 Support de fixation plateau 1 Pieds du tr pied 1 Axe flexible pour la mise au point de la hauteur l vation 1 Axe flexible pour la mise au point azimutale 1 Entretoise du tr pied 1 Mise au point du...

Страница 18: ...hons de protection Afin de prot ger l int rieur de votre t lescope contre la poussi re et la salet un capuchon de protection graph 12 X est plac devant l ouverture du tube Un autre capuchon de protect...

Страница 19: ...vous regardez travers l oculaire vous pouvez d tecter l toile polaire dans le t lescope Le cas ch ant vous pouvez maintenant l aide des tiges souples pointer l toile plus pr cis ment comme proc der a...

Страница 20: ...es terrestres les plus grands et le Hubble Space Telescope Il s agit de la partie principale d un nuage nettement plus grand compos d hydrog ne et de poussi re qui s tend de 10 degr s au del de la moi...

Страница 21: ...mmune Rue num ro de rue N de t l phone Date d achat Signature Appel gratuit vous sera communiqu par le centre de services DE GB FR IT NL PL CZ SK HU RO SE Informazioni generali Informazioni sul presen...

Страница 22: ...gio Coperchietti di protezione Per proteggere l interno del telescopio dalla polvere e dalla sporcizia l apertura del tubo protetta da un coperchietto fig 12 X Allo stesso modo sul portaoculare si tro...

Страница 23: ...del telescopio ripor tato sulla scala dell asta di regolazione fig 14 Y per es 51 5 Allineamento finale Ruotare l asse di declinazione fig 15 C incluso il supporto del telescopio di 90 Girare il tubo...

Страница 24: ...fetto ma tecnicamente inevitabile i 11 Uso Smontaggio Dopo un osservazione che si spera sia stata interessante e fortunata si consiglia di riporre l intero telescopio in un luogo asciutto e ben areato...

Страница 25: ...unzionamento bilanciare il telescopio dell inseguimento degli assi tramite il flessibile Nonostante il diagonale il portaoculare a specchio l immagine nel diagonale deve storta essere allineato perpen...

Страница 26: ...er E Buisopening F Lens G Oculairsteunen H Focuswiel I Buisclip J Statiefkop Montering 1 Accessoirevak 1 Clips Statief 1 Fixeerstops Opslagvakje 1 Statiefpoten 1 Buigzame as voor hoogte instelling ele...

Страница 27: ...kruis van de richttelescoop exact op de positie staat die overeenkomt met het beeld door de hoofd telescoop Scherpstellen van de richttelescoop Draai de ring van de voorste lens afb 10 X een tot twee...

Страница 28: ...lling zullen de schaal afb 15 D van de urenas en de schaal afb 15 E van de declinatieas nuttig zijn GEVAAR voor verwondingen Kijk met dit toestel nooit direct naar de zon of naar de omgeving van de zo...

Страница 29: ...tbaar en een bijzonder lonend object om met telescopen in alle uitvoeringen te bekijken van de kleinste verrekijker tot de grootste aardse observatoria en de Hubble Space Telescope Wij zien het belang...

Страница 30: ...n we alle even tuele materiaal of fabricagefouten Garantie is uitgesloten voor defecten die zijn ontstaan door schuld van de gebruiker of door incorrect gebruik van het product of indien een niet geau...

Страница 31: ...mieszka Wszystkie cz ci rys 1 3 B Tubus teleskopu C Szukacz teleskopu D Pokr t a reguluj ce szukacz E Wej cie tubusu F Obiektyw G Nasadka okulara H Stopie ustawienia ostro ci I Zacisk tubusu J G owic...

Страница 32: ...uj c okular celownika Kontynuuj t czynno dop ki krzy celownika nie znajdzie si dok adnie w pozycji odpowiadaj cej obrazowi z okularu telesko pu g wnego Wkr ci tyln oprawk soczewki rys 10 X przekr caj...

Страница 33: ...ycji z kt rej mog Pa stwo wygodnie pro wadzi obserwacj Precyzyjne ustawienie nast puje za pomoc szukacza teleskopu Prosz spojrze przez szukacz i spr bowa ustawi gwiazd po larn rys 16 w rodku krzy a ni...

Страница 34: ...stwa kraju Za cznik 1 Mo liwe obiekty obserwacji Poni ej wyszukali my dla Pa stwa kilka bardzo interesuj cych cia niebieskich i zbior w gwiazd i je obja nili my Na ko cu in strukcji mog Pa stwo zobacz...

Страница 35: ...zielamy gwarancji na 5 lat a od daty zakupu Nale y zachowa paragon jako dow d zakupu Nasz artyku wyprodukowany zosta zgodnie z najnowocze niej szymi metodami produkcji i poddany zosta dok adnej kontro...

Страница 36: ...aji ovac rouby stativ 1 Upev ovac rouby odkl dac poli ka 1 Nohy stativu 1 Ohebn h del pro nastaven v ky elevace 1 Ohebn h del pro nastaven azimutu 1 V ztuhy noh stativu 1 Nastaven zem pisn ky 1 2 okul...

Страница 37: ...proveden teleskopu naleznete dva okul ry obr 1 2 18 a jedno zenitov zrcadlo obr 1 2 19 Pomoc okul ru si mu ete nastavit zvet en u Va eho teleskopu Pred nasazen m okul ru a zenitov zrcadlo sejmete ochr...

Страница 38: ...trost obrazu Uv domte si e zv t en hv zd je sotva zpozorovateln TIP Okul ry jsou ty sti syst mu o ek na n se p ikl d oko Pomoc okul ru se sn m tedy zvi ditel uje objekt kter vznik v ohnisku objektivu...

Страница 39: ...el mezi zem m s cem a sluncem to je mo no vid t na cyklech m s n ch f z Doba mezi dv ma po sob jdouc mi f zemi novolunn p edstavu je cca 29 5 dn 709 hodin Souhv zd ORION M42 obr 21 Rektascenze 05 32 9...

Страница 40: ...ln orga nizace slu eb pro likvidaci a nebo na ad pro ivotn prost ed 4 SERVIS A Z RUKA Za tento p stroj p eb r me z ruku na 5 let ode dne koup Uschovejte si pros m doklad o koupi jako d kaz N produkt b...

Страница 41: ...nstvo 1 Nastavovacie skrutky stat vu 1 Upev ovacie skrutky odkladacej poli ky 1 Nohy stat vu 1 Ohybn hriade na v kov nastavenie Elevation 1 Ohybn hriade na azimut lne nastavenie 1 V stuhy n h stat vu...

Страница 42: ...r 1 2 18 a zenitov zrkadlo obr 1 2 19 Pomocou okul ra ur te pr slu n zv enie V ho teleskopu Predt m ako nasad te okul re a zenitov zrkadlo odstr te najprv ochrann krytky z hrdla okul ra obr 1 6 a zeni...

Страница 43: ...e zv enie hviezd je sotva badate n TIP Okul re s vlastne syst my o oviek pr buzn oku Pomocou okul ru sa nasn ma objekt v ohnisku objekt vu t zn stane sa vidite n m a e te raz sa zv Potrebujete okul r...

Страница 44: ...u mesiacom a slnkom toto je vidie na cykloch f z mesiaca as medzi dvoma po sebe nasleduj cimi novmi je asi 29 5 d a 709 hod n S hvezdie ORION M42 obr 21 Rektascencia 05 32 9 hodiny min ty Deklin cia 0...

Страница 45: ...m poskytne miestny odvozca odpadu alebo rad ivotn ho prostredia 4 SERVIS A Z RUKA Za tento pr stroj preber me z ruku na 5 rokov odo d a k py Uschovajte si pros m doklad o k pe ako d kaz N produkt bol...

Страница 46: ...ajl kony tengely a magass g be ll t s hoz elev ci 1 Hajl kony tengely az azimut lis be ll t s hoz 1 Stat v r gz t 1 A sz less gi fok be ll t sa 1 2 okul r 31 7 mm ill 1 f 20mm f 4mm 1 Zenit t k r 2 K...

Страница 47: ...ez d st l meg vja a tubusny l st egy v d sapka 12 X bra v di Ugyan gy tal lhat egy porv d sapka az okul rtart kon 1 6 bra Megfigyel shez vegye le a sapk kat a ny l sokr l 8 Fel p t s Hajl that karok A...

Страница 48: ...lencse rendszerek Az okul rral veszi fel az objekt v gy jt pontj n keletkez k pet ez azt jelenti hogy l that v teszi s m g egyszer felnagy tja K l nb z gy jt pont okul rokra van sz ks g a k l nb z na...

Страница 49: ...ik a sz g a F ld a Hold s a Nap k z tt ez l that a Holdf zis ciklus ban Az id k t j holdf zis k z tt k r lbel l 29 5 nap 709 ra ORION M42 21 bra csillagk p Rektaszcenzi 05 32 9 r k percek Deklin ci 05...

Страница 50: ...d pontj t l sz m tva 5 v garanci t v llalunk K rj k igazol sul rizze meg a v s rl si bizonylatot Term k nket a leg jabb gy rt si m dszerek szerint gy rtottuk s szigor min s gi ellen rz snek vetett k a...

Страница 51: ...sol de prindere tav accesorii 1 Picioare stativ 1 Tij flexibil pentru reglarea eleva iei 1 Tij flexibil pentru reglarea azimutului 1 Suport stativ 1 Reglare latitudine 1 2 oculare 31 7mm 11 4 f 20mm f...

Страница 52: ...10 X cu dou trei rota ii c tre st nga Pute i regla contrainelul separat Privi i prin luneta c ut toare i focaliza i o asupra unui obiect n dep rtat Roti i montura lentilei n una sau cealalt dintre dir...

Страница 53: ...15 F n afar de aceasta pute i cre te gradul de m rire prin nlocuirea ocularului Ave i n vedere c m rirea stelelor de abia se poate z ri SFAT Ocularele m resc imaginea nevizibil direct fo calizat de t...

Страница 54: ...se rote te n jurul p m ntului i schimb periodic nclina ia fa de soare De aceea putem observa schimbarea fazelor lunii O luna ie complet dureaz 29 5 zile 709 ore Constela ia Orion Marea nebuloas din O...

Страница 55: ...ama ii lua i leg tura cu centrul nostru de service Colabo ratorii no tri instrui i v vor ndruma cu pl cere Mai jos pute i g si linia noastr de asisten telefonic pentru service Dac este necesar acordar...

Страница 56: ...low lins 3x Delar bild 15 Montering A Vertikal kl mning B Lutningsplatta C Deklinationsaxel D B jlig axel f r f ljning E B jlig axel deklinationsaxel F Inst llningshjul f r sk rpa Del I Uppbyggnaden 1...

Страница 57: ...ervation A Azimutal Idealisk f r observation av f rem l p jorden B Parallaktisk Idealisk f r observation av himmeln Ang ende A Vid den azimutala uppst llningen sv ngs teleskopet i horisontell och vert...

Страница 58: ...sera denna effekt man vrerar du den b jliga axeln bild 15 D f r timaxeln och ditt teleskop f ljer stj rnans skenbara flygbana 10 Anv ndning Tillbeh r Till teleskopet h r tre okular bild 2 18 Genom att...

Страница 59: ...orial p stativ Achrom Refraktor Achromatic Refractor Art No 96 18750 f 700 mm d 70 mm 3 Avhj lp av fel Fel Hj lp Ingen bild Da av dammskyddslocket fr n objektivets ppning Oskarp bild St ll in sk rpan...

Страница 60: ...60...

Страница 61: ...61...

Страница 62: ...62...

Страница 63: ...63...

Страница 64: ...he Vergissingen en technische veranderingen voorbehouden Zastrzegamy sobie mo liwo pomy ek i zmian technicznych Omyly a technick zm ny vyhrazeny Omyly a technick zmeny vyhraden T ved sek s m szaki m d...

Отзывы: