background image

200 SERIES TWO-MAN AUGERS 

FORM GOM08042004US, VERSION 1.1 


English-EN


11


8. 

Grass and other overgrowth conditions will hamper digging capability of 

any auger bit by becoming "clogged" around auger bit teeth and screw 

bit. Removal of such obstructions from hole location BEFORE digging will 

increase digging efficiency and overall productivity. 


10  OPERATING INSTRUCTIONS 


IMPORTANT: 

DO NOT operate Auger until each operator completely 

comprehends contents of this manual, plus applicable safety and operational 

information supplied by engine manufacturer. 


INSTALLING AUGER BIT 

1. 

Refer to STOPPING AUGER in OPERATING INSTRUCTIONS section of 

this manual. To install auger bit, place Auger with spark plug facing up.  


2. 

Connect auger bit to Auger with correct factory supplied auger pin. Model 

BRPA265H Auger uses 3/8 inch (9.5 mm) diameter pin P/N BR10628. 

Model BRPA270H Auger uses 5/16 inch (8 mm) diameter pin P/N 

BR10627.  


STARTING ENGINE WITH AUGER BIT ATTACHED 

DO NOT attempt to dig with Auger until Crew Chief and Crew Member have 

acknowledged to each other they are ready and are in full control of 

machine/accessories. Crew Chief operates engine throttle control with right 

hand and is responsible for verbal commands.  Crew member operates choke 

control and starts engine. 


3. 

Place Auger in vertical orientation on desired hole location. 


4. 

Crew Member opens fuel tank breather vent (if so equipped) to its 

maximum set position. Failure to open breather vent prevents engine 

from receiving continuous supply of fuel. 


5. 

Crew Member opens fuel tank ON/OFF valve located under fuel tank to 

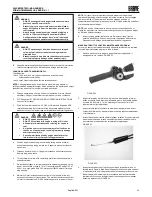
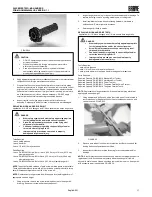
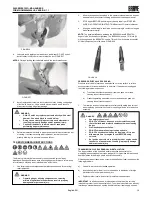
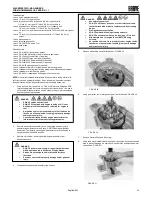
ON position as shown.  FIGURE 9  


               FIGURE 9 

  CAUTION      


DO NOT dig initial hole with smaller auger bit then use larger 

diameter auger bit to “ream” hole to desired size.  


This method will prevent auger bit screw of larger auger bit 

from providing sufficient directional stability during “reaming” 

process.   


  WARNING       


DO NOT use shovel and/or foreign object to remove loose 

soil from around hole area while operating Auger.  


This can result in shovel and/or foreign object to become 

entrapped by rotating auger bit.


  DANGER       


DO NOT connect auger bit to Auger with engine running.  


A sudden change in engine speed will result in property 

damage and/or personal injury.  


  CAUTION 


When installing auger bit and auger pin, always place Auger 

with engine spark plug in upward position to minimize 

potential for oil and/or gasoline to enter combustion chamber 

and create a hydraulic lock up.  


Such occurrence can result in property damage and/or 

personal injury. 


  CAUTION 


DO NOT use any other connecting device except auger pin 

supplied with Auger which is designed to withstand high 

stresses encountered while digging.  


Use of any other connecting device, including cap screws, 

bolts, pins, etc., can result in damage to Auger driveshaft 

and/or auger bit drive hub. 


Improper connecting devices can cause property damage 

and/or personal injury. 


  CAUTION 


If Auger and/or an individual component/accessory does not 

appear to function properly, STOP and DO NOT operate 

Auger until corrective action has been completed. 


If you have any questions regarding proper operation of Auger, 

contact Customer Service Department for assistance BEFORE 

using. There is no charge for this service. 


  CAUTION     


Restarting engine with auger bit in partially or completely dug 

hole requires higher degree of operator experience, skill and 

common sense over introductory or novice level expertise.  


Manufacturer is aware many operators restart Auger’s engine 

with auger bit in partially or completely dug hole on regular 

basis while in the field.  


Manufacturer also realizes procedure must be utilized when 

auger bit extension is used to extend digging depth. 

Manufacturer has no control over experience, skill and 

common sense levels of each operator of the Auger.  


Manufacturer has no control over each job site or specific job 

application for the Auger. 


  DANGER       


To reduce potential for personal injury, stop Auger 

between each hole.  


DO NOT choose to save time (time required to restart 

engine), money (if Auger is being rented) or gain added 

convenience by electing to keep engine running between 

each hole.  


Actions can lead to loss of control, resulting in property 

damage and/or personal injury. 

  DANGER      


Auger is designed for two operators. Use by only one 

operator or by more than two operators will lead to 

confusion and loss of control, resulting in property 

damage and/or personal injury.  


Start engine according to instructions outlined below to 

minimize possibility of unexpected auger bit rotation.  


Unexpected auger bit rotation can result in loss of 

machine control and possibility of property damage 

and/or personal injury. 


Содержание 200 Series

Страница 1: ...ration or when servicing product Before operation read and comprehend operator manual content When ordering replacement parts please supply the following information model number serial number and part number Customer Service 1 800 359 8739 Customer Service Telefax 1 866 779 9963 Note There is no charge for Customer Service Internet Address http www braveproducts com Email sales braveproducts com ...

Страница 2: ...Use of an Auger requires strenuous work activity This type of work activity can be considered to be greater in magnitude than that experienced with the use of many other types of both light construction and lawn and garden related equipment This type of work activity should only be attempted by operators of adequate physical size and stature mental awareness and physical strength and condition Eac...

Страница 3: ...________________________ Operator ______________________________ Owner Instructor __________ Date _________________________________ Operator ______________________________ Owner Instructor __________ Date _________________________________ Operator ______________________________ Owner Instructor __________ Date _________________________________ Operator ______________________________ Owner Instruct...

Страница 4: ...ob site safety plus Auger maintenance Constantly examine and upgrade program to guarantee owner s and or operator s safety Each operator must be fully instructed regarding specifics of this safety program 4 SAFETY SYMBOLS SAFETY ALERT SYMBOL SIGNAL WORDS The safety alert general warning symbol indicates a potential personal injury hazard A signal word DANGER WARNING or CAUTION is used with the ale...

Страница 5: ...hoes are mandatory Wear approved safety hard hat where there is danger of head injuries Flying Debris Hole digging process can result in flying debris Eye protection and appropriate safety apparel is required when near or operating Auger DO NOT operate unit with onlookers or animals close by Burns An engine muffler can become hot Remain clear of and DO NOT touch a hot muffler or heat shield Auger ...

Страница 6: ...e can have magnitude to throw operators from Auger and or inflict damage to hands arms and other upper body parts Preventive Measures Operators must maintain physical and mental alertness Be prepared for unexpected auger contact with buried tree roots rocks etc and be capable to sense level of machine control they have Maintaining proper operating stances and applying reactive body english is one ...

Страница 7: ... slip at a limited number of specific torque values For an Auger such a device would make the Auger useless due to infinite number of potential operating configurations required and inability to design specific components to meet requirements of each operating configuration 7 Portable screwdrivers and drills are separate tools designed for different and specific job applications The drilling proce...

Страница 8: ...ive DO NOT DESTROY OR DISCARD SHIPPING CARTON UNTIL INSTRUCTED BY AUTHORIZED REPRESENTATIVE OF CARRIER OR FACTORY If missing parts are detected notify your dealer who will assist you in obtaining them INSTALLING OPERATOR HANDLES Tools Required 2 each 1 2 inch 13 mm wrench 1 each 5 16 inch 8 mm wrench 1 each torque wrench 240 inch pounds 27 Nm capacity with 1 2 inch 13 mm socket 1 each small Philli...

Страница 9: ...y for binding movement restrictions Adjust swivel assembly as necessary for complete freedom of movement FIGURE 7 FIGURE 7 11 Rotate throttle control counterclockwise maximum speed position Check inner wire pulls throttle lever arm of carburetor forward against stop Improper adjustment prevents engine to operate at maximum no load governed speed and affects overall digging performance of Auger Adj...

Страница 10: ...roper centrifugal clutch operation Maintaining oil level too high will cause excessive clutch slippage and result in high oil temperatures Excessive slippage and high oil temperatures will significantly reduce service life of clutch assembly and affect overall performance of Auger NOTE Use only an oil marked with an engine service classification SJ or higher As a general rule the transmission usua...

Страница 11: ... auger bit dig rates will not cause centrifugal clutch to overload and slip In most soft low density soils sandy etc it may be necessary to hold up on operator handles to reduce auger bit dig rate due to tendency of any auger bit design to cause centrifugal clutch to overload and slip In most hard high density soils hard clay etc it may be necessary to press down on operator handles to establish a...

Страница 12: ...injury CAUTION When installing auger bit and auger pin always place Auger with engine spark plug in upward position to minimize potential for oil and or gasoline to enter combustion chamber and create a hydraulic lock up Such occurrence can result in property damage and or personal injury CAUTION DO NOT use any other connecting device except auger pin supplied with Auger which is designed to withs...

Страница 13: ...sion noise and or vibration 10 Crew Chief rotates throttle control counterclockwise to increase engine speed regulate digging process Auger bit begins rotation when centrifugal clutch reaches initial engagement speed PROPER OPERATOR STANCE FIGURE 11 12 11 Grasp operator handles firmly Wrap fingers around handle grips keeping grips cradled between thumbs and forefingers 12 Keep wrists as perpendicu...

Страница 14: ...slot Release allowing spring to push handle up into lower detent position In this position lock device is fully deployed FIGURE 17 FIGURE 17 21 With Crew Chief and Crew Member on each side of Auger grasp operator handles and rotate Auger auger bit counterclockwise to left DO NOT FORCE Apply steady pressure until auger bit loosens in ground continuing rotation until auger bit is freed from obstruct...

Страница 15: ... of auger bit extension is clear FIGURE 18 Block remaining auger bit with auger fork to prevent falling back into hole An additional Crew Member will usually be required FIGURE 19 FIGURE 18 FIGURE 19 32 Disconnect Auger from auger bit extension Disconnect auger bit extension from auger bit 33 Reconnect Auger to remaining auger bit and remove power unit auger bit from hole Reconnect spark plug wire...

Страница 16: ...tual use operator handles have a maximum service life of 6 years Replace any operator handles meeting this time limit Handle material used reduces but does not eliminate long term effects of ultra violet radiation from sun 9 Inspect centrifugal clutch assembly properly disengages at specified engine speed or slips during overload conditions 10 Inspect engine muffler for wear or damage and replace ...

Страница 17: ...il plug gasket replace if worn Reinstall oil plug Tighten securely with wrench Wipe off any excess oil spilled on transmission Dispose of used oil rags per international and local regulations MAGURA THROTTLE CONTROL MAINTENANCE PROGRAM For every 8 hours of actual operation and whenever throttle cable is replaced the following maintenance program is to be followed 1 Remove plastic cover to properly...

Страница 18: ...s Tools Required 1 each safety glasses 2 each 1 4 inch 6 4 mm diameter drift punch 1 each plastic hammer or soft type hammer designed for impact use Parts Required Required Quantity PN BR10614 Standard Dirt Tooth or Required Quantity PN BR10615 Hardfaced Dirt Tooth or Required Quantity PN BR10616 Chisel Tooth or Required Quantity PN BR10617 Tungsten Carbide Chisel Tooth or Required Quantity PN BR1...

Страница 19: ...ansmission output driveshaft oil seal can push out of case causing loss of transmission oil b Gasket separating transmission cover and case can push out causing loss of transmission oil 1 To minimize issues clean pressure relief valve with safety type solvent when replacing transmission oil seal or centrifugal clutch rotor and shoe assembly TRANSMISSION OIL SEAL REMOVAL INSTALLATION The Auger util...

Страница 20: ... environmental standards 2 Remove transmission assembly bolts Use plastic hammer to split separate transmission cover and case DO NOT damage alignment dowel pins Temporarily store engine transmission cover assembly in upright position in suitable location 3 Remove clutch drum primary gear pinion gear assembly from transmission case 4 Clean transmission case with safety type solvent 5 Remove self l...

Страница 21: ...ely a 2 431 inch 61 7 mm outside diameter The inside diameter of tool is approximately 2 1 4 inch 57 2 mm Apply face of service tool to the crimped bead of the oil seal Too much pressure too close to center of the seal will distort or damage it 18 If an arbor press is not available tap oil seal into place with thin wood block and plastic hammer Position seal against machined shoulder of transmissi...

Страница 22: ... 1 each feeler gauge set 1 each 3 16 inch 4 7 mm Allen wrench 1 each 1 8 inch 3 2 mm long handle type Allen wrench Parts Required 1 each PN 3516 clutch drum pinion assembly 1 each PN 330H 0175 rotor shoe assembly units with Honda engine 1 each PN 310 0101 transmission gasket if required 1 each PN 6 alloy Woodruff key if required 1 each container of high temperature anti seize compound 1 each conta...

Страница 23: ...nstall primary gear pinion assembly If existing transmission gasket is damaged replace Realign transmission dowel pins when reinstalling engine and cover assembly Torque all fasteners to 20 pound feet 27 N m in an X sequence IMPORTANT Use of transmission gasket is required to provide adequate clearance DO NOT substitute silicon material or gasket adhesive for factory approved gasket 13 Rotate tran...

Страница 24: ...e engine manufacturer supplied information ENGINE OVERHEATS Possible Cause Correction Incorrect carburetor adjustment See engine manufacturer supplied information Cooling fins clogged with debris Remove engine blower housing and clean cooling fins AUGER LACKS POWER Possible Cause Correction Incorrect transmission oil level See FILLING AUGER WITH TRANSMISSION OIL in MACHINE SET UP this manual Centr...

Страница 25: ...d creating hydraulic lock up 9 DO NOT allow handles to come in contact with augers shovels or other sharp and abrasive objects during storage to prevent damage 10 Store Auger inside If Auger must be stored outside protect it and each auger bit with a suitable covering 15 END OF LIFECYCLE If the machine comes to the end of its lifecycle destruction of the machine must be conducted according to inte...

Страница 26: ...200 SERIES TWO MAN AUGERS FORM GOM08042004US VERSION 1 1 English EN 25 ...

Страница 27: ...200 SERIES TWO MAN AUGERS FORM GOM08042004US VERSION 1 1 English EN 26 ...

Страница 28: ...200 SERIES TWO MAN AUGERS FORM GOM08042004US VERSION 1 1 English EN 27 THIS PAGE INTENTIONALLY LEFT BLANK ...

Страница 29: ...200 SERIES TWO MAN AUGERS FORM GOM08042004US VERSION 1 1 English EN 28 Replacement Parts Diagram BRPA265H BRPA270H Auger Equipped With Honda GXV160 Engine ...

Страница 30: ...200 SERIES TWO MAN AUGERS FORM GOM08042004US VERSION 1 1 English EN 29 Replacement Parts Diagram Transmission Cover Assembly BRPA265H BRPA270H Auger Beginning with Serial Number 174809 ...

Страница 31: ...200 SERIES TWO MAN AUGERS FORM GOM08042004US VERSION 1 1 English EN 30 Replacement Parts Diagram Transmission Cover Assembly BRPA265H BRPA270H Auger Beginning with Serial Number 174809 ...

Страница 32: ...200 SERIES TWO MAN AUGERS FORM GOM08042004US VERSION 1 1 English EN 31 Replacement Parts Diagram Transmission Case Assembly BRPA265H BRPA270H Auger Beginning with Serial Number 174809 ...

Страница 33: ...200 SERIES TWO MAN AUGERS FORM GOM08042004US VERSION 1 1 English EN 32 Replacement Parts Diagram Transmission Case Assembly BRPA265H BRPA270H Auger Beginning with Serial Number 174809 ...

Страница 34: ...VERSION 1 1 English EN 33 Replacement Parts Diagram Throttle Handle Assembly BRPA265H BRPA270H Auger Beginning with Serial Number 174809 Replacement Parts Diagram Operator Handle Assembly BRPA265H BRPA270H Auger Beginning with Serial Number 174809 ...

Страница 35: ...VERSION 1 1 English EN 34 Replacement Parts Diagram Throttle Handle Assembly BRPA265H BRPA270H Auger Beginning with Serial Number 174809 Replacement Parts Diagram Operator Handle Assembly BRPA265H BRPA270H Auger Beginning with Serial Number 174809 ...

Страница 36: ...200 SERIES TWO MAN AUGERS FORM GOM08042004US VERSION 1 1 English EN 35 Replacement Parts Diagram PN 310 0030Throttle Handle Assembly For Use With BRPA265H BRPA270H Auger ...

Страница 37: ...200 SERIES TWO MAN AUGERS FORM GOM08042004US VERSION 1 1 English EN 36 Replacement Parts Diagram 4 Inch Diameter Auger Bit 1 3 8 Inch Hexagon Drive Connection For Use With BRPA265H Auger ...

Страница 38: ...200 SERIES TWO MAN AUGERS FORM GOM08042004US VERSION 1 1 English EN 37 Replacement Parts Diagram 4 Inch Diameter Auger Bit 1 3 8 Inch Hexagon Drive Connection For Use With BRPA265H Auger ...

Страница 39: ...200 SERIES TWO MAN AUGERS FORM GOM08042004US VERSION 1 1 English EN 38 Replacement Parts Diagram 6 Thru 18 Inch Diameter Auger Bits 1 3 8 Inch Hexagon Drive Connection For Use With BRPA265H Auger ...

Страница 40: ...200 SERIES TWO MAN AUGERS FORM GOM08042004US VERSION 1 1 English EN 39 Replacement Parts Diagram 6 Thru 18 Inch Diameter Auger Bits 1 3 8 Inch Hexagon Drive Connection For Use With BRPA265H Auger ...

Страница 41: ...200 SERIES TWO MAN AUGERS FORM GOM08042004US VERSION 1 1 English EN 40 Replacement Parts Diagram 4 Thru 12 Inch Diameter Auger Bits 7 8 Inch Square Drive Connection For Use With BRPA270H Auger ...

Страница 42: ...200 SERIES TWO MAN AUGERS FORM GOM08042004US VERSION 1 1 English EN 41 Replacement Parts Diagram 4 Thru 12 Inch Diameter Auger Bits 7 8 Inch Square Drive Connection For Use With BRPA270H Auger ...

Страница 43: ...200 SERIES TWO MAN AUGERS FORM GOM08042004US VERSION 1 1 English EN 42 Replacement Parts Diagram 14 Thru 18 Inch Diameter Auger Bits 7 8 Inch Square Drive Connection For Use With BRPA270H Auger ...

Страница 44: ...200 SERIES TWO MAN AUGERS FORM GOM08042004US VERSION 1 1 English EN 43 Replacement Parts Diagram 14 Thru 18 Inch Diameter Auger Bits 7 8 Inch Square Drive Connection For Use With BRPA270H Auger ...

Страница 45: ...200 SERIES TWO MAN AUGERS FORM GOM08042004US VERSION 1 1 English EN 44 THIS PAGE INTENTIONALLY LEFT BLANK ...

Отзывы: