background image

www.branxfitness.co.uk/productsupport

www.branxfitness.co.uk/productsupport

During the first few minutes of using the treadmill, inspect the alignment of the 

walking belt. Align the belt if necessary (see Adjusting Running Belt Alignment on 

page 30).

4. Going through all the programmes

Whilst in “Ready Condition” press the “Prog” button to select from one of your 

treadmills 19 different training programs. All info on what the programs do can be 

found on page 20.

5. Setting your own goals manually

In “Ready Condition” press the “Mode” button to manually program Time, 

Distance or Calorie targets. In addition pressing the “Stop” button under any other 

conditions (with the treadmill belt static) will return to “Ready Condition”. Use the 

“Speed” up/down buttons to change values in each window. For more info please 

(See this page)

6. Change the incline of the treadmill as desired

To change the incline of  the treadmill, press the “Incline” buttons

either on the console or the handrail. Each time one of the

buttons is pressed, the incline will change by 1%. The buttons

can be held down to change the incline rapidly. Press any incline

shortcut key whilst in “operational Mode” to move the incline

directly to the selected gradient. To decrease the incline level

whilst in “Operational Mode” simply press this key on the console


or this one 

on the left handrail (See picture to the right)


and the incline will decrease in 1% 

increments. Or press one of the “Shortcut” keys                          if you want to go 

directly to level 3, 5, 8, 12 or 15% incline gradient.

Note! After the incline buttons are pressed, it will take a moment for the 

treadmill to reach the selected incline setting. 

7. Change the speed of the treadmill as desired

To change the speed of  the treadmill, press the “Speed” buttons

either on the console or the handrail. Each time one of the speed

buttons is pressed, the speed  will increase in increments of

0.1km/h. The buttons can be held down to change the speed

rapidly. Press any speed shortcut key whilst in “operational Mode”

to move the speed directly to the selected value in km/h. To

reduce the speed whilst in “Operational Mode” simply press this key on the 

console 


or this one on the right handrail (See picture to the right)


and the 

speed will decrease (reduce) in 0.1kp/h increments. Or press one of the “Shortcut” 

keys                        if you want to go directly to 3, 6, 9 or 12kp/h of speed.

Page 16

8. Listening to music whilst your exercising

Simply plug in your music player using your MP3 connector cable into the MP3 

socket   and use your device to operate further. Please note that an adaptor 

(not supplied) may be required for some music player devices. Use your music 

player device to control your song choices and volume. Also use the “Voice” 

buttons on the treadmill to control the volume. 

   Listening to music through your headphones. 

Follow the above procedure, plug in your music device, phone or iPod into the 

MP3 socket then simply plug in your headphones into the headphone socket 

located above the MP3 socket and listen away.

Listening to music through youriPad or similar device

In order to use your iPad or similar device to listen to music or watch a movie 

simply plug in your device with your MP3 cable and your off. You can use your 

device to control the music you want to hear or your film choice. 

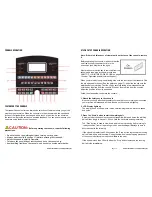
9. Safety Cut Off Chord 

It is not possible to operate your treadmill unless the red magnetic Safety Cut-Off 

Cord is in position on the treadmill console. Whilst in “Operational Mode” removal 

of the red magnetic Safety Cut-Off Cord will stop the motor, which will slow/stop 

the running belt.

Page 17

Содержание ELITE RUNNER PRO BF-ER-5088S-TR

Страница 1: ...s essential you read this ENTIRE user manual and ALL installation instructions It describes equipment setup and instructs you on how to use it correctly and safely This treadmill is for Home Domestic...

Страница 2: ...p quality guage steel and coated with a smooth elegant finish for the best quality and a nice appearance I have an easy to use console display area with a whole array of exciting features like 19built...

Страница 3: ...le of high speeds Adjust the speed in small increments to avoid sudden jumps in speed 1 2 3 4 5 6 7 8 9 10 11 12 13 14 15 16 The pulse sensor is not a medical device Various factors including the user...

Страница 4: ...part will ever affect your warranty SELECTING A LOCATION Place your treadmill on a flat solid surface that allows air to circulate around it Place your treadmill so that it is close enough so that the...

Страница 5: ...frame motor base underside console cover front facing console cover console core left decorate rail right decorate rail press button board left side protecting cover right side protecting cover motor...

Страница 6: ...NSOLE SECURELY INTO POSITION THE ABOVE IS REQUIRED FOR BOTH SIDES OF THE TREADMILL PLEASE TAKE EXTRA CARE NOT TO DAMAGE THE CABLE AS PER STEP 5 AND AS SHOWN HERE STEP 1 YOUR TREADMILL ARRIVES FLAT PAC...

Страница 7: ...he electrics are 100 safe and in compliance with current regulations If in any doubt whatsoever contact your local fully certified and reputable electrician This product must be earthed If it should m...

Страница 8: ...eader When you are ready to begin exercising step onto the foot rails of the treadmill Find the clip attached to the key See the picture on page 17 and slide the clip onto the waistband of your clothi...

Страница 9: ...ired To change the speed of the treadmill press the Speed buttons either on the console or the handrail Each time one of the speed buttons is pressed the speed will increase in increments of 0 1km h T...

Страница 10: ...ur device or by using the Voice up and down buttons see photo on page 19 on the treadmill The music will now be heard via the speakers on your treadmill Please note that an adaptor not supplied may be...

Страница 11: ...h 4 6 6 8 8 8 6 8 6 8 6 10 6 10 8 4 Incline 0 2 2 2 4 4 8 8 4 4 6 6 6 4 4 0 P12 SPEED Km h 4 6 8 10 8 6 4 6 8 12 8 6 8 12 12 6 Incline 0 2 2 4 4 6 6 8 8 12 8 6 4 4 2 0 P13 SPEED Km h 4 4 6 6 6 8 8 12...

Страница 12: ...FUNCTION PROGRAMME GRAPHS Programme 1 Programme 2 Programme 3 Programme 4 Programme 5 Programme 6 Programme 7 Programme 8 Page 22 Page 23 Programme 9 Programme 10 Programme 11 Programme 12 Programme 1...

Страница 13: ...mill out of direct sunlight Do not leave the treadmill in the storage position in temperatures above 30 C 85 F HOW TO MOVE THE TREADMILL Before moving the treadmill convert the treadmill to the storag...

Страница 14: ...r video tutorials etc you still feel you are uncomfortable or not willing to carry out these procedures you can email us at service branxfitness co uk and we can arrange for one of our fully qualified...

Страница 15: ...of your treadmill matt Or apply a liberal amount to a lint free cloth and run the cloth along the length of the running deck underneath the mat NOT on the matt belt itself Focusing as close on the st...

Страница 16: ...at the lowest speed step onto the mat and walk at the same speed 4 Continue the rest of your workout Finishing Your Workout 1 Turn the treadmill to the lowest speed and incline settings 2 Using the ha...

Страница 17: ...should be enough Don t push yourself too hard you should never feel exhausted during or following exercise It is always recommended that you seek medical advice before beginning any new fitness progr...

Страница 18: ...ucts used as store display models No other warranty beyond that specifically set forth above is authorized by BRANX FITNESS LTD WHAT IS COVERED The entire BRANX FITNESS Product is warranted to be free...

Страница 19: ...ess co uk video tutorials 3 For all Frequently Asked Questions and there answers and or to request assistance if your experiencing a problem with your treadmill visit www branxfitness co uk productsup...

Отзывы: